You still with me on this petticoat journey? It's an extraordinarily long one, isn't it? The goal of figuring out how to make a godet petticoat with the proper flare is no longer me trying to make a costume, it's trying to figure out how original methods might have actually worked. After all, we have read about them, seen them in photos and film; let's see one in action.
(By the way, if some of the pictures aren't set to the middle of the page and the text looks wonky, I cannot seem to fix the HTML; the code view won't allow most of my edits and the "Compose View" tools don't always work as they should. It's annoying.)
Last post I added a buckram-stiffened tall hem facing to the seamed-up silk petticoat, creating a perhaps unnecessary understructure to hold the boning/whatever and haircloth frills that are supposed to create the silhouette we're after. It's not likely that I will quite reach the look of the lady in a frame from an 1890s film clip, standing in Plaza San Marco in Italy, feeding the pigeons, but that remains the goal.
From a workaday conservative silhouette to a fashionable silhouette
You can find all of the posts describing the design and construction of this petticoat on the 1890s Costume & Research page, under the header 1895 Silk Godet Petticoat With Multiple Hem Stiffeners and Stiffened Frills.
This post describes the set of experiments I made on the bottom of the petticoat while winter still had its hold on Kentucky, and then a second round in May. I tested some of the means that dressmakers had employed to achieve amplitude and that are explicated at length in the posts
By the way, almost all of the posts in the series have been edited and expanded over the last year as I have returned to the primary resources looking for answers to questions that would come up as this project proceeded. There's nothing like making a garment to make you ask new questions, is there?
Also in the experimemtal mix were some unusual modern materials, because I wanted to see if recycled materials might work.
What Shape Do I Want to Create -- The Godet Look Physics
I wanted to echo the shape of Isobel Mallon's moreen and haircloth-frill petticoat* and add just a few of the lovely godet flutes present in The Delineator haircloth petticoat. Okay, clearly not as many godet flutes as the Delineator model which is brimming with them. More like two or three flutes. And with the boning or wires creating a lightweight result. After all, writers of the day complained about how heavy haircloth petticoats and interlinings were and how hot and tiring to wear.
This is a complicated shape to create, because the boning or wire or rattan has to both hold the skirt out at front and sides but also be flexible enough to collapse into godet plaits in the back when those flutes are forced into position by being sewn to elastic tapes set in 2-3 rows down the back. It truly is a physics problem because the boning or stiffening has to be good at two things, not just one.
We know that creating this shape using other means than building it entirely out of hair cloth or grass cloth is possible because of all the period magazine, newspaper and book content discussing the matter that I have uncovered, and of course the sample of Warren's Skirtbone.
*Note: The Ladies Home Journal petticoat description said that the petticoat had a godet cut, but the illustration doesn't show fully formed godet plaits up to the top of the petticoat like the Delineator design has. A godet shape could also be obtained by gathering the back of the skirt, according to some sources I've read over the lifetime of this project. A petticoat with a drawstring arrangement in the back would do the job, and because the magazine description and illustration did not include godet flutes all the way up to the top of the petticoat, I am inclined to think that the design was intended to use the drawstring method.
Were Wired Petticoats Usually Round? I Don't Know
However, I do NOT know how many petticoats that sported wires or boning were shaped with godet plaits. Yes, people took patents out for underskirts in the godet shape, but I don't know if any made it to market, and doubt any did or magazines and advertisements would have trumpeted it. None of the textual evidence is clear about what shape was created when boning or wires were used in petticoats as opposed to wired or boned outer skirts. For all I know, most petticoats stiffened in this way looked rather like a variety of hoopskirt, and only the outer skirt had the godet shape. Take the example of the petticoat and its matching outer skirt sold by Live Auctioneers. We don't know how the auction company mounted the garments, and so the petticoat may be held out by modern means, but it could be boned or wired...but not in a godet plait shape.
1890s brocade petticoat and outer skirt. Live Auctioneers, 2019.
It's only as the project has worn on that I've realized that I might be creating an outlier petticoat.
Ah well, it's all a journey.
As we learned in Petticoats with Crinoline, Ties, Bones, Wires, we could insert boning into the bottom to help hold the petticoat out. I thought about Isobel Mallon's directions in "Comfortable Dressing in Summer" (Ladies Home Journal, July 1895, p. 21):
I would advise a skirt of mohair, cut exactly as if it were a dress skirt, and stiffened with five rows, quite close to each other, of the narrow whalebones that come for this purpose. They are mounted in the center of a braid that, extending beyond the bone on each side, makes it easy to sew the bands in position. This bone is pliable, as the best quality of whalebone is used, and it certainly will hold the skirt exactly as fashion dictates."
Lots of other sources, which I have documented in the Period Methods to Add Skirt Fullness post series suggest needing only one row of boning or wire. I decided to start with just one row of boning.
Here's where we get to have some fun. The search for a good boning product that would allow the petticoat to undulate rather than stand out like a hoopskirt has been many months long.
Some ideas were dismissed:
Warren's Skirtbone is no longer made or sold, and it's too valuable an historical notion to use in a skirt. Warren's Featherbone is too big and stiff for the job.
We'd never want to use baleen.
Regular steel boning and tutu wire are too stiff.
Very thin and flexible zip ties connected with duct tape might work, but I'd have to buy some and test it. Zip ties of the quality used for corsets are far too stiff.
I thought of the wire option, also common in the period.
Most easily available fine wires hold a bend when you put one in them (which feature is called memory). We don't want that for sure.
We definitely don't want that springy jewelry wire for stringing beads because it's is too thin unless braided, and then it would become quite expensive to use.
Sailboat stay wire for small dinghies was a thought, since I am familiar with it from my sailboat, but it won't produce enough curve for the organ or godet pleats.
That left the following stiffeners. I inserted each of them in turn at the bottom of the faced hem of the petticoat:
round spring galvanized wire -- more of a wire rope, because it's composed of many wire strands
two kinds of boning
rattan cane
PET material from milk jugs (yes, really)
Cat5 cabling (desperation time)
1/4" diameter nylon rope, to stand in for 1.25" thick silk cord which was out of budget
And one more.
Meanwhile, I had pinned and sewn the top of the petticoat into three box pleats and created three ersatz godet plaits with pins and bias tape straps on the inside. Two plaits is the minimum used originally: dressmakers sometimes created many of them across the back of the skirt. Then I stuffed each plait, in line with period suggestions to use stuffing to help hold the plaits in a rounded shape. To hold the stuffing, I pinned the plaits shut. I won't do that for the final plaits: they need to be open in back and I haven't worked out how to hold the stuffing in there. The resulting plaits are not shaped well, frankly. They need a lot more work.
Some pictures:
The pinned godet plaits. You can see that there are two box plaits. The silk shantung has enough body to ensure that there is already a bit of roundness to the pleats.
Here are the finished plaits from the inside. The plaits are controlled by being sewn in place with elastic. Here, I am using just a single row of bias tape as a placeholder.
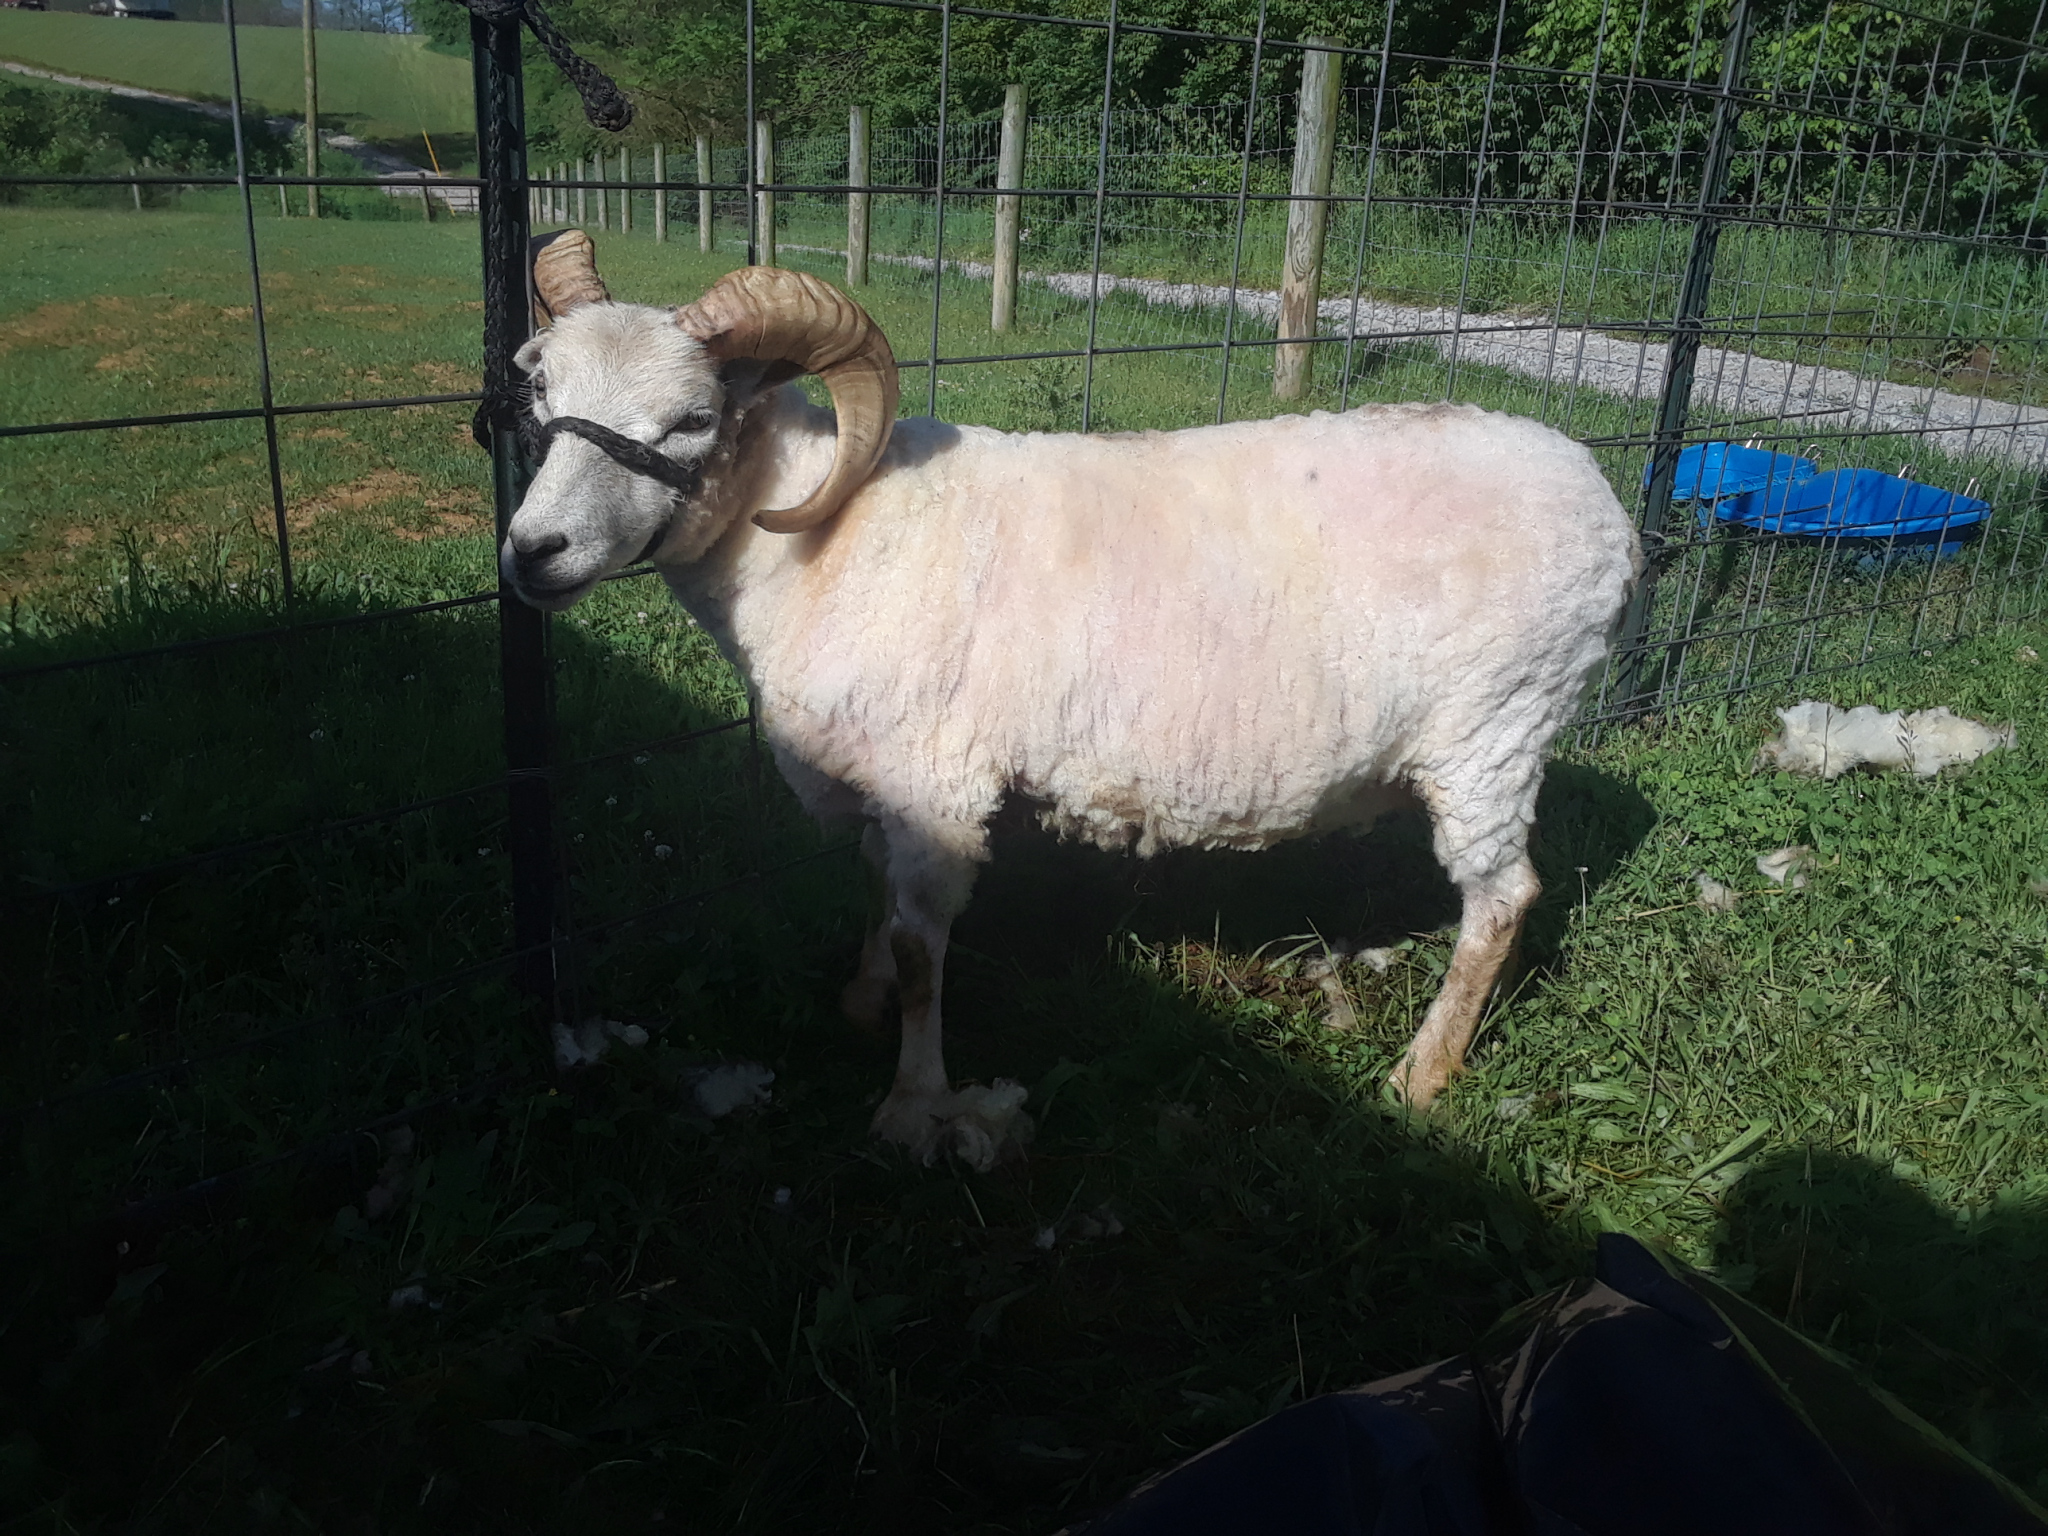
Here are the placeholder ersatz godet plaits again from the outside, with the top 12 inches or so (a quarter yard, per instruction from Ladies Home Journal, stuffed with washed and carded wool from my sheep, Lana and her daughter, Nina. Real godet plaits are prettier. They are wider at the top, and less crazily tube-like. You can see, however, how the back at the hem begins to form wide flutes. They are far from perfect, but the idea is there.
PET Milk Jug Strips
This was the first experiment, about which I was really excited in fall of 2020 when I ran a first test. PET is the acronym for polyethylene terephthalate, a plastic increasingly used as food packaging. It recycles easily, it can be melted at low temperatures, and it's really bendy. I cut up milk jugs into roughly 1" wide strips, literally ironed the strips together into a four-yard length, boiled them in a pot for a few minutes to relax the milk jug shape, and wrapped them around a steel water bottle to cool into a spring shape. I made two strips, one from Kroger milk jugs, and one from thicker Sam's Club milk jugs.
I was so excited about the potential victory that I videoed it...but never used the video because, well, the PET strips didn't work.
The Kroger thinner milk jug strip gave the petticoat hem some shape, but it wasn't great.
The Sam's Club milk jug strips partially reverted to their old shapes when the plastic cooled, and created too stiff a line anyhow.
Here are some pictures.
A roll of the processed milk jug "boning".
Now for how it looks on the petticoat.
Results, front.
Oog. The front of the petticoat is collapsing. The milk jug boning doesn't have enough strength to hold the fabric out.
Result, back. Yuck.
It's hard to tell from a distance, but only one godet plait has been held out; that's the two sides of the skirt flaring out in imitation of godet plaits, but in the wrong place. Failure.
1/8th-3/16ths Diameter Galvanized Wire Rope
Well, that experiment lasted oh, five minutes. Wayyyy too stiff: it turned the petticoat into a sort of hoop shape. Besides, it added more weight than was good. Maybe a smaller diameter wire might work? Didn't follow up, because entering a store during the height of COVID spread wasn't going to happen (I am immunocompromised due to a kidney transplant so that it's super-easy to get sick).
The results:
Here is the wire. It's the same stuff I used for the sleeve puffers.
The back when the wire rope was threaded into the bottom of the petticoat hem. The spring was just too much: it created one giant swoop of fabric that ate the godet plaits, and would overpower whatever ties I created under the skirt to hold the flutes in position. Failure.
Very Thin Split Cane
Dee-saster. I used split cane, which is rounded on one side, flat on the other. Not only was the cane so stiff that it wouldn't hold godet plaits, but it's quite brittle: I broke it several times. It's also so light that the petticoat hem wouldn't stay even. Soaking it would strengthen the cane, but again, it wanted to go all hoop-like.
Here are the results.
Here is the front. It's rounded but the slides collapsed. Wish I had a picture of that.
Here is how the cane at the bottom of the hem looks in back. Meh. Once again, the cane boning eats the godet plaits, and creates swoops at the sides. When I forced the back swoop into two godet plaits, the cane argued with me and then broke. You can also see that it's so light that the hem won't stay even at the bottom. No go: failure again.
Recycled CAT5 Cabling
By this time I was getting punchy, having spent probably 5 hours over several days readying materials, and sitting on the floor threading whatever material I was testing into the hem, then pinning it like crazy. A trip to the basement hunting for options produced this silly idea, but you know, it created massive flutes! Just a little too big for our purposes. I've always wanted an internet-ready skirt, haven't you?
Pictures.
Here is the CAT5 cabling; it's ordinarily used for internet service. It has a little bit of spring to it, but not much.
Here is the cabling threaded through the hem in the front. It creates nice swoopy folds, but we don't want that in front, we want a nice flare! Still we could plug it in, right? :}
Here's the back view. Nope. The cabling is trying unsuccessfully to follow the lines of the two trained box plaits, but there is a giant "in-swoop" to the inside of the petticoat. Again, failure.
Rigilene
It's pretty soft for boning as Quinn of The Quintessential Clothes Pen warned, and doesn't give a whole lot of support in bodices, but people are using it to stiffen ball-gown skirts, so it seemed I'd better test it. Ordered a roll of 50 feet for a few dollars, and tried it. Was feeling good about the material's chances so took the time to sew it into the buckram-stiffened hem. What a bloody -- literally -- mistake. Blech.
The Rigilene boning comes plain. I decided to encase it in twill tape, thinking I could sew the tape to the buckram right at the bottom of the petticoat hem.
Here we are in the painful process of sewing the Rigilene into the 4-yard hem.
Here is the front of the petticoat after the Rigilene has been sewn in. Underwhelming. It sort of flares, but also collapses. The sides collapse inward, too, so that the petticoat has little backward thrust. Once again, wish I had a picture of that. Would a second layer help in the front and sides? Probably, but it already weighs a bit. I was worried that it would add too much weight.
The back. I bet I could train the plaits into place with the second row of elastic sewn to the edges of the plaits inside the skirt, so it sort of works. Well, one criterion has been met, but not the other.
At this point the plaits had been stuffed, by the way.
At the time, I counted the Rigilene boning as a failure. In retrospect, with multiple rows of it in the front and sides, it might have worked. Someone else might want to have a go. It's inexpensive, especially if you already have yards and yards on hand.
Nylon Rope
By now, it was mid-March. Several period sources suggested using silk cording on the exterior of fashion skirts to impart simultaneously some stiffening and some visual interest. Silk cord is available, but it's terribly expensive and I couldn't find anything in the 1.5-inch-diameter class. Since so many cords for centuries have actually been silk wrapped around a less expensive material, perhaps that's how the original 1890s cord was made.
Anyhow, being lean of purse, some 1/4"-diameter nylon rope in the basement looked like a good candidate. I cut it into the four-yard length, unstitched the Rigilene and pulled it out, and slowly coaxed the rope into the hem bottom.
Hey, we had some nice undulations, but the front a sides were too likely to collapse, so I ran another length on top of the first cord around the front half of the skirt. Again, feeling good about the chances of this being the solution, I sewed it again, and added more blood spots to the silk. Nice.
The results were not bad, really. There wasn't a whole lot of backward thrust in the petticoat but it did look rather like the silhouette of the Ladies Home Journal illustration. The rope is heavier than I wanted and I think that decreases the amplitude obtained. It was a decent if somewhat underwhelming candidate. We can't count it as a failure, any more than we can count the Rigilene as a failure. Unfortunately, you will have to take my word for the rope working, because I blanked out and didn't take photographs. After all this work, to miss documenting the results. Disappointing.
The Project Sits Because I'm Unhappy With the Results, Until...Eureka!
The costumer hack had worked but wasn't the boning I had promised. It was frustrating. The Rigilene was modern boning and in my view then had failed, and the reed was historical boning and it had failed too. Modern steel boning or tutu wire would produce a hoop effect, I knew for sure.
I had the wild idea of purchasing a whole bunch of chicken feathers and processing them into homemade Skirtbone by core-spinning them on the spinning wheel with thread, for example, or using the information out there in the original patent. What a huge project replete with pitfalls that would have been.
So the project went dormant. The petticoat left its spot on the mannequin and was banished to the shelf of an upstairs closet. We had three ice storms in a row, and then a week later springtime arrived. One day in April I decided to return to any primary source I could turn up about the wires: patents, newspaper articles, catalogs, advertisements, legal papers, magazines, surely more information would turn up. Although jeepers, in this overall project I've had to have spent over a hundred hours combing through primary texts and writing up thoughts afterwards, just like in the graduate school era. I guess you can't take the historian out of someone, even after they change careers. It's a rather insatiable urge, satisfied with little hits of dopamine, I suppose, whenever a lead turns something up.
Back to history of this project. I struck gold this time and edited the Petticoats with Crinoline, Haircloth, Ties, Bones, Wires! post on April 25. Several quotations and an extant dress gave me what I needed. Here's one of them:
From a syndicated article appearing in The McCook Tribune (January 12, 1894):
A swell dressmaker confessed recently that the reason why some of the flaring skirts hung out around the bottom with such a graceful flare was because of a flexible steel a quarter of an inch in width which runs through the hem. Some of the latest silk petticoats have two of these wires run through the folds, one at the hem and another a few inches above.
Flexible steel is spring steel, which is ubiquitous today in industrial applications. 1/4" wide, too; that intimates that it's flat, not round. Because it's pretty narrow, and flat, and super flexible, it is likely a very thin steel. I was off to the races (an apropos choice of phrase because the thoroughbred racing Spring Meet at Keeneland was on just then). I was looking for an inexpensive source that wouldn't require me to talk an industrial supplier into selling oompty-tiddle feet of whatever. After rejecting a whole slew of options as out of my league, it seemed that repurposing an existing light industrial or consumer product was the way to go. A reel of steel fish line used to run electrical cords through walls looked promising, but it's pretty strong stuff, as I found by watching videos of electricians using it in houses.
And then, it hit me. I probably had the stuff already, in my house, all this time. Have you guessed?
It's a thin steel measuring tape, the miniature purse size that I carry around everywhere, ready to measure lumber, furniture, fabric. Pulled mine out, waved it around, bent it. Ooh! It bends into narrow flutes -- so it meets criterion #1. It springs back into a soft curve -- so it meets criterion #2. Plus, it's light as a feather. Holy cats! Eureka! (Maybe) I have found it!
I pulled up a ten-foot Stanley brand 1/4" steel measuring tape online, and bought two. So here's the experiment.
1/4" wide steel measuring tape
After ripping out the stitching (again) that held the rope at the bottom of petticoat hem, I disassembled one of the measuring tapes, to find that not only did it hold the steel tape, but a nice long length of plain spring steel in the same bendiness and size. That's the steel spring that drives the pull of the measuring tape itself. It meant that I had more than 10 feet of steel in one container and would need only one measuring tape to create the four yards needed to go round the petticoat hem. I cut the steel off the reel, unhooked the measuring part that's barely attached to the spring part, overlapped them and duct taped both sections together, measured out just over 4 yards (12 feet) so there would be overlap once the steel was threaded through the hem, and duct taped each end, both of which were sharp.
Then the metal strip was nested into the bottom of the petticoat. It was a slow go threading it in because there was no way I was going to take out the finished stitching holding the buckram. I'd had enough of that. One of the twins helped guide it through -- it's so thin it wants to try and bunch up.
The results? At last. Even with ersatz godet plaits, you can see that the measuring tape offers the front and sides of the petticoat the desired flare. The back? It can be guided into the handsome godet plaits.
Here are pictures.
The spring steel from the disassembled measuring tape, with the second measuring tape (still whole) beside it for comparison. It's a small measuring tape that you can hold in the palm of your hand.
Here you can see that I have run the final length of spring steel into the petticoat. The ends, protected by duct tape, just overlap each other. I could have used fabric and thread to bind the ends, but did not. Patience with the endless project is waning by this point.
Here is a view of the petticoat from just off the front. You can see that the front and sides flare out. The final darts haven't been set in the waistline, the yoke isn't in to strengthen the top, and the second row of steel isn't inserted above the first row yet, but we have a good shape emerging. The steel is super-light, but heavy enough to hold the hem pretty even.
Here is the side view. Do you see how the back-thrusted cut of the petticoat shows? That's the line of original godet petticoats. You can imagine just how excited I was to see this. All those illustrations in magazines and advertisements, they weren't exaggerating too much, were they? Do you see the rounded end at the back? The steel can curve pretty tightly. Good.
Here's the back. Now, I freely admit that the ersatz godet plaits have been eaten by the spring of the wire. However, I had removed the plait stuffing, and the interior placeholder elastic godet shaper, so there's nothing but two box pleats to create the shape. Why did I do that? You're not supposed to change the experiment from trial to trial. Dumb move on my part. You can see a curve emerging, however, at the top of the petticoat, and we already saw the tight curve on the side view.
The back looks like a failure on first inspection, but I was still excited. It was the only material to create the back-thrust effect, and I could see that the spring steel was capable of holding a tight curve.
I then held the wire in my hand and moved it into the shape of two funnel shaped godet plaits, and the steel moved easily and without resistance.
This material, despite the lack of complete plaits in the back, I counted a better success than the others. Not only did the overall front and side shape appear, and hints of the back plaits, but it was made of a close approximation of the period material.
Now I need to build the real plaits and hold them in place with three rows of elastic sewn inside the the petticoat, and probably stuffing. Two rows of elastic will not be enough. Then we'll have another gander at it.
Mmm, I've just noticed that the buckram is tipping in towards the interior of the skirt. The fix, below!
The Petticoat Project's Next Steps
The next step is to add a second row of spring steel at the top of the buckram so it won't tip inwards and to strengthen the flare. The second row of steel will perhaps go only on the front and sides, perhaps all the way around. Then I will test the look by making a beta test of the godet plaits. This is likely to take some experimentation, because the measurements in the German skirt pattern assume a smaller waist measurement than I have.
While the rest of the petticoat has been handsewn, except for the frills to come, stitching through buckram has been a miserable experience, so the spring steel will be threaded through channels sewn on the Willcox and Gibbs machine.
Then it will be time to sew the godet plaits into their final form, and to figure out how to stuff them so that they will hold their shape when the outer skirt is placed over them.
After that, add a placket behind one of the box pleats, and sew on the hair cloth frills after box pleating them. I made the frill strips back in March. Then finish the waist with a yoke. Still a lot to do, but we can see the light at the end of the tunnel! Boy, won't it be good to finish at last! I don't know how long this will take, however. Summertime is here, the boys are out of school, and so there is a lot going on.
Hope you have enjoyed this part of the adventure. It took months and months, but it's so nice to have come up with a material that I believe is pretty close to the original. I'd like to schedule a visit with a museum in Ohio or Indiana at some point if they will allow it and see if a wired extant skirt is available for inspection. Then we may finally have full closure to this long-lasting puzzle.
While I haven't posted about the petticoat since February, it's not for lack of working on it. Oh no. There's been a ridiculous amount of work. Documentation simply fell behind. So. In this post I'll talk about a step I never meant to take: adding a stiffened hem facing before tackling the boning.
The petticoat, laid flat, inside out, with facing sewn on but not finished at the top. The little lump of shadow on the sofa is Lily kitty in the middle of a mid-winter nap.
How did that happen? Trying the petticoat on the dress form is how it happened.
It seemed smart to see what the petticoat was like sans any stiffening whatever but with the godet pleats set in place. After all, without those large undulating flutes, the back is longer than the front and the entire thing looks ill-fitting.
So I set the petticoat onto the form, and then pinned the side darts approximately where my original pattern suggested to fit the sides into that hip-defining shape so typical of the decade, and pinning three very messy box pleats in the back, as close to where they are supposed to go as I could get given my larger waistline. The original pattern has oodles of initial waist room. Remember, it's the box pleating of that excess, and how the pleats are handled, that creates the godet plaits.
No opening was cut. That can wait until the exact placement of the box pleats is set, and then an opening can go under one of the pleats.
Here's what it looked like. My adjustable dress form isn't "me" at all: it's too wide across the front and two narrow from the side, especially if a corset were worn, and the godets are just pinned madly, but you get the idea.
The petticoat without stiffening, back
The petticoat without stiffening, front
The petticoat without stiffening, side
What a droopy back, but you can see that the godet plaits -- godet fluting -- organ folds -- whatever you want to call them -- have the potential to be beautiful if given something to help them puff, and that the full body of the silk shantung is a good match for that sort of effect. Something to keep in mind for outer skirts!
Adding the Facing
However, I looked at the silk and thought, putting boning or wires and especially the pleated haircloth frills from my inspiration petticoat is going to drag on that silk. I need a hem facing. Then I thought, whether it's overkill or not, I am going to stiffen that facing with interlining.
I am beginning to think like a mid-1890s home seamstress: stiffen, stiffen, any way you can! Beauty before ease...
The prospect of paying for more haircloth to use as interlining was not attractive, so out came milliner's crinoline (a bit different than tarlatan) from the stash. It proved too limp to do much. Here is some in my hand, so you understand what it's like.
Milliner's crinoline
Out came milliner's buckram, a medium-heavy weight. That seemed about right in the hand, and probably too stiff, but I have what I have. Here it is.
Milliner's buckram, mid-weight. No flopping in the hand here...
So I cut the silk facing and the buckram interlining:
5-inch wide facing pieces (including 1/2 inch for the bottom seam allowance and 1/2 inch for the top) was cut using the original pattern pieces as a guide, with 1/4 inch for each side seam allowance;
4-inch wide interlining, again using the pattern pieces as a guide.
Because I had sewn the petticoat seams by hand, I hand-sewed the facing pieces onto the petticoat bottom too. Running stitch for two stitches, then a backstitch, and so on.
Sewing the facing to the bottom of the petticoat while Nutmeg naps
...And tacked the interlining to one layer of the silk by hand. The tacking stitches will be covered by the haircloth frills. Dear Heaven, was tacking an awful, unpleasant, bloody-hell process. Why didn't I use a sewing machine? At that time we were in an icy cold snap, outside it was still getting dark early, and sitting at a machine up in the brr-chilly, shadowy upstairs was not enticing.
So instead, stubborn -- but warm! -- silly that I was, the silk and buckram and I battled the entire four yards around the petticoat bottom, leaving multiple little bloody marks on the silk that never did come out completely. The needle kept hating to go through the silk and then would stop angrily on tough, thick buckram fibers and slip unexpectedly sideways and into my fingers.
The facing was not hemmed over the buckram to finish the inside. That's a later step.
That's the post for today.
Next up, the battle of the bones, wires, CAT5 cabling, canes, milk jugs, and cords to give the petticoat the delicious width and sweep it cries out for. Can you guess which one ended up staying in the petticoat hem?
Good portions of the United States have had a miserable and dangerous time this past seven or eight days and portions of Kentucky have been trashed by repeat rounds of ice and sleet. The Twitter account of Chris Bailey, our local weatherman, is full of downed trees and power lines, blocked roads and ice-sheathed everything, along with bizarre videos of sleet pouring off of roofs like barrel-fulls of ball bearings. Several friends were without power or power and water both, though the main damage has been to the east of us. The snow and cold will linger a few more days.
Outdoors, all is quiet except for the birds. Our street has been white and rarely traveled for over a week.
At our house, we avoided a power outage this time, and the main concern has been feeding the birds, because everything is covered thus:
With two layers of ice on the ground, and most of the branches still encased, the birds can't get to food too easily. The below picture was at high magnification. The branches aren't blurry -- that's ice.
We put out multiple feeding stations: the hanging feeder for the titmice and finches, cardinals, chickadees and sparrows; pans under the porch overhang and sprinkled over the snow for the robins and starlings -- who fussed at each other until realizing there was plenty of food for all -- and bluejays, and crows. I spread peanut butter and seed on a pinecone and hung it next to the arbor vitae for the wee birds, but the bigger birds found it until driven away by a squirrel, who hung upside down on it and chomped away.
Here robins and a starling, feathers all puffed out against the cold, share the feeding pan in a protected spot next to the back door.
Inside the back door, the kitties watched and watched during most of the daylight hours, Nutmeg chattering and flattening herself, and sometimes pawing the door. Here they are after the first ice storm, when there was less white on the ground. The birds knew they are safe, so ate unconcernedly, and watched us all indoors as we watched them. It's a mutual watching society.
Over the week, some of the ice had not melted as much as evaporated in the cold, so the trees droop less, thank Heaven, and we no longer have 25 to 30 birds at a time. There is plenty of birdsong, so I think they are all right, or hoping so. Understand that ice storms can be really hard on the populations, although the spring nesting is usually highly successful, what with less competition. Oh my, the world is a hard place, even when it's beautiful.
In the evenings, I'd cup my hands around my eyes to shade them, and peer outdoors to see if it might be snowing again. Sometimes it was, although the flakes were often small enough that the camera didn't catch them. I thought this picture was atmospheric: inside we have windmill palm trees, and the shadow of one is thrown onto the porch ceiling. A warm-cold contrast, I'd say.
I took a walk this afternoon to take in the quiet and the sounds of the cardinals calling and a downy woodpecker somewhere up in a maple. Walking proved to be less than a silent affair:
With each step I'd sink into fluff, then the boot would meet a hard surface that would suddenly give way down into the next layer. Like walking on a giant block of peanut brittle that kept falling through onto marshmallow or something.
Then there was the sledding. The second-best day proved to be during the second storm, while it sleeted. That's not snow on the ground, those are ice pellets. The sledding was fast and furious, as one of our friends described it. Sledding on ball bearings would be :}
A sign of the times: masked sledding. The coverings did add warmth. And yes, one of our friends is filming the ride while sliding on a saucer sled, backwards. Fearless dude.
One of the joys of being with your buddies:
Yesterday's day on the slopes proved to be the best. The snow was thick and hard-packed -- the ice under cover now -- the temperature good and cold -- about 21 F when we arrived about 9:30 -- and our friends and a few acquaintances already there. Oh, did we have fun all morning! I was shaky-legged afterwards from walking up the hill so many times.
I was entirely and perfectly happily a kid again:
The thaw began this morning, Sunday. It's still thick in most spots, but the roofs are all dripping and where sunshine has warmed the surface, tips of grass are beginning to show. This was an historic week-plus, what with three storms. It didn't drop as much as we've had other years, but it's the longest lasting, and it was lovely to feel like I was in Ithaca once again, with the house bright with reflected light and the as bright with the prospect of playing or walking outdoors day after day in a world made wonderful. Once the animals were fed, that is.
Today I have something special to add to the research on period methods of adding skirt fullness in the mid-1890s. A length of antique, unused "Skirtbone" produced by the Warren Featherbone Company of Three Elms, Michigan.
At just a quarter of an inch wide and about 1/16 inch thick (NOT 1/32" as I have it in the video), it's a springy, sproingy boning. It weighs, well, a feather, and you'd not notice any additional weight in your skirt, I believe.
To understand it, you really have to see it close up, see it move, and see the insides. It's really remarkable, and perhaps the most interesting thing about it, is that it's not made of wire, but the quills of poultry feathers, set parallel to one another. I hypothesize that the quills were woven together with black thread and probably glued in place, and then covered by interwoven black threads that are again glued or perhaps starched.
I've made a YouTube video so you can get as close as possible to experiencing the real thing.
Here's the reel that the length actually came from, below.
Warren Featherbone Company's "Skirtbone" hem boning. Photo from Annie's Antiques on Etsy.
The skirtbone in detail. The actual boning in only 1/4" wide, so the photo is quite magnified. It's really quite small. Photo from Annie's Antiques on Etsy.
Skirtbone and Warren Featherbone's other products are a clever use of easily available and renewable natural materials. Back in the day, Featherbone was an alternative to whalebone, and made from materials not otherwise used, say in feather dusters. Skirtbone would have been an alternative to wire-based skirt hem products, too, which would have been subject to rust; somehow I can't see folks using stainless steel for a stiffened hem tape, do you?
Warren's Featherbone was invented in the 1880s by Edward Kirk Warren. His application for a patent is copied in full at the bottom of this post, and it explains the construction of the first featherbone product. As Randy Miller of the Michigan newspaper The Herald-Palladium explained it,
"The process for making featherbone was published in magazines and newspapers across the country in 1883 and was described as follows:
'The first thing is to strip the feathers of their plumage. Rollers, with knives attached, split the quills in half. Sandpaper rollers revolving rapidly removed the pith. Then, a series of interlocking knives reduced the quills to fiber. In this state, the material is fed into a machine that forms it into a strong fine cord; at the same time it is being wound with thread. In another machine, four of these tightly wound cords are wound together with thread, in such a manner as to form a flat tape.'"
Here's an advertisement for it that appeared in towards the back of the August 1895 issue of The Ladies Home Journal (p. 27).
Warren's Skirt Bone advertisement, August 1895. It appears that the product was pretty new. Other Warren's products were already popular.
The sample of Skirtbone is still amazingly flexible, as we have seen. No, we don't know how how it stood up to sudden breakage or repetitive stress breakage. We do know that whalebone tended to become brittle, while this product isn't brittle at all, even now. That's some pretty good longevity, no? Am I going to bend it wildly or bash it to see how it takes rough treatment? Um, no. It's antique and a small but significant part of dress history. It goes into the collection.
Skirtbone wasn't the only mid-1890s skirt aid that Warren's produced. They also made "Bustle Bone", a wide bone strip that dressmakers were urged to shape into small hoops and install inside godet plaits to help hold the rounded funnel form. Here is an advertisement for it from December 1896, towards the end of the godet skirt's popularity, in The Delineator (Vol. 48, No. 6, , p. 108)
Warren's Featherbone Company "Bustle Bone" advertisement December, 1896
For those among us who are vegetarian or vegan, the prospect of reviving the use of feathers for boning likely doesn't appeal. However, it is a nice alternative to plastic. I sure wish Warren's would consider bringing it out again. Are you listening, ladies and gentlemen of the Warren Featherbone Company?
More About Warren's Featherbone Company and Its Products
The Warren Featherbone Company is still in business, although it's no longer in Three Elms, Michigan, but in Georgia. There's quite a bit out there about the company and its history. Here are a few good examples, and if you run a search, you'll find much more:
EDWARD K. WARREN, OF THREE OAKS, MICHIGAN, ASSIGNOR lOF ONE-HALF TO GEORGE R. yHOLDEN, OF MICHIGAN CITY, INDIANA.
CORSET-STIFFENER.
SPECIFICATION forming part of Letters Patent No. 286,749, dated October 16, 1883.
Application filed January 9, 1883. (No model.)
.T all whom it may concern.'
Be it known that I, EDWARD K. WARREN, of Three Oaks, in the county of Berrien and State of Michigan, have invented certain new and useful Improvements in Corset-Stiffeners, of which the following is a full, clear, and exact description.
This invention has for its object the utilization as a rib or stiffener for corsets and other articles of dress or fabrics of the stalks, stems, or quill portions of feathers after they have been stripped-as, for instance, the feathers of turkeys, geese, chickens, and other fowlsmuch of which kind of stock has heretofore had little or noK commercial value. These I propose to use, among other purposes or uses, as a substitute for whalebone in corsets, Waists, dresses, abdominal supporters, surgical appliances, and other articles of wear and use. The growing scarcity andfincreased cost of whalebone for these and other purposes has led to the employment of various substitutes, including bones, horn, rubber, steel, and rat tan; also, the fibers of tampico held together by an exterior binding-as, for instance, by a wrapping of wire or thread. Many of these are expensive and much inferior in numerous respects to whalebone. My improved bone or rib, which I term featherbone, has many advantages, and the same may be made to form a compact stay or bone, which in some respects is better and has more enduring elasticity than whalebone, as it 'is not so liable to breakv or Warp, nor will it be injured by prespiration or boiling Water in washing. Such elastic substitute for whalebone I generally propose to make by splitting or otherwise reducing, either by hand or machinery, but preferably by machinery, the quills, into splints. These splints or bers may be held together by any suitable external binding. Thus I wrap them with either wire or thread by winding, braiding, twisting, or they may be cemented or be otherwise put up together to form a featherbone of any desired shape in` its transverse section, and may either be simply inserted in the article to which they are applied or be Woven therein, or they may be woven together, so as to form an elastic or 5o iiexible fabric.
`their entire form.
Reference is to be had to the accompanying drawings, forming part of this specication, in which similar letters of reference indicate corsponding parts in all the figures.
Figure 1 represents any exterior longitudinal 55 view of a featherbone in which a number of quill splints are held together by winding a wire or thread around them. Fig. 2 is a similar view of a number of quill splints held together by a woven covering. Fig. 3 is a View 6o in perspective, upon an enlarged scale, of a portion of one of the quill splints detached; and Fig. 4 is a cross-section of Fig. l, and Fig. 5 a crosssection of Fig. 2, both being on an enlarged scale. Fig. 6 is a perspective view of 65 a stiffener made of the entire quills in a suitable wrapper.
In the drawings, b b represent a number of split-quill splints arranged longitudinallyto-` gether in any suitable manner to form afeathl 7o erbone, A, of any desired form in its trans versesection, and which maybe held together either by a wound wire or thread external binding, c, as in Figs. l and 4L, or by a woven external covering, c', as in Figs. 2 and 5, or 75 which may be otherwise held together, as hereinbefore specified.
By using the separated fibers or splints of the stripped quills or stems of feathers, produced by splitting or disintegrating them, the 8o resiliency of the quills is preserved without exposing them to breakage` in bending, to which they would be more or less liable if used in However7 the entire quills make avery good stiifener lwhen stripped and 8 5 bound together, as shown in Fig. 6 ofthe draw-- ings.
Having thus fully described my invention, I claim as new and desire to secure by Letters- Patentl 9o A corsetstiffener formed of quills or quill splints stripped of the feathers and bound together, as shown and described.
EDWARD KIRK VARREN.`
Vitnesses:
HENRY A. MOGANN, RETTA HOLLETT.
Additional Research
Extensive research on mid-1890s skirt stiffeners is contained in a series of related posts available on this blog's 1890s Costumes & Research page. Primary sources include books, magazines, newspapers, film clips, and extant garments.
Okay, I've interrupted the petticoat project. Unless something else interesting shows up, which as we know from this blog sometimes occurs, we're back to it next time.
Wishing you all health and safety during very dark days, literally and figuratively...
Where were we? It's been a little while since I worked on this project. Oh yes, we're cutting the pattern to petticoat length and finally constructing the thing. The project has turned into yet another test of period materials and methods to see how they work. Nonetheless, if the petticoat works, it will give my cotton skirt the regulation -- to use the popular term of the time -- flare.
This time we're cutting and seaming, but the seams are not normal ones...
Cutting the Pattern to Petticoat Length
Petticoats are usually a little shorter than outer skirts. Therefore, I subtracted 1 1/2" inches (6.35cm) off the pattern, which is 40 inches/100cm in front. That works out to 38" long when finished, but leaving a 1/2" seam allowance in place. That allowance will be needed to seam the bottom facing and a hem binding to. Hem binding on a petticoat that doesn't touch the ground? What an oddity, but that's what's suggested.
So I copied the pattern pieces onto fresh paper (oh joy), and cut off the bottoms. This way, I have the original skirt pattern plus the petticoat pattern to go with it.
The next, rather obvious step was to cut out the fabric pieces.
I used silk shantung from some old silk curtains I made years ago.
The old curtains were rolled up. I used an entire panel, about 4.5 yards. First I had to deconstruct the entire panel, removing the lining (bonus fabric!) and the plastic curtain facing stuff at the top. Forget what it's called. Fortunately, only bits of the silk were weak or shattered, so I could use most of the fabric. Oh, and yes, our hallway library doubles as a free-weight lifting station. Pandemic creative space use :}
The silk fabric has body and resistance to wrinkles, although probably not to the degree that moreen has. The latter fabric was a favorite among dressmaking writers for silk petticoats (Davis, Mallon), as we have read. As it happened, the two larger pieces were cut on the bias, but not on the perfect bias and another was pieced, because I placed them puzzle-wise to conserve fabric.The bottom of the petticoat is to be faced, hence the 1/2 inch (1.27cm) seam allowance.
The side seams were cut with a 1/4 inch (.635cm) seam allowance. Note: I would have used all metric measures and forgone inches and feet, but the presser foot and markings on the treadle sewing machine are in inches, and they are wonderfully natural sewing guides.
The top of the petticoat has a 1/2-inch seam allowance, but the plan is to cut a yoke for the petticoat, so the extra is just in case I change my mind :}
Stayed...and Bound...Seams
Next, all the skirt pieces were seamed together, but watch out! The seams are emphatically not normal ones. Because just about every seam is on the bias and thus at the fabric's weakest position, we have to sew in a fabric stay on each one so that the fabric doesn't stretch at the seam and cause ripples and puckers and a poor skirt hang. Sophie Klug writes in the 1895 book The Art of Dressmaking, "Where two bias edges are to be joined in one seam, a stay tape or strip of lining must be basted at one side and sewed in with the seam to prevent stretching." (p. 35)
I was going to use bias tape for the job, but big thanks to Quinn of The Quintessential Clothes Pen for pointing out that using bias tape would have been bias over bias and therefore not much of a help. I looked back at documentation on an 1890s skirt in my collection, and sure enough, there's a straight-grain stay there. Why I'd forgotten such an interesting detail, haven't a clue.
Not only would the strip be a seam stay, but it would also bind the seam allowance for a neat, durable finish. Petticoats normally have nicely finished seams because they get so much wear. Twofer!
Making the Stay/Binding
So, I cut 1" strips of thin cotton (from the old muslin curtain lining fabric -- why waste it?) on the straight as long as each skirt seam.
Then I ran the strips through a 1" bias tape maker widget (the Clover brand version; there are others).
It's pretty easy to use. First, you start feeding the fabric strip into the channel.
Help the fabric through the channel by sticking a pin into the fabric and pulling...
...and pull at the tip to pull the fabric right out the end.
Voila! You have bias tape, or straight tape, in my case.
You will want to make sure the fabric strip is out of the way of the little wire handle.
After you start pulling the fabric through, go to your ironing board, pin a bit of the finished tape to the board, and heat your iron to steam heat level. Then slowly pull the gadget, feeding the fabric into it, and pressing the resulting tape immediately.
I found that the fabric wanted to go in wonky sometimes, so the pulling process was slow. Other times the steam from the iron was so hot that I just pushed the bias tape maker along in front of it, like so:
Sewing the Seams
To create a seam, the two skirt pieces that were to be seamed were laid, right sides together, ready to sew. On top, I laid the prepared cotton binding with its pressed edge at the fashion fabric edge and and the rest of it open and ready to fold over the top of the completed seam to bind it. All three layers were carefully pinned together, trying to lift, handle, and tug the fabric as little as possible. Every tug can stretch the bias-cut fabric.
Each seam was sewn from skirt top to bottom in case the ends should get a bit out of alignment.
Immediately after sewing a seam, I folded over the prepared binding to wrap the seam allowance in it, turned in the already prepared fold so no raw edges would be showing, and sewed it down on the covered seam allowance to finish the seam.
Readers, I started sewing the seams with the Singer 28k handcrank machine. The 28k came out during the 1880s, so this was a logical choice. However, we all know silk can be no fun to sew by machine, and the long and slippery skirt pieces were determined to be naughty, and I only had my left hand to guide the fabric, because the right hand was cranking the machine! Here's a sample, videoed by my son, Christopher.
I even tested the antique Singer binder attachment. It worked; the attachments nearly always do -- alas that I don't have a video, because it's interesting! -- but again, trying to do all this with a hand crank on silk was annoying and error-prone. The process became so unfun that I chucked that idea, removed the first seam, and hand-sewed them all. The main seam I made in running stitch with a back stitch every five stitches or so, 6-8 stitches per inch. Then the binding was of course hemmed. I enjoy hand-sewing, so it was a relaxed effort.
Here I have pinned the two skirt pieces right sides together, and have pinned the stay/binding to the edge. I am running-stitch the seam with a backstitch every few stitches. Generally I pile up three or four running stitches on the needle, then pull the needle through, then take a back stitch. It becomes a steady, rhythmic pattern of movement.
Here is an example of a completed seam. The sewing thread blends in so well that it's practically invisible to the camera this afternoon.
The hand-sewing makes sense within the context of undergarments of the day. Hand-sewn underthings were desirable as being particularly dainty.
I wasn't the only one relaxing. Nutmeg settled in, too. Here we have evidence that some kitties will sleep on just about anything. For some unaccountable reason, she found my sewing box to be a good pillow.
Interested...
(Yes, I made sure she wasn't into anything sharp.)
Getting nappish...
Oh boy, time to go to sleeeeep...
It's January. A good time for napping. Wishing you safety and many naps this month!
Next steps with the petticoat? Facing the bottom and inserting the surprise stiffening. Yep, a mid-winter surprise for you.
As I look out the front windows, a soft snow is fluttering and the temperature is dropping rapidly. Snuggle up, Kentucky, and all safety and health these holidays, wherever you are.
My goodness, it is gray outside. So gray that, unusually for me, I am sitting facing away from the windows, view trained on the warm light of the lamps nearby. Saint Lucia's Day is just past. Winter has settled in here in the Kentucky Bluegrass, and the thick veils and clots of clouds that bring rain and snow that feed the numberless streams and creeks and ponds and the Kentucky River snaking deep beneath its palisades -- or the more realistically foreboding name, gorge -- are here for the next months. Gloriously bright days will be relatively few and valuable.
As valuable as the knitted mitts from my sheep that sit unfinished here beside me. A moment ago I cut a length of yarn to sew up the sides of the rectangle that will make a mitt, and quite suddenly was viscerally aware of the impossibly high value of that yarn.
--- Green, green grass on a Bluegrass farm --- Sheep grazing --- A year's daily shepherding, morning and night --- Shearing --- Fleece skirting --- Picking vegetable matter --- Scouring --- Drying --- More picking --- Separating outer coat from inner coat --- Carding --- Winding into nests --- Spinning --- Plying --- Skeining --- Washing and blocking --- Yarn.
And, other than the mower that trims the grass if needed, every single bit accomplished by pairs of hands and the most ancient of tools:
--- fingers --- shears --- soap and water and tub --- air --- wood and wire hand-carders or hand-cranked drum carder (quite an old tool) --- foot-powered spinning wheel --- time --- patience --- persistence.
Hours and days, days and hours and hours. Months. Years.
Lana and Nina grew the fleece on their backs three summers and winters ago, munching on the grass of my friend Sarah's farm not far away.
Nina, Liam the English gentleman, Neo the honorary Shetland, and skittish Lana October 2020.
Every day, Sarah cares for the sheep, whether it's muddy or parched, icy or foggy, or finger-cramping or beautiful enough to cry and thank God for the peace of it and the sweetness and interest of the sheep. She is patient and loving and the sheep thrive and she knows each one and its character and society. I am lucky to have her as a friend.
Liam at the hay rack. Lana is nearby. November 30, 2020. Read about the drama just past in "Disruptions Due to Snow" on Sarah's blog.
On a nippy morning the next early spring, around about 8:00 a.m. when our breath streams in clouds around us when the rest of the flock leaves the barn for a day in their fields, Sarah and I have the task of separating out ever-fey Lana from her boyfriend Liam and daughter Nina in their stall, and she leaps and evades until by main persuasion with torsos and arms and legs we halter her, so that she could be sheared. The only time each year that she wears anything but her own self. In a month or so her fleece, her skin a hand's width deep under her blond-tipped locks, would start to separate and slowly, imperfectly shed. She needs shearing before that happens, and before the heat of a Kentucky summer makes life far too hot for her under such a blanket.
So the two of us, each with a pair of hand shears, lean or kneel the either side of Lana, haltered to a fence outside and in sight of her flockmates to calm her and begin to shear. She kicks and trembles and we work as softly as we can so as not to nick her so-tender skin. She calls out to her grown baby and pees so that you move quickly to avoid the piercingly nose-wrinkling liquid. We trade places frequently as muscles cramp, and Sarah's mother Peggy talks quietly to Lana and strokes her. Occasionally one of us runs to gulp a bit of tea from our Thermoses. Some of the wool is spoiled by dung and urine, other parts so full of VM (vegetable matter) that I cannot efficiently clean it. That lot goes to the hedgerow for birds and rodents to carry off for their springtime nests. We smell of lanolin and dung and trampled grass.
Sheared, Lana's halter is gently removed and she kicks and wriggles and runs to her family. A good part of the time the flock is non-plussed by the fleeceless stranger, and will butt and carry on until they are convinced and assured that she belongs with them. That can take a while because sheep are so visual, and seems to us humans grossly unfair, unless we should think of the day we wore an unpopular outfit to school and were laughed at and occasionally pushed by the more thoughtless of our classmates, until they tired of the game. In the last years, however, the flock is kinder and Liam and Nina welcome her with raised heads and low bleats and she resumes her life just a few yards from Liam, her life's love and companion, while her daughter pretends she's not Shetland, but Soay, and leaps and climbs and talks with her flockmates until returning to her mama, as an offspring usually will. A flock is made of clans and it is a complex society.
I gather the mounds of yielding, springy brown and blond fleece and stuff it into an old pillowcase. It scents the Tahoe. We go and shed our outer things outdoors, and wash up thoroughly, and lunch together next to the kitchen, watching the flock from a bank of windows that look to the West.
On other mornings it will be one or two more sheep, Nina and Liam, and sometimes one of the other Shetlands. Soay sheep are less likely to be sheared. Some roo, that is, the slowly shedding bits are pulled off lock by lock -- this is what humans did before shears were common.
After that? The fleece is packed into a tightly closed plastic bag and goes into my deep freezer to evade the clothes moths that would entirely spoil it.
Then, when I have energy and time, the oddly pleasant pastime of picking. In springtime Kentucky can be a breezy, windy place. Just outside the back doors at home I sit on a step with the open bag of fleece, scented with lanolin and straw and a bit of dung. Picking up a lock or two in my fingers -- sheep grow their fleece in sets of hairs that tend to stick and curl together -- I pull at the lock, holding it in front of me so that the airs can toss the hairs and release bits of straw and grass and seeds and the occasional dead bug or tad of dung; they fall in a random rain to my lap and the ground and some makes its way, airborne, into the tall trees that rim our little property. Usually it's necessary to pick out individual bits, fingers pinching and pulling. The lock, a bit cleaner now, goes into another bag, ready for scouring, which is a gentle washing, not the rubbing and scrubbing that the word generally implies.
Hundreds of locks later, washing. Drying in limp bunches, like hairy Spanish moss or the wrack of a mummy's wrappings, in the basement. A little disturbing if you come upon it unexpectedly.
Packed again in an airtight bag until there is time to do what most fleece does not need. My dual-coated Shetlands are a crofter's dream, for they offer downy undercoat for airy yarn and long outer hairs good for socks and rugs, all on one small and delightful animal. Yet the undercoat grows in among the outer coat and the two must be pulled apart. This is slow, my friends, and after a time the hands and wrists and arms tire of pulling on the resisting locks of fleece as the tightly integrated parts release their hold on each other. Of course, some down is lost into the hairs and the other way around. A few fiber mills who take small wool batches have specialty equipment for handling this sort of uncommon wool, but the process is expensive and the only mill, a state away, that I could afford closed. This year I sent fleece to another mill, because I simply cannot hand-process it all and the freezer was full to bursting, but it will not be separated. It has been nearly a year, and the roving isn't ready. I fear it's lost.
The sorted wool is bagged again, and again waits for time to hand-card it, or to run it slowly through my hand-cranked carder, a largely wooden machine with two drums lined on their outer surfaces with closely set wires, which arrange the locks into a fluffy batt.
I pull and elongate the carded wool into a fluffy strips, roving, and wind them into nests. Back they go into a bag.
Later, months and months later, as fancy strikes I pull out the newer spinning wheel, a Kromski Minstrel from Poland, a beautiful and versatile machine, and spin the roving, unwound from its nests, into a thinnish yarn. Good for weaving as a "singles" yarn.
Spinning on the Minstrel, early 2020, not long before lockdown.
Again later, I pull out the wooden bobbins of yarn, and ply some of it into two-ply, Aran-size yarn. It's not always that consistent of course, because I am no very accomplished spinner, but it's still pretty wearable stuff.
The yarn rests a bit after plying and then it's out with the homemade yarn swift or skeiner, and the bobbin is unwound from the distance of half a room as I turn the yard-circumference tool to allow the twist to even out, and wind it into a skein. The turns are counted so I know and mark down the yardage.
Then goes the skein, which twists of itself into a braid, into a bag, until I am ready to swish it in some warm water with a tiny bit of soft soap, and to hang it to dry so that the yarn relaxes a little, and sets into a useful state.
And then, and only then, is it ready for knitting.
And so I knit the Pluviose mitts in garter stitch, the yarn now, from a moorit (warm brown) fleece with bleached tips, to a rich German chocolate color.
Pluviose mitts are simply garter stitch, and thus nice and stretchy over the hand.
Let's not knit just now, but nap instead, says Nutmeg. She loves wool and seeks it out to rest upon.
Just now the mitts sit beside me, ready to be sewn with more yarn into their final shape, the leather button ready to be added to each wristband. Then they will be, after a three-year journey, complete and ready to be wrapped in tissue paper to go under my mother's Christmas tree. She will open the parcel Christmas morning, and wear the mitts, I hope, that started as grass a few miles away, to keep out the chill of a Kentucky winter. While Lana and Nina wear their fleece again this year, warm and toasty under it even in the sere fields lined with leafless trees, the damp and chilling -- or bracing, take your pick -- breeze soughing through the branches.
The cycle does not end, the sheeps' lives and the hands' work, so long as we remember to practice the skills that keep the sheep healthy and the yarns ready to envelop and warm us.
Whatever your beliefs, and wherever you are, may you live in Thanksgiving, Patience, and Hope into the new year and the spring, or the harvest, that isn't so very far away.
Note: because of COVID, most of the images of the sheep are from Sarah's blog. We haven't been able to visit one another, which has felt very strange.
During a walk this afternoon, all bundled up against a sneaky breeze and November's weakening sunshine, I found fallen leaves to appreciate, and spotted mistletoe maybe 15 feet overhead, waxy white flowers blooming while it lives off the sap of the trees that support it. A neighbor waved and I wondered if she could tell that I was pretty tired out despite having walked rather less than a mile. Sure hoped not.
Tired or not, it was a mentally relaxing half hour, a time away from what is honestly is, and has been for years, a daily offensive to push through all the duties of mother and wife and worker before the daily afternoon or evening physical crash. All while knowing that COVID is spreading fast, and knowing that if, Heaven help me, I get the disease, this body cannot fight it very well.
I have a kidney transplant. Have written that before, so some of you have heard about it. Also high blood pressure and other issues, brought on by the disease for which a transplant is a treatment, not a cure, as well as the very medications that keep this person ticking. Like mistletoe berries, they are toxic, but paradoxically, in the right amounts keep the body from rejecting my mother's kidney, a gift beyond any that I tear up about in gratitude so many years later. Those same medications suppress the immune system, making me easier prey for a host of bugs, COVID among them.
When in health, I exercise to build a cache of strength. In health or not, I watch food carefully, am compliant about taking the meds, one of which, a half inch long capsule smells like skunk. Good thing have gotten used to that: the first while taking it was a battle against gagging. The healthy times are largely good, and gratefulness to Heaven and those around me is a daily wave that washes over, as my husband and I raise our twins, now half-grown, and try to be useful and loving to those around us. We live pretty unremarkable lives.
Take this life, and multiply it by the hundreds of millions. Change the circumstances, modest, or excruciatingly difficult, or easy.
As a student in public health, I helped with a quality of life survey in a public hospital in a large city -- in the oncology wing. Where people waiting to be treated for their cancer sat on a concrete floor if there was no chair left, prisoners walked, cuffed hand and foot, to their appointments with their accompanying officer. Some windows opened, some didn't, so the air was usually a temperature you didn't want it to be. And the staff worked against such odds. The patients, too. We talked about how they made their way to their appointment: could they catch a ride, how far was the bus stop from their home, could anyone accompany them to help them with steps or be there if something happened? Some had children, some were raising grandchildren. Some were holding jobs despite their cancer; some were too sick. Most spoke with humor, or upbeat tone, some were still, expressionless, holding it together in an endless tunnel of this-is-what-it-is, this-is-all-it-is.
When I had sepsis once, a hellish gift from E. coli, and had such shooting pains in my legs that I was crying out in the emergency bay for was it 24 hours, and...no, no...it's too hard to bring back; there was a woman nearby yelling imprecations at anyone who came close. She had overdosed on something. How we felt for her, through our own suffering. I got better, and that spring we hiked -- the boys were old enough to appreciate moss and the joy of wading a burbling stream, stick in hand, mud boots on. I hope that woman survived and recovered and is living clean and has happiness.
There was a girl at the transplant recovery house, a preteen, dragging an oxygen tank but cute as a button and talking with her friends on her cell phone. She'd had her second heart transplant, having been born with damaged organs after her family's apartment was sprayed heavily for pests, repeatedly. Her mother was pregnant. I imagine, with her grit, that she made it and maybe she has a family now. She will always take medications. She will always be at risk. Her fellow patient, and mine, a man in his 50s who had worked and raised a family while on peritoneal dialysis for a decade, and had a big garden he liked to talk about with us, as we recuperated in wicker rocking chairs on the porch. His transplant from his brother was a perfect match and he didn't have to take medications like we did. He had damage to his nerves, though, so walked with a permanent shuffle.
These millions and tens of millions of people have lives and stories and many of them have suffered, oh suffered unimaginably, but they are working and raising families and many probably have funds of empathy and understanding and love for others that bring relief and grace to those they meet who are in need themselves.
A few days ago, something had the chance of happening that might have brought COVID home. The environment would be conducive to spread. Hearing about the potential event -- details aren't pertinent -- I held my hand to the kitchen counter, felt the chest tighten, the pulse skyrocket, the ears attempt to ring, all in a nanosecond. Like the evening ages ago when a man stared at me on the sidewalk, then fell in behind as I neared the apartment building, matching his footfalls to mine, and was able to get in the door and into the hallway with me, staring, his face hard, before I made it into a full elevator and the door closed between us. Like the time the lady in the eggplant-colored van pulled into our lane on a highway when my stepmother, sister and I were out to look at wedding dresses, and the car went out of control and hit the median wall head-on. That kind of fear. Existential. I swallowed it down, gritted myself into normality, but not before squeaking so hastily that attending wouldn't be a good plan that I ruffled feathers. It's like that, living under this shadow, continous low-grade stress that blows up every so often. We're most of us humans very stressed anyway. we most of us carry extra burdens, for which God give us strength. The addition of an existing illness to the cocktail is an unwelcome splash of wormwood.
You all, that's what it is, this COVID thing. An existential threat to people who somehow have been dealt the hard hand -- already. Any age, infant to elder, people who already have faced trouble and pain, some physical, some the economic or social fallout of severe illness, many both. Sometimes over and bloody over. The cancer comes back, another brittle bone breaks, a heart attack, an organ fails. I was thirty-two when they told me, during final exams in graduate school, that I had a carcinoma, severe kidney disease, and pink eye, all at once. Who had to visit the dean to beg off exams for a while, and who could barely see to get down the hallway to his office. Felt pretty goofy doing it. That girl at the transplant recuperation house, she was still a kid, our fellow patient a father. We put our lives back together and went on. Most of us? You'd never know there had ever been anything amiss, or if you did, we had the grace to just accept (most of the time) and keep going. There are so many of us with such similar experiences, living right now.
This is going to be a long winter, and for those living way south, a long summer. I don't know what I am asking. Just that the person next door may have already had a bad bout with some awful disease. They're probably pretty good folks. Why not give them a chance? After all, we're all in boats that can tip at any time.
All the best of safety and health to you. Vaccines are coming.
Never trust your first draft, right? Edits are always necessary, and the truism held here, too. Only, for once it wasn't my fault, but a typo on the original 1895 Illustrierte Frauenzeitung draft! Despite the extra work, it's nice not to be saying, "Oh, noooooo".
Anyhow, I cut out all the pattern pieces, and laid them on the floor, folding in the seam allowances where needed so I could check the fit.
Ruh-roh.
Something wrong with the side-back piece, which, in action, actually forms part of the back and gives enough fabric to allow the godet flutes or organ pleats to take shape. Or the back piece.
Uh-oh, something's not right...
Thinking I could have mis-measured, the next eon was spent in running a meter stick along all the seams, measuring them, and checking them against the numbers on the draft. I couldn't find my mistake.
The Pattern Draft Typo
Frustrated, and wanting to get the draft right so that we could see what a godet petticoat cut is really like, I went to bed. And thought about it, and thought about angles. That side-back piece was the one that confused me when drafting it, for the original draft of the piece had two different measures for the line that would be used to create the side-back seam angle. The top of the draft read 90, and the bottom, 99. What if one was wrong and it created a bad angle on the pattern piece?
Urr, thinking about pattern pieces is just what I should be doing instead of falling asleep. On the other hand, I could be thinking of far darker things. Our poor, hurting world... Perhaps a quiet geometry problem before bed is what the doctor ordered.
Now, if you have compared the cut pattern pieces with the draft, you may already have guessed which measure was the correct one and which was the typo.
The bottom measure -- the 99cm -- was the culprit. The FrauenZeitung typesetter may be having his little joke on me, all these years later, and you know what, it happened right at Halloween. OOOoo...
By drawing out the draft's bottom measure to 99cm, the back seam on that piece strettttched out. When the pattern piece was cut out and its right side laid up next to the back piece, its right side was too long.
Good thing I caught the mistake, or we would have even more fabric in the back than we meant to!
The Fix
Pulling out the meter stick and ruler and pencil -- and eraser -- I redrew just the mistaken draft line, this time 9 cm less than before, and that changed the angle and made the right side seam shorter, as hoped. Problem solved. Phew.
That's better! Yes, I'll fudge the one little off bit
Oh, and the little gap between the side front and side back piece length? Fudging it. A cm or so is not worth it.
Rohrenfalten-Rock skirt pattern piece completed! Now I have a master pattern any time I want to make this sort of skirt.
The Petticoat Pattern Pieces
This next step isn't illustrated.
Petticoats are usually a little shorter than outer skirts. I am going to need to cut 2 1/2" inches (6.35cm) off this skirt that's ~ 40 inches/100cm in front, or 2 inches shorter with 1/2" seam allowance that I will need to seam the bottom facing and a hem binding to. Hem binding on a petticoat that doesn't touch the ground? What an oddity, but, that's what's suggested.
So I will copy the pattern pieces onto fresh paper (oh joy), and cut off the bottoms. Then we'll be ready to cut the fabric, at long last!
In other news...
...the boys and Grandmother carved a pumpkin for Halloween, and the boys made Pan de Muerto for Spanish class to celebrate Dia de Muertos, which has a bit of similarity to our church's All Souls Day but which has, to my mind, more joyful elements. Our pumpkin's looking forward to noshing on some of that semi-sweet, orange-and-lemon scented yeast bread, and so am I.