Showing posts with label 1870s petticoat. Show all posts

Saturday, November 17, 2012

*Still* the Steampunk Black Dress: Overskirt

Aren't we done with this dress yet? Goodness, no. Overskirt construction details and how the trim was done need documentation. Then we're done with describing the construction, at least.

Of course, the dod derned* dress itself isn't really complete, as already mentioned. The neckline trim needs redoing, and all the other trim needs what are called "bias folds" to finish them, and the flounce is missing an added puffing. I want to fuss  around with the overskirt: it needs more height and that might require more interior strings as well as a little built-in bustle pad. Then there's my entirely inadequate hairdo, all out of balance with the fluffy puffiness of the rest of the costume. That's the experimentiness of my blog coming out: as many fails as successes!

*straight from Mark Twain, and so of true 19th century flavor.
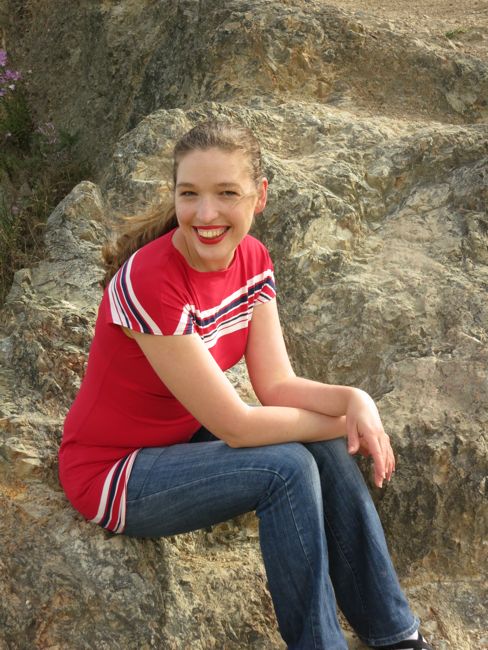
The Dreamstress
models her new
t-shirt.

So if you yawn and stretch at the interminability of this steampunk beast, best go visit the Dreamstress: she about always has something new to show. Besides, her take on modern t-shirts is just great and I am itching to make one of my own. Only four seams and three hems! The free pattern from 3HoursPast’s Blank Canvas Tee.

Overskirt Documentation

You already met the overskirt when it was a-toiling.

Remember where the pattern came from -- January Peterson's Magazine, 1869, right figure. The pattern is right in the magazine, and it's available on Google books.


To make my toile, I displayed the pattern on my computer, laid out a large length of muslin, doubled in half, and drew the pattern pieces by eyeballing them. Peterson's gives some basic measurements in inches, and this helped me, but I also and checked the proportions by examining the fashion plate. As in: okay, the front wings come down to about to thigh level on the figure.

Note: I cut the back a little longer than the Peterson's pattern: I just wanted extra length to pull up for extra pouf, or to let down for a more flowing look.

Here are all the pieces for the toile all cut out, and lined up ready to sew together. There are two "wings" in front, two side pieces, and a very large back piece.

Ladybug tests the toile.
Look closely, now. Why do you suppose the little wings pieces, which will sit at the front over the tummy, have a curve that goes opposite to the shape of the pieces they sit next two? That's to help create some puff and drape in the front. I didn't care for the drape, when I finally wore the dress, even though I liked it on the dressform. Next time I'd make the wing pieces longer and pleat them into the side pieces with three small pleats. The finished length would be the same, but the pleats would add some shadowing interest.


Then I toiled up the pieces to test for fit, as per my past post. I followed the construction directions that came with the pattern. They included putting several sets of upward-facing pleats in the side pieces. What a neat way to create drapey poufs and shadow lines! An upwards-facing pleat pulls fabric up, not down, poufs it out, not smooths it. You can see the effect clearly in the photo below.

I also curved the front edge of the wings a little more than in the original pattern.


Once I had the toile the way I wanted it, I unpicked the seams, and recut and marked the pieces to reflect my alterations. Then I laid the pieces out on the fashion fabric, and cut the fashion fabric pieces. The toile pieces became a lining.

Yes, the overskirt is fully lined. My original 1870s dress, including the peplum or basques, is lined with e very light but crisp polished cotton. I felt that lining it would give the drape extra oomph as it did, sort of. In retrospect (fall 2020) I might have lined it with organdy or book muslin/tarlatan rather than cotton muslin. The muslin is quite heavy and body it gives is heavy, at odds with the puffiness of the era. Something feather-light but slightly stiff would work better.

Just as with the extant dress (which see the post "Building the Underskirt", the lining is a flat-lining: the lining and fashion fabric are treated as one, and seamed up that way. That means that the seams show on the underside, but that was normal. I finished the seams by overcasting them. Then I slipstitched the bottom and sides to hem them. The big stitches you see in the photo below? Those are the tacking stitiches that hold the trim in place. You would find that on extant dresses too.


Then it was time to add the waistband and finish it. Because an overskirt is drapey, it is 3-D, and so I pinned it together on the dressform, not flat, to make sure it would make up the way I wanted. Sure, I had a toile, but what if adding heavier fabric changed things?

First step: gathering the back piece tightly. Note that I matched the side back seam on the bodice with the side seam on the overskirt.


Here's the gathering, from the interior (after the overskirt has been sewn to the waistband):


Next, I pleated the sides of the overskirt. I set in very, very wide pleats. Look on the back side of the overskirt, and see that the pleats are inches wide, in some cases. My finger points them out in the photo below. Is this because the pattern was too big? No, I don't think so. It just took a lot of fabric to create such pouf on the overskirt, and all that fabric has to be pulled in tightly in order to pouf well.


The pleats are set on a backwards angle, as you see below. This will help pouf the fabric towards the back.


Then the overskirt sides were pleated with those upwards-facing pleats.


All the sets of side pleats added.


Half the overskirt pleated. Notice how the side pleats create a pannier pouf, that is, a pouf which sticks out at the sides, which was very popular that year. It was towards the middle of the 1870s that most of the bustle effect was concentrated in the back, leaving the sides slim. In 1869, width was still important -- a nod to 18th century pannier hoops and skirt polonaising.


Next I pinned the second side. Then the overskirt was carefully removed from the dressform, and all the pleats and gathering backstitched, by hand, into place. I used a spaced backstitch, with tiny stiches showing outside, as below.


Inside, the stitches look bigger: they are the vertical lines of black stitching below. If I want to redo the look of the draping, I can take out the stitching and redo it easily, without bothering the hems.


Then the first inch or so of the overskirt top was turned inwards and whipped to a waistband, just as for the underskirt. I built in about three extra inches at each end of the belt so I could add a real belt buckle if wanted, or just pin the band together, as desired. Here's the effect from the outside. I used strong quilting thread to do the whipping: unfortunately it's white and shows.


 However, that's the case on my extant dress, too: look at the little white whipstitches on the waistband of my extant 1870s skirt in the photo below.


Phewee, that's the end of the overskirt construction. Last bit? Trim...next time. I am worn out, aren't you?

Tuesday, November 06, 2012

Steampunk Black Dress: Building the Underskirt

Edited September 8, 2020

In the rush to get the steampunk dress ready for the Halloween tea, I neglected to share with you several aspects of its construction, most of it based on my extant 1870s dress, and/or on Harper's Bazar instructions. So here they are, after the fact, in the next few posts.

Let's talk about the underskirt. Watch out: this is an image-heavy post.

A Late 1860s Extant Dress as a Model

I used a late 1860s dress as a model for many construction decisions in this dress. Recently a dress historian and costumer, Cassidy of A Most Beguiling Accomplishment, analyzed the dress in detail in her video and post "Ca. 1866 Brown Gown - A Close-Up Look". I had sent the dress, along with many other antique garments, to her several years ago, believing she could analyze and conserve them better than I could. The analysis dates the dress to 1866-1867, probably altered for a first time in the early 1870s, and she walks viewers through a number of minute construction details and later alterations that I entirely missed, while confirming some of my findings. I hope you will view the video, because the construction certainly affects how the dress would look when worn.

The Underskirt Pattern and Seaming up the Pieces
The extant late 1860s dress that I used
as a model for construction methods.
This garment was straightforward: I used the TV201 pattern again, the same as for the petticoat, for the pattern pieces, except that I added a bit of a train...just adding some inches to the back piece. I did not, however, follow the Truly Victorian construction directions, but instead the construction of my extant dress. You'll see why in a bit.

The skirt is entirely lined in lightweight muslin. Why? Well, my extant dress is, and I wanted the solid effect that most non-summer 1870s skirts have. They drape crisply and a bit heavily. You can see that in the image of the extant dress here. That silk, by the way, is light as air, and backed by polished cotton and "book muslin" at the hem.

Had I been able to find polished cotton, it would have been great, because then I wouldn't worry it would cling to the petticoat. In the event, it didn't anyway, which is good. It would have been NOT good if the skirt had clung to the petticoat and crept out of alignment or pulled up or something.

After seaming up the skirt pieces, I overcast the seam allowances to finish them and keep them from fraying. In this skirt, the two allowances are placed together and overcast as one: the skirt is thick enough to do this without it showing on the right side.


The Placket

Next, the placket. It sits on the wearer's right side, just in front of the back piece. This makes the skirt a bit of a pain to put on, because the opening is so far back, but it's well hidden by the overskirt.

Each side of the placket opening was turned inwards into a hem, and the lining ditto: then the lining and fashion fabric were slip-stitched closed. Easy peasy.


How the 1870s extant skirt did the placket was a little different. Here below is the placket from the outside. See the big running stitches where the lining and the placket are sewn together. No slip stitches here.


On one side of the placket, the fashion fabric is brought inwards, and hemmed down. Note the tobacco-colored polished cotton lining. Pretty color, isn't it?


On the other side of the placket, the lining is brought out to the edge, turned in, and sewn together. Note the old repair at the bottom of the placket. This dress has layers and layers of repair; at one point it may have been used as a costume.


Skirt Hem and Facing

Then the bottom hem was completed. As with any mid-century skirt, the skirt is "balanced" so the hem is made even by adjusting the waist, not the bottom hem. This makes finishing the bottom hem infinitely easier.  You just turn it up and sew it. Plus you have the extra fabric handy in case you want to make the skirt longer in the future.

Harper's Bazar recommendas and my extant dress features a deep facing at the skirt hem. It makes the skirt hang better. I simply followed the extant dress as closely as I could. The skirt's fashion fabric was turned in about a half inch and pressed flat.

A wide facing -- about 9 inches -- was cut in black muslin, following the bottom of the pattern pieces, and seamed together.


Facing seamed up.
The facing was placed on the outside of the skirt, right side to right side, and sewn. Then the skirt was turned inside out, and the facing was turned inwards, and pressed so that the fashion fabric shows a little on the interior.This prevents the facing from ever showing on the outside of the skirt. Then the top of the facing was turned down into a hem and was slip-stitched to the skirt lining. This was kind of a pain, because sometimes the needle would go all the way through to the outside of the skirt, and I'd have to take it out, or hope that the trim would cover up the stitches that showed :)

Facing pinned in place.
Completed facing. (The black fabric showing on the ouside of the skirt is actually flounce trim.)
Skirt Waistband

Big fun, this part :} Really? Well, maybe. Depends on your point of view.

Let's look at the extant 1870s dress and see what it tells us. When I first bought the thing, I was a bit flummoxed, because it seemed to have a petersham waistband. You can see it clearly in this image below...the big ribbon-like band at the top of the photo.

It turns out that the original waistband was either worn out or fragile or didn't fit the new wearer, because the petersham waistband is a later addition, made in a hurry with a combination of machine and hand stitching.


The next picture might tell the story better. I've marked where the petersham band begins: we're looking at the inside of the skirt at the waistband level. The petersham band was sewn to the outside of the skirt. The original skirt features a wide-ish waistband. The skirt was leveled at the hem, probably while on the wearer, with the raw top edge turned inward and pulled down until at the floor level the skirt hem was positioned where it was wanted. The raw edges were loosely overcast to protect them from raveling. Then the skirt was pleated as needed until it fitted the wearer's waist, pinned in place, most likely. Then, probably while off the wearer, the waistband was whipped to the skirt with thick, strong thread. You can see all of this below, with my annotations.


The original skirt wasn't pleated all the way around, of course, since fashion required a nice flat front. Instead, a very few wide pleats were taken at front and sides, and then the back of the skirt, where all the fullness lies, was cartridge pleated, and then sort of whipped to the waistband so that the pleats would swing clear of the band and stand out in back, helping the bustle pouf. You can see that below. Note that the lining goes right up to the top of the skirt fabric! This gives the pleating more strength, of course, but also helps to make the pleats stand out more.

When the skirt was redone the seamstress just sewed the cartridge pleats flat.


The Truly Victorian pattern directions ask that the skirt pleating or gathering be fitted inside, encased, in the waistband, and this is easy to do, of course. Yet it makes for a thicker waistband, and forces the skirt fabric downwards. When you want a bustle pouf, you want that skirt going outwards at the first available opportunity, so cartridge pleating is a better bet for that effect.

Now, what did I do? What the extant skirt did. I just put a few fitting pleats at the sides and front, and then cartridge pleated the skirt in back until it fit tightly at the waist. This is key: you can make the cartridge pleats bigger or smaller, so do that part last: get the smooth parts in place first. I set each pleat while on my mannequin, pinning it in place. It's all eyeballed, not measured.

Memo to file: it took two tries to get a good fit. The first time round I box-pleated the back of the skirt, but didn't like the effect.


Then I whipped the skirt to a waistband. The waistband was made of a tube of both muslin lining and fashion fabric, sewn right sides to right sides, turned, and then one long edge topstitched so that the tube laid perfectly flat.


I made the waistband about two inches longer than needed, not being sure if I might need to make it bigger down the road. To wear the skirt, I just pinned the waistband ends together with straight pins, like an 18th century garment would be. That way the skirt will always fit pretty well, whether I lose weight or, please not, gain any.

So that's it for the underskirt construction. No one sees much of the underskirt when it's worn, so it's not that exciting a garment, but the shot below gives you an idea.


Next up, overskirt and trim notes. Then it's on to the small finishes that will make this a better dress, and lastly, better hair!

Tuesday, October 30, 2012

Steampunk Tea Part Two: Oh, Do We Have Bustle!

It's evening three after the steampunk tea, and outside the breeze is still blowing the last bits of Autumn off the record. Yet how can I complain of a little wind, when much of the East Coast is enduring a flooded, wind-wracked, nerve-wracked sort of hell? Most of the rest of the country is thinking of you all, and praying the storm just gets itself gone.

To Rebecca up in the D.C. area, we are so glad you all made it through neatly. To cheer you up even more, as promised here are the last of the pictures of the steampunk tea.

The edibles subtly convey our state's culture. Kentuckians are especially good at tea sandwich fillings: olive nut (which is what it says, whipped into cream cheese and sometimes mayonnaise, and herbs), ham salad (which is, you guessed it: like chicken salad but with finely chopped ham instead); Benedictine (cucumbers and cream, dyed green); chicken salad, pimento cheese, and numberless other variations. Our table was loaded with a goodly assortment, and rounded out by spinach and nutmeg tarts, tiny vanilla cakes, apple tart, and red velvet cake, as velvety and as deeply truly red as always, except for the popping white of the frosting.

Look at the massive wrinkles in the bodice! It fit well when I made it. There's an easy-but-annoying explanation for the iffy look: the corset underneath is upside down. However, at this juncture the bustle overskirt was sitting neatly, for I'd not sat down, nor been running about, as I'd do later. It is interesting to see how easily disarranged a dress can become, unless one takes careful steps to avoid that. More on that later.

And that durn hat! So it was askew right from the get go. What shall I claim as excuse? Why, the truth. I dressed before we set up the tea things, and was in a dreadful hurry -- hence the corset/bodice mess. I looked at the immense chignon hairpiece I'd made, thought of how I'd be contorting myself into frustration to attach its minute combs to the back of my skull, and discarded it. Next went the gloves, simply forgotten. The proper belt buckle was waved off as just too much effort too. Noting the minutes ticking, I flopped the hat atop the head, rummaged in the too-dark travel bag for three vicious hat pins, and finding them, hesitatingly punched them through the hat, heedless of the handsome lace, and into my hair, praying quietly that I wouldn't graze the skin, and thanking Heaven for a current tetanus shot. I wonder how many women have contracted lockjaw from contaminated hat pins in the head?

One of the party's conceits was that I'd greet everyone as they stepped off the airship, thank them for flying the Concord, and wave them into the house. In the event, only a few passengers were treated to the schtick; ah well, it's so hard not to say "Oh, hellllllo! So good to see you; I've been missing you", and offer to take their platters for them...

Our partygoers, before we tucked into afternoon tea. [Durn hat.]


Rebecca, we decided on a buffet: no formal tea seating this time, but we did balance our cups and plates without spills, so you will be proud of us. Shall I whisper that in an attempted sniff Julia plopped the lid from the lavender "elixir of life" bottle into her tea, to the sound of snorts and hoots?

Leaden outdoors as it was, with spots of rain, we went outdoors anyway for playacting and to bat at a very special pinata.

Herewith, proof that Jenni and I really were after bustles worthy of balancing a dinner plate.
I could have carried a small cat, or even a small child, back there, had the steels been more numerous... [Yes, those are stewardessian golden wings on that hat.]


Pinata. What did you think it might represent, other than an airship? Jenni built it, Rebecca. It was neat. It was well built.


Hanging it from the pergola was simplicity.


Whack!
Whack!
Whack!
Whack, whack!
Double-whack!
 
Whomp. The ordinarily tough tobacco stick broke in half, then in thirds.
A tree limb was substituted. Whack!
And so it went, rounds and rounds, and the pinata held and held, until finally enough of it opened up to let fall some candy, and we called it a success.


(Video courtesy Jenni of Living With Jane)


Our teahouse proprietress Polly called us back in.

Not before I requested a back view of the dress, never having seen it, and not being able to turn myself around fast enough to catch a view.


Oh vanity, thy name is Woman. The first sight of the result had me sigh in frustration. The afternoon had not been over-kind to the overskirt. It had lost its symmetry, and the rosette at the waistline went off center. A second look many hours later brings more charitable thoughts; I look probably as real as most women do after some exercise in a big poufy complex outfit.


Here's that rosette. It was a duck to make and I'll do more of them with pleasure. It's a close cousin to one in Harper's Bazar.


Then it was back inside for charades and a last cup tea and a nibble. The afternoon's light faded, we wished friends goodbye, and multiple hands helped Polly wash up and put everything to rights. In some ways such traditional work is as fun as a party. More time for conversation, for breathing deep, for slowing down, and Monday morning quarterbacking the event.

Oh dear, I'd write more, but small Christopher is inconsolable in his bed. He has had five days of fever, on and off and tonight he is flushed and damp. Noah has had six. We thought they were well Sunday but that was either the boys' ruse to get to see their grandparents, or perhaps Fate's poor sense of humor, for here we are again....  Tomorrow promises another doctor's visit.

It all started a week ago Monday, after I had been sick that weekend. Both boys have missed school and all of us have missed sleep. My face shows the puffiness of sleeplessness in the tea pictures. I am so glad not to have missed that tea: what a relaxing moment of fun and sanity!

Oh, dear boy, do stop crying. I've been in to comfort you three times already...no, your voice is too pitiful, here I come...

So ciao, everyone. [Oh, he has stopped the wails. Probably fallen asleep mid-sniff.]

Next up, more tidbits on the dress construction (with views of my extant 1870s dress construction for comparison), and notes on what is left to be done. Wait, it's not done? No, it's not. Critical eyes will note that the skirt flounce lacks a finish, there are no bias folds covering the trim stitching -- an almost de riguer element of early 1870s trims -- there should be rosettes at the front overskirt "wings" and at the overskirt belt, and at the neckline lace is simply tacked in to the bodice lining. Many women would have worn an ornate jabot or equally ornate and removable lace collar.

Goodnight!


Sunday, October 28, 2012

The Steampunk Tea, Part One

Natalie cannot hit an airship pinata to save her life.
After a few good whacks at thin air, her hat
slips askew.
My dearest Ladies and Gentlemen,
You are most cordially invited to Afternoon Tea at Rose Cottage Teahouse, Proprietress Mrs. Polly, on Sunday, the twenty-eighth of October. Rose Cottage is acclaimed for the taste and beauty of its Furnishings, its genial garden Setting, and applauded for the excellence of its fine Edibles and exotic Teas, not only within Scotia, the gentle nation in which it comfortably resides, but also so far as the lands of Lexington, Winchester, Richmond, and points farther afield.
We take the liberty of hoping that you will choose to honor us with your presence, and to afford your extra pleasure, will be pleased to carry you thither, and home again, in the famed and well-appointed airship Concord. Arrival and docking promptly at 4:30 post meridian. Our pilot does beg that any weapons shall be securely sheathed or holstered, and wishes to favor the ladies with the gentle word that hats should be well pinned and skirts perhaps weighted, to avert the possibility of any unfortunate accidents which might otherwise occur.
The favor of a reply is earnestly requested.
Ever your most sincere servant,
Mrs. Natalie
Stewardess, the Concord
 

Just hours ago the airship Concord docked at the Famous Kelly Avenue Teahouse, Rose Cottage, disgorging a set of friends, ready for a delightful afternoon.  Polly, our proprietress, and I, the Concord stewardess dispensing tea and sympathy, were joined by warrioresses, Mary Poppins (soaring in on her own umbrella), and an intrepid time traveler carrying the elixir of eternal life, trying to escape the clutches, teeth and net of a bounty hunter.

The menu of attractions:
  • afternoon tea, in three courses
  • "Guess what I am thinking of", a parlor game
  • charades -- miming common proverbs
  • an airship pinata!
Here you must know that this party was also in honor of our friend, now departed for northerner climes. Rebecca, we missed you very much, and dedicate the following glimpses, in this post and the next, of the afternoon to you.

"Not the net, dear sir, not the net!" cries Jenni, as the bounty hunter threatens vile capture, and the despoiling of the elixir of eternal life. Did you know that eternal life smells like lavender? Really, it does; one sniff of the precious oil is divine.


In which our proprietress displays her hat, and, sylph-like, blends with her tree. Oh roses, thou late bloomers, show thy faces bravely next days, for the forcasters have predicted snow by Wednesday.


We had finished off the airship pinata, the candy all spilling to earth, and decided to pose all disheveled. My hat's even further askew, and the bodice all rucked up from batting at the pinata with a tobacco stick. What? You think that's some sort of cigarette, eh? Ah, friend, but we're in Kentucky. Tobacco sticks are about four feet long, of good tough wood roughly cut, and spiked at one end, and are endlessly useful, not just for propping up tobacco plants, but for staking anything...or hitting anything. Awful handy, they are.

Jenni (right) and I (left)

At parties I am a dreadful photographer, so that's quite literally all I have. Soon as compatriots send me the goods, Rebecca, I will post more!

Oh, and yes, the dress performed wonderfully, although I was not happy about the bodice fit. I appear to have lost weight, was often standing slightly hunched over, making the bodice wrinkle, didn't employ side bust pads, and so on. So different an effect than during the multiple fittings! 

It's comfortable to wear, however. A bustle is not as big as a crinoline skirt, so I had no fear of knocking over small tables. Plus, it collapses neatly when one sits, spreading a pretty small sea of fabric about, but revealing nothing. Second thing, I only backed up onto my own train once, and didn't fall, and only one party-goer trod on it, and it didn't rip. That in itself marks success. Third, the stiff sleeve ruffles you see on 1870s dresses have an advantage over more fly-away 18th century or 1930s versions: they stay where you put them and do not drag in the soup. Had they been airier, I'd be daubed with Polly's excellent cream of tomato soup in the above photo.