Showing posts with label Enlightenment. Show all posts

Thursday, July 11, 2013

Papillote Curls Trial Run Number One

Practically sans makeup, and sunburned, to boot.
Forty-five minutes, a cut-up sheet of bright green tissue paper, a flat-iron, my turban silk and a few pins, and I have this very simple hairdo, or headdress, as it was known, to show you.

The spiral curls are made in the papillote, or butterfly fashion. It's a little tricky to learn, and this is only a first effort, but it's the method used in the 18th and early 19th centuries to create both spiral curls and frizzed curls, and I am surprised, but it's working for me :}

As a test, I made tiny spirals and big, fat spirals, to see how they would compare. Check. Tiny and big resulting curls. Well, at least I got what I expected! That doesn't always happen when it comes to my hair. The June picnic is a good example of a hair experiment that decidedly failed to produce the effect aimed for.

The curl-winding needs to be a little neater, so that the curls are more even, but still, the effect is pretty. The curls should sit and cool a bit longer, too.

Excepting one curl, there's no setting lotion, goo, or pomade, or spray in my hair. Am sure I'll have to use at least one of them for the real curling process next Friday evening. That and a night-cap (ye gods), to protect the hair until Saturday's Jane Austen Festival.

Because I have shoulder-length hair and these spirals don't easily go right to the scalp, there are pins shortening the curls in front. The back hair is straight and is turned up plain for the "chignon", as was often done. I'll need a bit of added hair for the chignon: that's the next trial, along with playing with the front curls to make them tighter, shorter, and more regular, and adding fat long curls on the sides and top. Once those lessons are learned, add hair décor appropriate to the occasion, and we have a usable headdress.

Of course, if these curls fall out overnight, Isis' standing pin curls are my backup. Thank you, Isis, for your research and tutorial!


This is what we're aiming for: a mix of Hortense de Beauharnais' style (I even have the cross-front dress!) on Pinterest, and the second young lady's fluffier 'do (Circle of Jean-Baptiste Soyer, circa 1790/1795, at Christie's).


Gee, the more I look at Madame de Beauharnais' portrait, the more I like it. Sensitive, well painted, calm, atmospheric.


This young lady looks fun, doesn't she? Her smile is real, and I can imagine that she was a treat to be around.

You know what's ironic? I have curly hair. It ringlets on its own, once washed. The issue is that the ringlets won't stay more than a few minutes before they fall out and frizz starts to take over. The amount of curly-hair goo added makes no difference. Hence all this craziness, getting 1790s curls that will hold up.

On to the next trial...

Addendum, two mornings later: yesterday, I just bunched it all in a ponytail bun, without brushing, and they held. No ponytail the second night, just plain hair. This morning, the curls are holding together -- still. I brushed my hair at last, and now I have fluff. Not frizzy, just fluffy waves. Interesting.

Tuesday, June 04, 2013

Embroidered Sleeveless Spencer: Finished at Last!

Pinch yourselves all you want, but it remains real: I am truly done with the sleeveless spencer. The first post, Spenceration, is dated October 26, 2011. Well, well.

So how does it look? Here are the first shots, after I completed the last stitches at Noah's table by his sunny windows. I am pretty happy with it.


The sleeveless spencer from the front. It closes inside via stays-style lacing, and pins shut on the exterior. When wearing it, I'll use plain straight pins top and bottom and hide them as much as possible in the fabric.

As you know, the spencer is made of light purple silk shantung that I dyed myself. I embroidered it in flat silk (Soie Ovale from Au Ver a Soie), all-silk chenille from Hand Dyed Fibers, real 4 mm gold plate spangles, and real 2 mm gold plate spangles. The top-stitching and point a rabattre sous la main hemming work is done in Au Ver a Soie, gold color. The ruche is tacked down in French blue flat silk, the closest I could come to the purple with the threads I have. The stitches barely show at all, as I hoped.

Inside, the spencer is lined in white linen, with lacing pieces in a heavier linen. Part of the seams are sewn in Gutermann cotton thread (because I forgot to use linen), and the rest in natural linen thread left over from a stays project.


Christopher was excited about the finish, too.


Noah and Christopher show off the back of the spencer. Yes, the ruche on the back is incrementally wider than the ruche on the front. Ruches could be shaped, and I thought this looked extra nice, besides raising the back neckline a bit. More on the reason for that anon.

The Finishing Touches

Front Closure

Following a Swedish or Danish example, which I can no longer find, the spencer actually closes by lacing together two interior panels whipped to the lining. The original was a dress; the two flaps underneath, so common in early Regency dresses, laced shut rather than pinned shut.


I cut a rectangle of heavy-ish linen, hemmed three sides, and turned a wide hem on the fourth. Then I added a row of eyelet holes. Finally I attached it to the spencer lining; it's attached on the end closest to the spencer's side seam, and on the top and bottom up to the wide hem. That should hold it flat, without pulling, and leaves a flap with the eyelets for lacing. The flap's mate is on the other front piece of the spencer.

I decided that I wanted the close fit the lacing allows; the idea is that it should take the strain off the pins used to shut the garment itself and produce a smoother line, sans many horizontal wrinkles. My Metropolitan Museum inspiration garment laces shut, too. I decided that on my spencer, the lacing would complicate the visual impact of the spencer, since there is a ruche too, as on some early Regency spencers.

Spangling

You know already about the embroidery, and how it was all an experiment in using the flat, almost untwisted filament silk normally used in 18th century and early 18th century silk embroidery, as well as in couching down chenille thread, another common embroidery element.

Yet there are spangles, too. How did I add those? The same way de Saint Aubin, in L'Art du Brodeur, suggests, with two stitches run through the same hole. Sometime I will show you in a mini tutorial.


By the way, because the spangles were thought of after the garment was sewn up, when adding them I slid the needle between lining and fashion fabric rather than sewing through both fashion fabric and lining, so as to keep the inside of the garment as free as possible of embroidery thread stitches.

Ruche and Neckline Shape

You also know already about my 2012 plans for a neckline ruche, and how I felt that the bodice straps would have to be curved, hollowed out at the neckline. In the event, it turned out no hollowing was needed, and my strap pieces were so wide anyhow that I had to cut them narrow and straight anyhow, so that all curve was lost.

I was so silly during the design and fitting phase: the ruche can create the curved shaping to the neckline! Just curve the ruche as you sew it down, and glide it over the corners where the straps meet the bodice fronts and backs, and there you have it, a pleasant round curve. Straightforward. No silly fancy cutting needed. The trim creates the curve. Sigh...lesson learned. Hey, that's what this is all about. Many failures can lead to a success :}

Pinning the ruche to the spencer.
Anyhow, why is the ruche so flattish? Because so many extant garments show ruches to be scant, and laid quite smooth. To make the shantung behave and not fray, I was going to use gum arabic, which had been used in the 18th century to stop fraying. However, this proved unnecessary. Why? Because I pressed the ruche silk, and starched it stiff. That made pleating fairly easy, produced the flat box pleats, and prevented fraying on its own. Yes, the shantung takes starch just fine; I soaked the fabric with it. So we'll experiment with gum arabic some other time.

Oh, you ask, won't the starch come out if the garment gets wet? Yes, of course, but this is a luxury garment, and it's fragile all the way around, and entirely unwashable. I wouldn't wear a hand-embroidered silk garment anywhere near the weather. Should the pleating lose its freshness, I can remove it and redo it -- that would be an entirely expected 18th century move -- or carefully re-starch and re-press it in place.

Why the Ruche Is Wider in Back

I liked a wide ruche in back; it gives extra oomph, and reminds me a bit of a collar. Ruching could be graduated during the period.


Yet there's a practical reason for it. It arises out of a fitting and sewing error.

Way back when I fitted the spencer, in 2012, the neckline wasn't all that deep, and the spencer came just above the natural waist. For safety, too, I made very wide seam allowances.

When I cut out the actual pieces in January 2013, somehow the straps got longer, and I thought, wait, this is so long-waisted! So I trimmed the bottom of the spencer shorter.

Once sewn up, the back neckline was very low indeed. Sure, there is at least one example of this, at the Met.

Spencer, Metropolitan Museum of Art, circa 1800. 11-60-295F
Yet the spencer would look strange with the dress neckline projecting above it. No neckline projects below.

Detail from plate in Gallery of Fashion, Bunka Gakuen Library.
Or here, either.
Detail of bodice (as it was described in the text), April 1794,
Gallery of Fashion, Bunka Gakuen Library.

Nuts. That's what you get for spreading a project over such a long period of time! Another lesson learned, maybe. Sometimes time just gets in the way.

So the, ahem, brilliant idea occurred to me of faking a higher back neckline with a wide ruche. Thus it is that on my spencer, in the back only the lower part of the ruche is actually sewn to the garment. The top line of stitching serves only as a stay, to keep the pleats in place and to match the rest of the stitching. I worry not at all about it. My inspiration spencer is a wildly homemade thing, the spencer above is roughly constructed, garments of the period are often pieced...one did what was needed. The same applies here. I did what was needed to make the garment work, and to recover from an error.

Below you can see the fabric for the ruche, cut with a graduated thickness. Given that the ruche is scant, the fabric making it being about 1.5 times as long as the finished trim, I totally eyeballed how much of the fabric needed to be wide and how much not, and when the trim was tacked on, used the pinker to graduate the curve a bit in some places.


Ruche trim pinned in place. The pinning process is straightforward. Eyeball each box pleat to about an inch wide, press the fabric with your fingers, pin it down. Leave about 1/4" space, and do it again. The starch ensures the pleat stays fixed.


So there we are. I'll wear it to a Regency-themed picnic this Saturday, and see how it does. Next up, photoshoot!

Tuesday, March 26, 2013

Progress on the Sleeveless Spencer / Bodice

For goodness' sake: we have some progress on the sleeveless spencer -- or bodice, as we learn it was often labeled in the day. Hooraybob. This project wants to be done in time for springtime. Although "springtime" is a dubious concept right now: it was snowing five minutes ago, as it has been for days, and the daffodils are despondent.

Sleeveless spencer or bodice, front.
Above you can see that I've about finished attaching the lining to the embroidered silk. You may remember that last spring -- golly, has it been a year already? -- I started the project by trying out silk filament embroidery, embellished with gold spangles, using an existing bodice at the Met as a model.

In my version, the seams and hems are topstitched with Au Ver a Soie (spun silk thread) in golden yellow for a little hint of extra color. All that's left as of today is the back neckline, the front closure, and the straps.
Here below is a detail of the top stitching. On the seams I used a combination stitch (several running stitches followed by a backstitch). On all hems it's actually made using the point a rabattre sous la main stitch, which is a sort of hem stich.


Sleeveless spencer, topstitching detail.
The inside. All seams are lapped, in the order they would have been in the 1790s. Three layers are stitched together, and then hem of the lining on the innermost layer is turned under and hemmed down.

Interior of the spencer body.

A detail. You can clearly see the back of the point a rabattre sous la main stitching at the armscye hem. On top, the stitch looks like a running stitch, but underneath it looks like a hemming stitch. You can see the hemming stitch, in linen thread, on the vertical seam.


What about the straps? Well, they make me laugh. I had recut them last spring such that they incorporated a hollow curve at the neckline. Well, in an effort to make sure I had enough fabric to work with, I made the cut pieces really wide, so that when the straps were fit to the body, they were too wide. No problem, just fold in a wider hem allowance, and trim off the excess. Silly error, but who's worrying, since this is a first go and it harms nothing?

They're just roughly fit for now. I will put on stays and dress to do the final fitting, baste the lining in place, cover it with the fashion fabric, and seam and hem them.

After that it's time to add a wee bit of boning at center front, two bones on each side of the closure, and then do up the eyelets. I have some Edwardian-era boning that I might use for this: it's very narrow, very thin steel, in short lengths. Add self box pleated trim around the neckline and at last, we're done.

The below picture is just for atmosphere. Our calamondin orange is blossoming and fruiting at once, and the orange of the fruits looked so pretty next to the lilac of the spencer that I had to take a picture.

Still life: work with oranges*.
 * "Work" used in the old sense of a sewing project in progress: a woman would take her work to the good light near a window and sew away.

Tuesday, July 24, 2012

Sleeveless / Convertible Spencer: Proof of Construction!

Whee! Construction starts! Here's proof, in three pictures:


Turning in hem allowances along the armscye of one front piece -- pinning them in place prior to perpetrating a point a rabattre sous le main hem on it. Because the hem is curved, I needed a lot of pins. Otherwise the fashion fabric would have wrinkled badly.

Why is the stitching on top of Costume Close Up? Because I kept referring to it...


Hem sewing, in progress. Because I am left-handed, I sew from left to right. In Koshka-the-cat's version of the stitch, probably a more accurate one because it's faster, one makes a running stitch through the fashion fabric side of the work, but picking up a few threads of the lining hem when bringing the needle out. If one uses matching thread, this is fast and easy, and binds two layers and finishes the hem in one step.

I was concerned that my stitches be as even as possible, since I am sewing them in contrasting yellow thread for effect. Therefore, I push the needle upwards to the back, catching just the fashion fabric. Then I push the needle back through to the front, this time straight through both lining and fashion fabric. Doing so, I can measure the length of each stitch precisely. Slower, and therefore not efficiently mantua-maker-esque, but the result looks even, and nice from both front and back. Later I'll play with ways to make this stitch both fast and even.


Some finished hems. At about a hem or a lapped seam a day, it will take me a bit to complete the spencer, but it's about all the speed I can manage :}

Ciao!

Thursday, July 19, 2012

Sleeveless / Convertible Spencer: Embroidery Completed!

At long last, eh? I started the embroidery in late April, and here it is, practically late July. The project started October 26, 2011. How's that for glacial movement?

Ta-da.


I've worked on the project in bits and drabs, obviously. Sure wish I'd kept careful count of the hours, but would say it varied from 30 minutes to 1 hour per complete motif.

Can you find the single blue motif? Why is there only one when the effect is so nice? I meant to use more of that color. Let's make up a myth to explain it. What shall it be?

The embroidery is sparse, similar to both extant spencers in the Metropolitan from which my design is inspired. It will feel tighter, however, when the seam allowances are turned and the pleating is added to the neckline.

American or European spencer, 1800-1830
Metropolitan Museum of Art


C.I.38.100.10
Late 18th century spencer
Metropolitan Museum of Art


1970.281.1
Now for construction, if I remember how to do it :}

Today I leave you with a bit of the silly season --

Three friends outside the entrance to the formal garden at Ashland Estate.

Sunday, May 13, 2012

Sleeveless / Convertible Spencer: Embroidery Experiment 2 a Success!

The working milieu
After the annoying and coarse results of the first embroidery experiment, I decided to order flat silk thread that would divide more easily. When the Eterna silk thread I chose finally arrived, however, most of the threads I had ordered turned out to be out of stock, and the few colors that I did order lacked the fine shine of the Au Ver a Soie thread, although the threads certainly divided easily and so could be used for fine motifs. Depression. What to do?

I thought of ordering the gorgeous Japanese flat silk that Hallie Larkin of At the Sign of the Golden Scissors discussed in her recent embroidery post, but it goes for $7 a spool, and even though you get 60 meters per spool, I don't need 60 meters of any one color and would have dropped over $50 on more thread.

Depression deepened. I set the project aside to sulk.

It kept calling out to me from the closet. I listened, disgruntled, but gave in.

A sunny afternoon found me on the pine floor in the kitchen, with a 20" thread of the Au ver Soie on my knee, and a long, narrow beading needle in my fingers. I attempted to use the needle to divide the silk filaments into narrow strands. Both Hallie Larkin and Mary Corbet said it could be done, with care. Indeed, the almost liquid silk DID divide, half-way through. Then it fuzzed up and tangled. I picked it up in my fingers in desperation, and slid it through them back and forth, between my fingernails, attempting to work out the tangles.

A miracle. The tangles smoothed, the gloss returned to the silk, and it flattened out, easing into a tiny rivelet of vibrant color.

I had a thought. My applique needle had a round eye but my beading needle a long narrow eye. What effect could I attain if the silk were truly applied so that its filaments were all laid out really flat, flatter than they could become when trapped in a round-eyed needle?

The silk easily threaded the beading needle, and did lie in my fingers quite flat. I took an experimental stitch, and in a second burst of inspiration, changed out my laying tool, a long pin, for the flat side of a seam ripper, and when I finished the stitch, I ran the seam ripper along the threads underneath, guiding them into flatness. The result was lovely and smooth, with the many filaments laying side by side reflecting light and looking like many stitches, not just one. Could this be repeated? I brought the project upstairs, into more even light.

The beading needle's length was a help, because I could find the placement for the next stitch without a shadow or fingers getting in the way of my eyes. The second stitch worked too. The third not so much, but I kept trying.

I worked a basic flower shape in laid stitch in a deep coral pink, and then threaded a narrow section of Eterna silk, and overlaid the centers of the petals in a light pink. The laying tool flattened and guided each stitch into place.

Then, after all the stitches were placed, I ran the flat side of the seam ripper laying tool under the stitches composing each petal and worked with them, repositioning the threads, and making the light pink thread nest down into the coral color. I "petted" and stroked each stitch to flatten and straighten it. I'd read or heard (was it Robert Haven who told me when several of us toured the UK Costume Department in January) that you could do this, and for Pete's sake, it worked.

Here is what I ended up with. In the image the Eterna silk (the inexpensive Chinese dividable silk) is threaded in the beading needle; the seam ripper and the coral Au Ve a Soie lie nearby. I am very pleased with this second effort. If you consider that each petal is the size of a woman's pinky nail -- about 1/4" -- when looked at with ordinary eyesight and not the camera's magnifying lens, it's pretty darn satisfying.


So that's what I will keep doing! I'll pet and poke and massage and primp the stitches until I have them the way I want them, and the handsome little flowers will soon start blossoming all over their lilac ground.

Let's look at the original Met spencer again. Here's a similar flower. The flower center is a single spangle. If you look at the little divots at the end of each stitch, and especially at the light pink sections of the petals, you notice that there aren't that many stitches composing each petal...there are lots of filaments of flat silk, but not that many threads. When I had last looked at the flowers, I had focused on the filaments. They are numerous and make you think there are lots of actual threads, but it's not so. The low number of stitches is even more evident in the leaves.

A similar flower design, from the original Met spencer.
 A final note: really good light is essential for this kind of embroidery. You want indirect bright light, and as few shadows as possible. This table sits at a double window, direction north-northwest, and it's barely good enough. A sixty watt bulb at night is not enough at all, and a bank of overhead lights only causes shadows, at least in my house. I've had to experiment a lot.
Good light is essential.
 So, onward ho, the greenery on this flower, and 15 more flowers to go!

Sunday, May 06, 2012

1790s Lilac Silk Petticoat: All About Hems

Hemming the lilac petticoat.
Good morning, everyone! Here I front-porch sit, playing hooky -- again -- from church, and feeling very guilty about it. Still, it's been a bit of a week due to illness and workmen in the house. The peace of a slightly damp but sunny morning out among the clover, the migrating songbirds, and the breakfast-hunting squirrels, the memory of a radio sermon in my mind, and the sewing box beside me are restoring health and energy.

The lilac project goeth strong. While I await the Eterna silk thread to arrive so I can complete the embroidery on the lilac sleeveless spencer, I've been making up the lilac petticoat. You first met it last fall in Making the Wrap-Front Dress Do Double and Triple Duty, and again in Lilac, Lilacs, and a New Look.

As with many of my projects, it is going through several iterations over time. This summer it is just a plain petticoat, accented only with silk stitching at the hem. Sometimes mantua makers and seamstresses sewed seams in contrasting colors to add fun and visual definition to function. I've tried without luck this morning to locate the Regency-era dress in the Victoria and Albert that features yellow silk stitching on a deep-colored ground: it's in Nineteenth Century Costume in Detail, an all-time favorite book. During subsequent years it will receive sprigged or swagged embroidery; right now the pattern is maturing in my mind.

Hemming the Petticoat

During the 1790s petticoats were still common, still worn with jackets or spencers or robes/open gowns. Many of the fashion plates that show what appear to be dresses are in fact made up of separate articles. Have a read of Gallery of Fashion or The Fashions of London and Paris at the Bunka Gakuen Library and this becomes abundantly clear.

This petticoat is no different. I am making it up just like countless 18th century petticoats, early or late. While I use more panels than they did, because most of our silk comes in wider widths (in this case with two panels of silk shantung), the rest is normal MO: the panels seamed selvage to selvage with combination stitch, with a narrow hem at the bottom (ordinary for the period and conserving of fabric), and a waist stroke-gathered to cotton tapes that then tie around the waist and two pocket holes at either side built into the seams.

The hemming is again ordinary for the period. No blind hem this, just a running stitch. Here is where the contrasting silk offers a little punch. Purple and yellow! Drops of sunshine on the lilacs.

Here's how to make the stitches even.

First, if you are sewing on tightly woven silk, use as narrow a needle as you can, and make sure it's fresh: run it through an emery (that little hard strawberry that comes with the ubiquitous strawberry pincushion) to remove any burrs or heaven forbid, rust. I am using a Clover applique needle, size ten. (In the wish list are good English needles that stay sharp longer.)

The sewing silk thread should be high quality. I am using Au Ver a Soie and the thread is waxed with beeswax (mmmm, good!) to prevent tangling and to help it slide through the silk.

Example of the running stitch hem.

Sew the fabric under tension, just as recommended in period texts (such as those gathered into The Ladies Stratagem. You could use a sewing brick, or pin the work to your knee, but I choose to pin it to my sewing box. Then stretch out the fabric taut, and turn the raw edge under perhaps 1/4 of an inch for a few inches, turn it under again, and press the hem flat with my fingers until it holds, and pin it for good measure.

Then running stitch the hem those few inches, rocking the needle to gather up two or three stitches at once, and make sure that the stitches and the spacing between them are as even as possible, perhaps 12 stitches per inch. Running hems on downs of the era do not use the minute stitches used for shifts; one wanted to be able to pull out the hem to remake the garment later.

Next turn under a few more inches to a hem, finger press it, stitch it, and repeat, ad infinitum until the hem is complete.

The example image below shows two stitches gathered up. I pulled them out of course, but would have anyway. Why? Look at the middle stitch -- actually a space between stitches, where the needle shows. Do you see how much needle is showing? Is that space the same size at the stitches to either side? No. It's longer. Unh, unh. For a neat hem that is not nice: pull it out and do it over. Force yourself to be a somewhat OCD and you will be happy with that hem for years.

Another example of the running-stitched hem.
That's all for today! Doesn't seem much, does it? Each little bit to me is special, a small practice in ancient skills.

Saturday, April 21, 2012

Sleeveless / Convertible Spencer: Experiment Number 1 in Soie Ovale and Silk Chenille Embroidery

Weeeellll, experiment number one turned out two mediocre motifs; the silk ovale thread is too big for the tiny motifs, so the results are clunky, if shiny. Big sigh. I had hoped experiment number 2 would be all about improving the stitch quality; instead, I have to get new thread!


The silk embroidery work so far, under the light of a lamp, to better catch
glints and gleams.

Here are the two motifs, embroidered on a side piece so as to be relatively hidden. If you look carefully, you can see the drawn lines that mark the edges of this side piece. The pins have been used to attach the silk to the edge of my impromptu embroidery frame. The fabric color is corrected to be as close to lilac as possible; the appearance of the petals is a little redder than it should be, but the shine is decently accurate; the thread shines like crazy and it is also taking on the yellow of the incandescent lamp the work has been placed next to.

The completed sprigs; petals in soie ovale, and stems and leaves
in silk chenille.

The petals are sewn with Au Ver a Soie soie ovale from Hedgehog Handworks, the stems and leaves with Hand-Dyed Fiber's silk chenille, narrow width, the gilt spangles from Berlin Embroidery, and spangle and couching thread in Au Ver a Soie Paris twisted silk (a great all-rounder!).

What are the designs I am working from? The sprigs from the Met sleeveless spencer, of course! It was those sprigs that drew me to the funny little garment to begin with. They are handsome little things, not quite high fashion, but not totally naive or provincial, either, and the level of work is nice, when one considers that each motif varies, I estimate, from under an inch to a bit more than an inch and a half high.

I copied the designs as nearly as possible, and colored them in, in pencil, marking the direction of the embroidery threads as well as I could. The colors are a little off compared to the original: I don't have the neccessary shades in my pencil set, or in my embroidery threads, come to think of it. Am going for the spirit of the designs, not a total copy; after all, I am not using that shade of sea blue silk!


The Petals and Working with Soie Ovale

The soie ovale has a sheen like no other thread. Made up of lots of silk filaments, it is untwisted, so it can be made to lie flat and display the full shine of the filament. Being untwisted, each filament is gossamer, like a spider's thread. Together the filaments make rather a thick strand. Mary Corbet describes this silk as having body, and she is right.


The strand is almost impossible to divide into smaller strands, because it's just one bunch of filaments. The strands fuzz and bunch if disturbed by too much handling, and lose their perfect smoothness, even after being run through the fingers.


When worked into petal shapes a quarter to a half inch long, the strands are too beefy, and I have not the skill to lay them pefectly together; the results look coarse, and too naive, if nice an glowy. Look at the closeup below: the quilting pins to the right give you an idea of the size of the motif, and of the thread, and of how few stitches were needed to complete a petal, making the result coarse. (N.B. It turns out the coarse effect is due to how I did the stitches; it's not the fault of the thread. Please read experiment number 2, which came out much better.)


A closeup of a motif.

By contrast, when I examine the threads used in the Met spencer, they are about as thick as the sewing thread used for seams: that's very fine stuff, resulting in relatively exact motifs. They don't have tons of glow., either, through time and wear could have roughened the threads. (N.B. As I learned in experiment number 2, this was not a good motif to look at. Other motifs show a thicker flat silk thread, very nicely laid.)

The Met spencer: closeup of stitchery.

The soie ovale is interesting to work with. It is slippy, it is slidy! It comes off the needly! Even with a size ten or eleven needle, it slithers out of the tiny needle eye very easily. Further, the filaments catch on the fingers, so it's best to have soft hands, not work-roughened ones -- which for this gardening, child-rearing lady, a big Ha! to that -- and to moisturize them well. Laying the threads in laid stitch with a laying tool is essential. Thank goodness it is pleasant and produces a nice flat surface, although I have some glitches, this being my first time at it. And the glow, the wonderful, wonderful glow, pure color that gleams back at you. Even with its challenges, I like working with soie ovale and with much more practice and the right project, should get handsome results.

Yet for this project I need a flat silk that is divisible into much smaller strands so that the motifs won't look so coarse, and have determined on Eterna Silk. It's inexpensive for silk thread and Mary Corbet says it's nice, if not the best. For a garment exposed to wear, it's more sensible. Further, it divides into up to twelve strands, since the main strand has a slight twist. When divided like that, it's downright pennies a yard. (N.B. The Eterna silk turned out to be not nearly as nice as Au Ver a Soie: when well treated, it does glow, and it is easy to use, but it isn't the quality and I am not sure it's being made anymore. The maker's site doesn't answer email and the place I bought mine from is discontinuing it.)

The Stems and Leaves and Working With Silk Chenille

Mixing embroidery materials and stitches happened a lot, it seems. In my explorations of 18th century embroidered garments that have good close-ups (see my Pinterest board), I have found tamboured silk and chenille coexisting, flat or spun silk and chenille coexisting, and goldwork coexisting with both. So it was with confidence that I decided to do the spencer's floral motifs in a mix of flat silk, silk chenille, and gilt spangles.


The silk chenille is fun to work with. I love couching work, and the chenille silk is just plain cute. If you like cats, or any fuzzy animal, really, you'll like silk chenille: it teases you to pet it.


Mmm, mm, good: silk chenille on the spool.

Once I learned to keep the chenille on the reel while couching it down, rather than cutting short lengths, it was easier to work. Short lengths bounce around and are hard to coax into shape. The ends are a bit fussy; you have to secure them with an extra couching stitch and then snip off the end with the point of your scissors right on your fabric (eep!). Shaping the stems and leaves requires forethought, like tambour work or fine soutache work. You have to figure out how, and if, you can run a continuous piece of chenille in order to avoid lots of tiny lengths.


I will be experimenting awhile, as I explore how doubling back on the chenille to keep going with one strand, and placing one layer over another and so hiding colors when a contiuous color is not wanted, works. This project won't require much of that, though. Others will; I note that some extant garments keep to really simple shapes and few tones, while others are like silk painting in chenille, with lots of tiny bits of color impressionistically used to create gorgeous, rich, shaded flowers and swags.


Time Expended

Even with practice, this embroidery will be slow; I am rather chagrined if I bore you.  Each petal stitch is carefully placed and laid with the laying tool. The stems and leaves are faster. I expect two motifs per hour-plus session, with one motif per session when it's a carnation. Since the Met spencer is sparsely embroidered, I have perhaps twelve to fifteen hours ahead of peaceful, peaceable, meditative enjoyment, spread over weeks.


Very little happens fast on this blog, does it? How very un-21st century.


So, What's Next?


I will put the embroidery into hiatus until the Eterna silk arrives. Meantime, I will hem and finish the waistband on the lilac petticoat, the long seams of which I had hand-sewn in the car during our Easter
trip.

That means, next up you'll probably be treated to a petticoat post.

Ciao!

Thursday, April 19, 2012

1790s Sleeveless / Convertible Spencer: Recutting The Neck and an Embroidery Teaser

Over the last week or so the spencer's neckline was recut to a lower, rounded shape. Here is where we started, with a very square neckline, as like to the Met spencer example as I was able to draft it and with seam allowances added: which makes the thing look rather too large. The pieces have been basted to make fitting easier.

Lining fitted, ready to be reshaped.
Reshaping the neckline was a matter folding the shoulder strap fabric into a pleasingly rounded shape, and then folding down the front pieces at the top to complete the curve, while folding up the bottom to shorten the spencer. Here are the rough folded results, pinned carefully. You can see that I have the image of the model spencer up on my computer to aid in the process.

You can see the neckline dip, but it's hard to see the curvature in the
shoulder strap part of the neckline. Trust me, it's there.

The model spencer, Metropolitan Museum of Art, number  C.I.38.100.10, has been dated from 1800-1830, and it has a very high waistline. Since my spencer is late 1790s and I want to fit it to my cross-front dress, I kept the waistline a little lower. I also recut the center closure of the front pieces so that they would lace shut or hook-and-eye shut; I cannot overlap them and pin them as originally planned because of the neckline ruche trim.

I took off the lining, marked all the folds with blue tailor's chalk, cut the basting threads, and laid the pieces all flat. Then, using the rough marks as a guide, I drew clearer, truer curves with the chalk, then took scissors and cut the new shape. The rounding in the neckline continues beyond the shoulders to the back, so I had to cut new shoulder straps and reshape the back neckline to a more rounded shape as well.

Here is what the pattern pieces look like now. The backs of the shoulder straps are particularly wide, because the curve of the neckline really pulls in there. The seam allowances are still very wide, too, for "just in case". They'll be trimmed later.

Recut lining; seam marks included in chalk.
Next up, reading for embroidering the fashion fabric in small sprigs, in soie ovale, silk chenille, and true gilt spangles! The sprigs I copied directly from that Met spencer. Here is a peep:

First experiment in silk chenille and soie ovale.

That's not plastic thread you're looking at, that's the fantastic shine of flat reeled (filament) silk floss, soie ovale from Au Ver a Soie. Like the silk chenille on the little rolls, way fiddly to embroider with, and a very different beast than cotton floss, spun silk thread, or crewel wool, but with experimentation, I will get the hang of it.

Today I leave you with a wish from the boys: they would really like a window seat, they say, and until I removed him for safety's sake, Christopher sat on the window sill to show me how pleasant window sitting is.

Tuesday, April 10, 2012

1790s Sleeveless / Convertible Spencer: Neckline Modification

Last I wrote about this project, I'd just fit the toile. Since then the silk has been dyed lilac, and now is the time to cut out the garment. Yet I can't seem to confidently take scissors in hand to the lining fabric, to create the second toile that will then be the pattern for cutting the silk.

What's the barrier, besides mowing the lawn, polishing windows, weeding, weeding and more weeding, laundry and more laundry, work, childcare, and a happy trip to family and friends in Georgia to celebrate Easter?

It's the neckline. I'm just not happy with it. Here is the toile:


The blue marks show where the toile is cut now; the red ones show the up-to-now modifications. After all, I was going for this sort of front: very low, very open...really 18th century short bodice sans sleeves. (If you look at the endless string of posts on this project, you'll get the history.)


You see, this design might do well with a ruche in the back, like my fashion plate inspiration model below, but can you see the ruche working in the front? Of course not. It would look really silly to ruche narrow straps and then a broad expanse of low neckline. You see, in the effort to make the poor little garment do so many things, I initially thought to tack on the ruche and then remove it as desired, for a different look. Ditto the epaulettes.


I've been looking at ruched spencers since the project began: the Met has lots of them, but not until Sabine of Kleidung um 1800 finished her cotton variation on the theme this past week did I really focus on my own ruching plan...and decided that I'd better rethink the front.

The best plan, I thought, would be a low rounded neck, ruched, or better yet, a vee neck, ditto. Luckily, an extant comes easily to hand, from the Metropolitan Museum of Art, which has quite a selection of spencers, a good number of them featuring a ruched or plaited neckline. This one is perfect in cut for my purposes. It's center-front closing, cut very deeply in the neckline, and has a narrow ruching.

Black spencer, 1800-1830, Metropolitan
Museum of Art, number

C.I.38.100.10


The Met included a fascinating photograph from an exhibition long past showing the spencer on a dressed model.

The Met gives a wide date range for the garment, and given the tiny diamond back, it is very unlikely to be 18th century, though the silk seems to be. No matter, the front cut is reminiscent of late 18th century fashion plates, such as this sleeveless spencer, or body, from 1799.
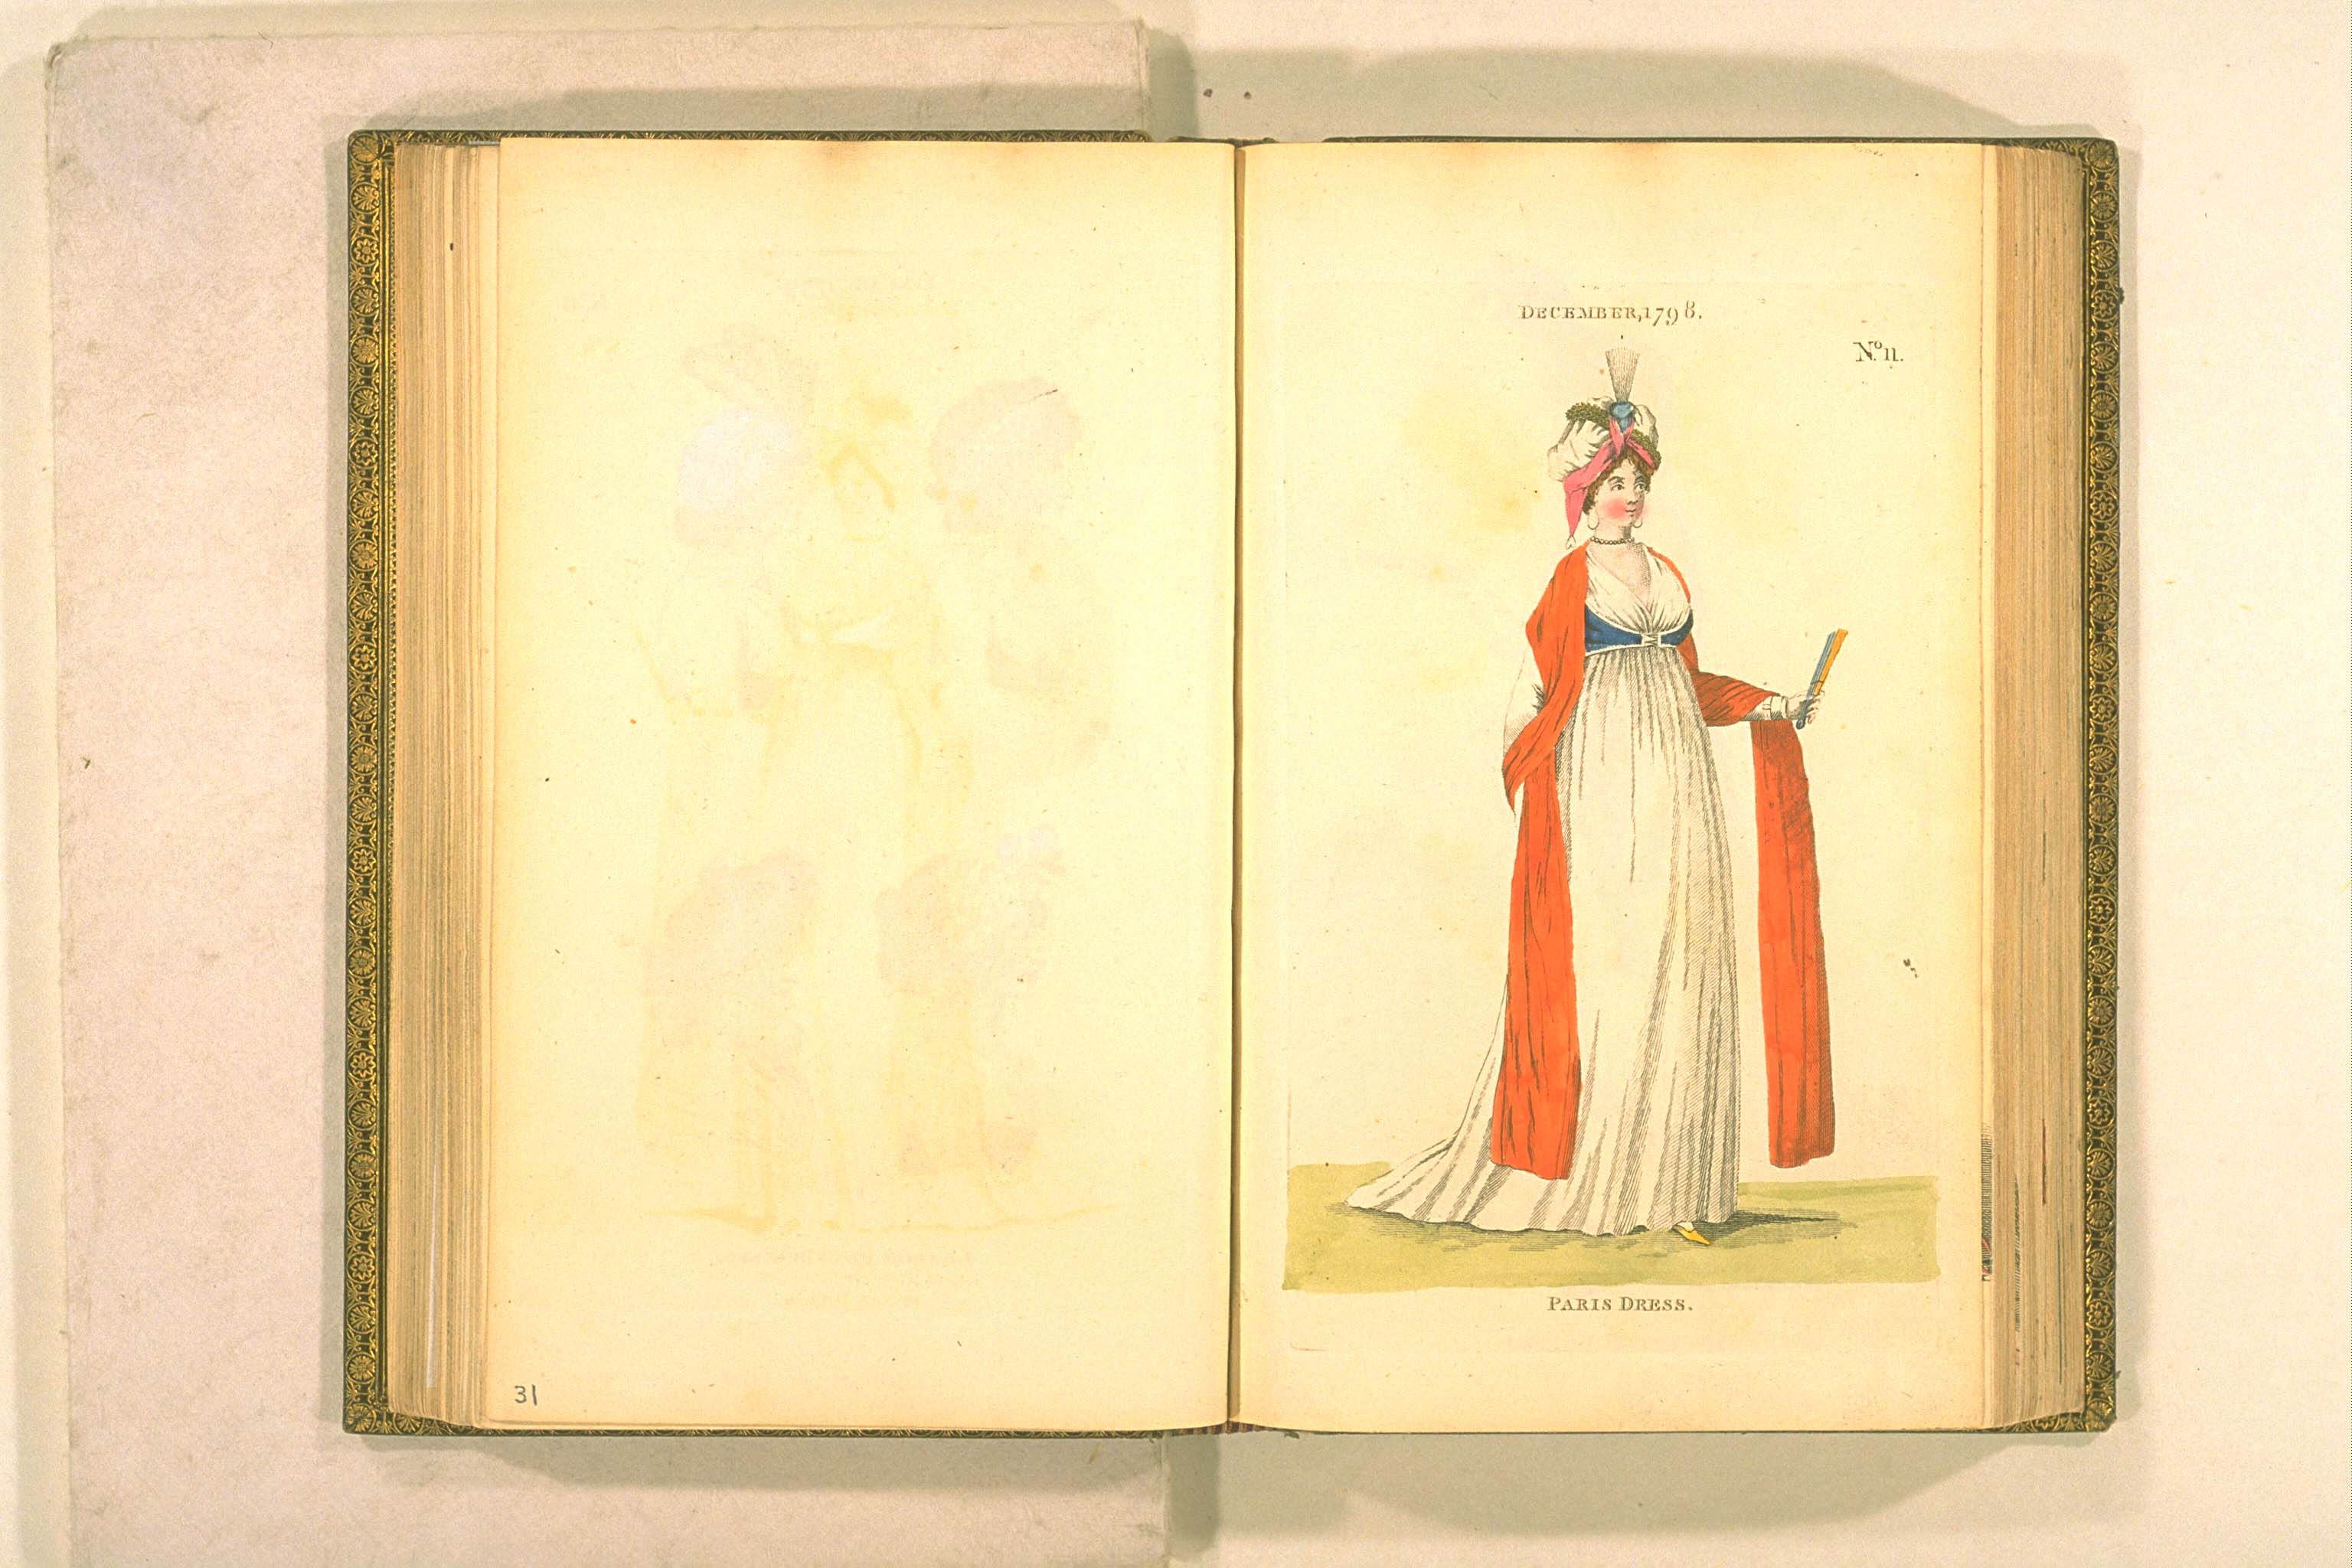
London and Paris Fashions, December 1799
(but appearing in the January1800 number)
Image Bunka Gakuen Library.
 The front works so much better with my wrap-front dress...


Just to show another favorite example. Here's a Met extant with the low round neck, a good bit lower, I might add, then some of the other specimens the Met has with the popular neckline treatment. Here, the ruching has become a careful pleated flat frill, sewn near the neckline, with a header.

Late 18th to early 19th century quilted blue
spencer, with pleated neckline frill. Metropolitan
Museum of Art, number

C.I.50.8.14.


Most of the other examples, and in fact my inspiration fashion plate, employ quite a wide ruche. Sabine did in her spencer, too. However, I think a wide ruche or plaiting, lovely as it is, would overwhelm my sleeveless spencer, so the narrow version in the black spencer above is more appropriate.

There, now I can rest easy tonight. Sometime later this week or next, as time allows, it will be time to cut the lining!

p.s. Ruched jackets were nothing new. The Victoria and Albert has this delightful printed and quilted jacket from France. Look at that neckline!

Printed and quilted linen jacket, France.
c 1785-1790. V&A, number