Monday, April 11, 2022

An Enormous Tulle Oscar's Party Gown: The Floofa Maxima


Once upon a time there was a girl, one of billions with similar dreams, who thought of someday wearing an enormous fluffy dress to a party and floating around on clouds of tulle with friends.

That day never seemed to arrive. A semi-serious sort, she grew up to wear things tailored, durable, sometimes sporty, but never fluffy and that proclivity remained steady through the decades.

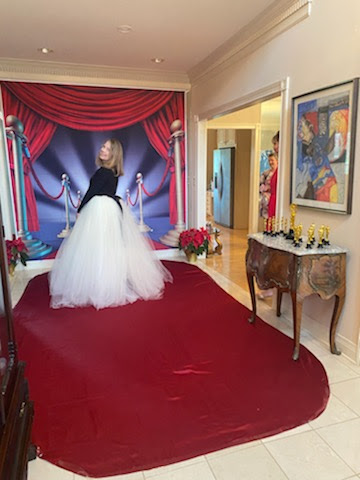
This February, as the endless pandemic seemed to ease, our tea society planned an Oscar's party. I am close to 60 now, and by golly, what better time to be a teenager again than on a red carpet?

So it was that on a gray, windy afternoon spitting a haze of drizzle I eased endless yards of tulle down the back steps, along with a plate of mushroom salad and baguette slices, praying that a nail or twig wouldn't tear a rent in the skirt, and somehow bundled myself and all of the tulle, plus the salad and bread, into the car. I was awash in tulle, and it puffed nearly to the chest and spilled in a giant bouf into the passenger seat, having been pushed out of the driving area for safety. The lace jacket across my shoulders was too short to bunch too, or driving would have been hypothetical at best.


Getting out of the car was an intricate process I hope left unseen, and the passage to Ida's front door was made in a serious of awkward bounds as the wind had picked up and was doing its best to pick up the tulle too, with me in it.

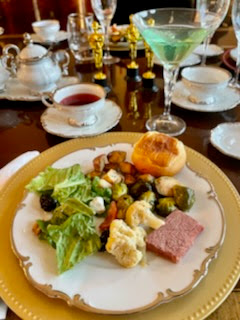
Once at the party? Delight! Swanning around was part of the agenda, as we all had dressed up, and so the day slid into evening very happily, as parties with good friends often do. It was a chance to be truly elegant and silly simultaneously and I think we made the most of it.


Tea and a green martini? Tonight, why not? Three desserts? It's the Oscar's, darling.


Here we all are, holding our pretend trophies, Ida, Caroline, Julia, me, Darlene, Elizabeth, Cara. We sure missed those of us who couldn't attend!


...and taking a stroll down a red carpet. I found walking in the tulle cloud a little trying and wonder if actors often worry about falling over their own clothes.


Made it through without too much embarrassment, perhaps due to having already passed through that fire a few minutes earlier.


I discovered that sitting in such an enormous dress means that you become enmeshed in the stuff. Ballerinas who play the swan in Swan Lake or sugar plum fairies in The Nutcracker never appear to stick or to trip a neighbor when they sink to the floor, a blossoming of tulle spread around them, but when I sat on a chair to have an hors d'oeuvre, the skirt puffed gorgeously while threatening to upend anyone attempting to walk by.

Standing up later to help Elizabeth find her formal purse, a tiny, pre-1960 silk satin affair entirely encrusted with brilliants set in prongs, that had gone missing, I found managing chair legs, plate, and martini while balancing on those ridiculously high heels among the tulle a little like a circus act. 

Too bad I couldn’t break the heels off of my shoes like Sandra Bullock does to her spikes in "The Lost City", but then, she could move as she liked -- sometimes -- in her purple sequined catsuit, while I'd have been treading on and swimming in five or so inches of floor-bound skirt, being suddenly that much shorter. The two situations don't compare, except perhaps in their lucridiousness.

The purse wasn't found until somebody hooted and said I'd made off with it, which I didn't understand, my hands being full. Of course, you already know: I'd sat on it -- how could anyone see or feel a purse under all that floof -- and it was stuck to the back, trailing on the floor.


Pronged brilliant aren't easy to untangle from mesh.


Oh, and the tulle stuck to a glittering shaped bow on Julia's heels, and tore half of it off. I was mortified. Really, the skirt could have figured in a noire movie, or a farce.

Would I wear it again? Oh, of course. My mother thought it likely a one-off (she is rather puzzled by the costumes), but once you've experienced the crinkly whoosh of tulle, weightless all around, at the party we agreed anyone would definitely want to try it again. Just watch out for sharp edges, other people's belongings, and mind your heels.

Making the Outfit


The outfit pulled together surprisingly seamlessly. It consists of six elements:

1) A Capezio long-sleeve leotard. Wore them as a kid, and going to wear them again now. So sleek, so pulled together.

https://www.capezio.com/team-basics-long-sleeve-leotard

2) A vintage lace jacket, possibly 1980s and possibly by Gunne Sax. A classic I'll wear for ages.


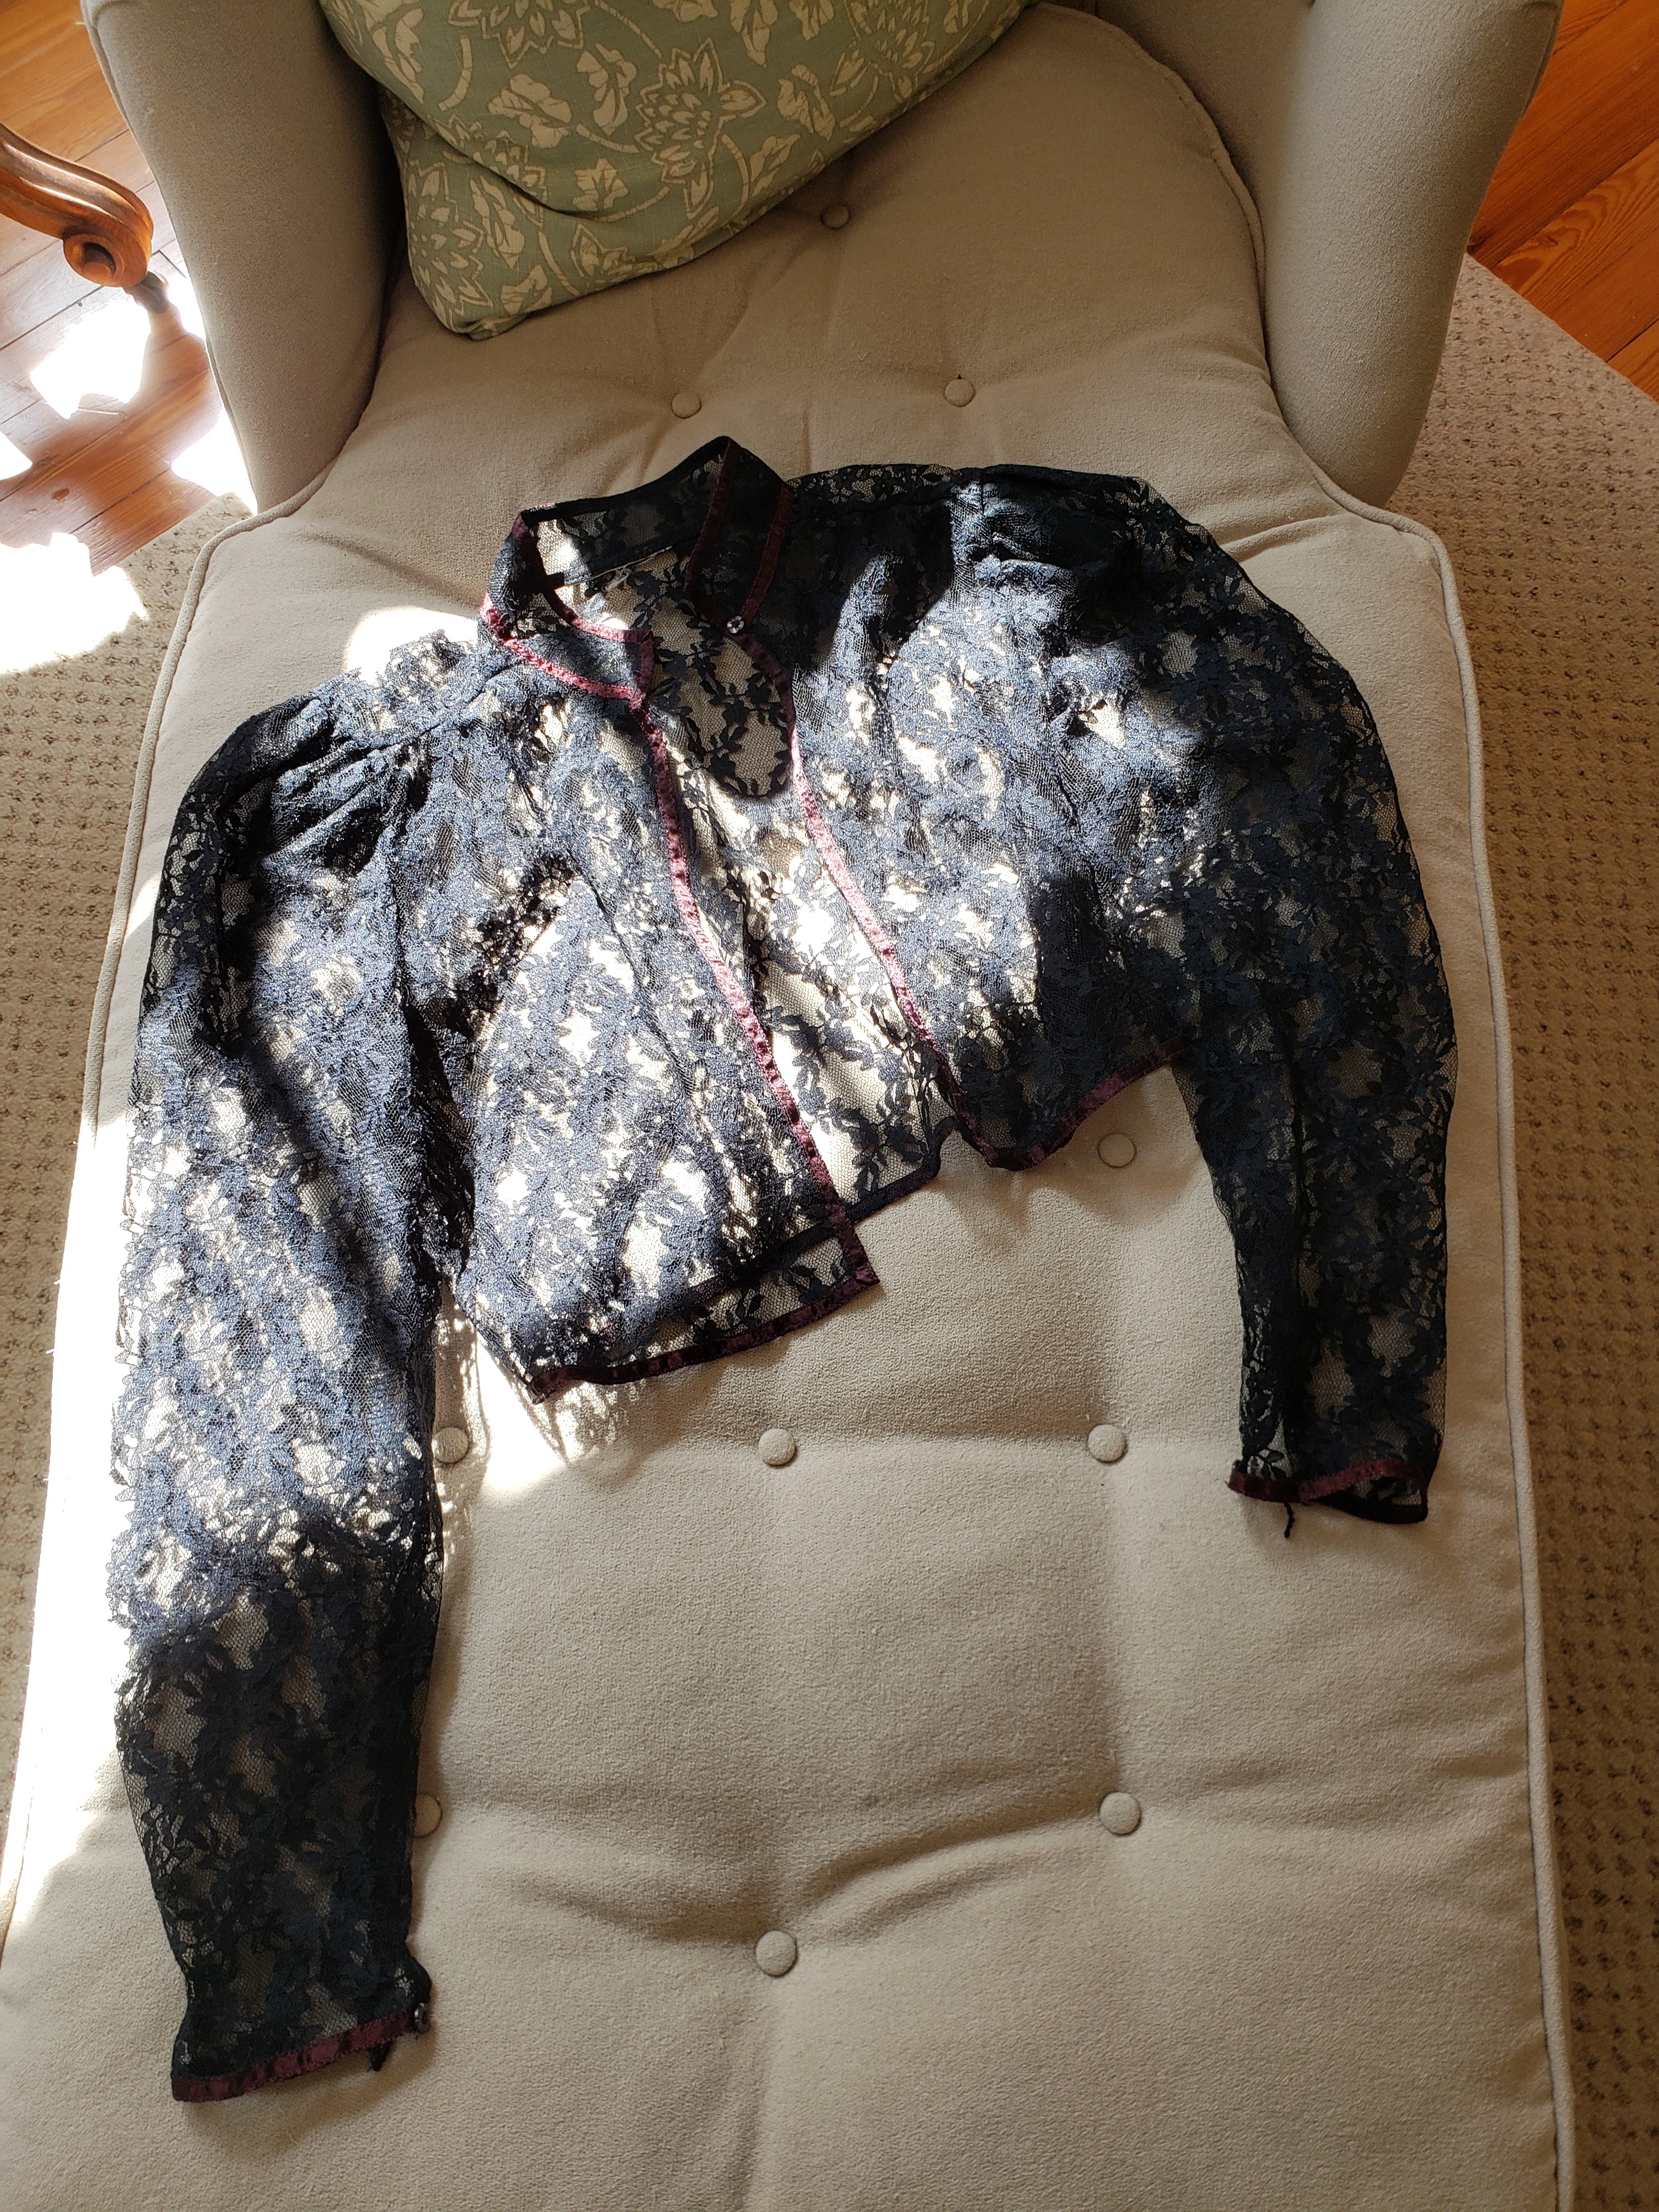
Construction detail: a touch of gathered fine tulle to puff the shoulders.  


3) An inexpensive organza bridal petticoat from Amazon. Again, generally handy. It allows the tulle to slide. Muslin pettis and tulle do not dance together. They bond, and not in a good way.


4) Really, really, really tall shoes I've had for years, Y2K chunky because it seemed that a single in-your-face Grrrrrl element was in order, to counteract the mega-floof.


5) Large earrings I bought back in the 1990s for a High Museum of Art event when I lived in Atlanta.


On the verge of disco-ball tawdry, but not quite and weren't they the thing in 1991. 


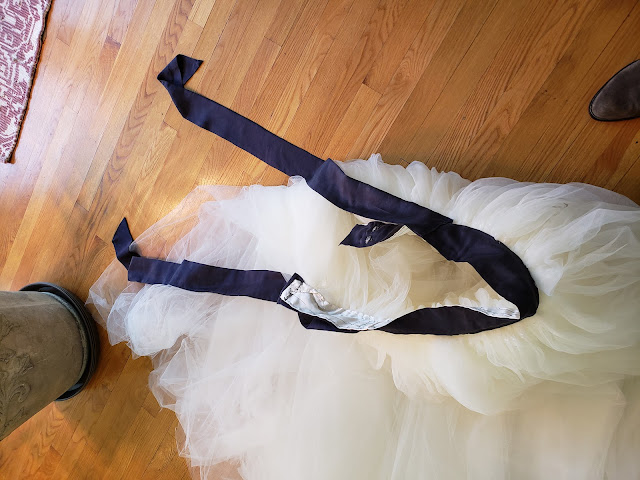
6) The floofy, enormous skirt. It's made from 41 yards of 108"-wide tulle.


The skirt's construction is inspired by Starset Moonfire's video, titled "Making a Ball Gown in Two Days", at https://youtu.be/VGNEJrCn8NE. She is so engaging in it that I found myself smiling right through at her enthusiasm and creativity and upbeat personality. Her version turned out really well, and wait until you see how she managed the top.

In the end, I made the waistband quite differently, but like hers, my skirt is a wrap style (so sensible!), features long ties, and is made of gathered massive amounts of tulle folded in half longways. When you count both layers, the 41 yards becomes 82 yards all gathered up in to about 34". You can whistle now.

Undoing the bolt of tulle, I found that its width was folded in quarters. All I had to do was unfold it once, leaving the remainder folded in half, and sew a channel big enough to run through a bodkin with a string attached just next to the fold.

So, I plopped my machine on the dining table, unfolded about 4 yards of tulle, leaving the rest on the bolt for neatness, pinned the layers at intervals to prevent sliding, and started to stitch the channel.

Once that section was complete, all there was to do was unroll more tulle and continue, ending with a single 41-yard length with a channel along the fold. I had cut nine yards from the 50-yard bolt in an experiment and am glad to have saved it, in case of rents later that need to be replaced.

Because I used the Singer 27 handcrank sewing machine, this wasn't a rapid process, multiple hours over two or three days. You can hear the click-click-of the machine, now 111 years old and still agile and precise, in the video.


Can't see the video? Here is the link.
https://youtube.com/shorts/Tzm1QXeWIE0?feature=share

Nutmeg was keen to help and very interested in the Singer. At one point she hopped in my lap and decided to have a paw at the sewing. There was an anxious split second as I waved it away.

You can see the channel I am sewing here. It's about an inch wide.
Wanted to make sure that stringing the bodkin through would be 
as easy as possible. Probably I should have made it narrower.

The next step? Taking a bodkin and running tatting yarn through the channel. It was on this string that I would pull up the 41 yards to fit my waist measurement, plus a bit more for the wrap-around. Remember, this is a wrap skirt.


Initially, I whipped the top edge to a cotton tape, but that proved too loosely woven, and I wanted the waistband to live largely above the tulle, with the tulle sewn to the outside of the waistband to help it puff while not adding bulk.

So I turned to a long remnant strip of Hymo haircloth encased in silk shantung that I had in the stash. It was strong and smooth, able to manage all of the tulle without going limp. The gathered tulle was whipped to it a little above one long edge, with giant stitches in two overlapping rows for stability. 

Inside of the waistband. I may line it in paper-thin silk to neater it up.

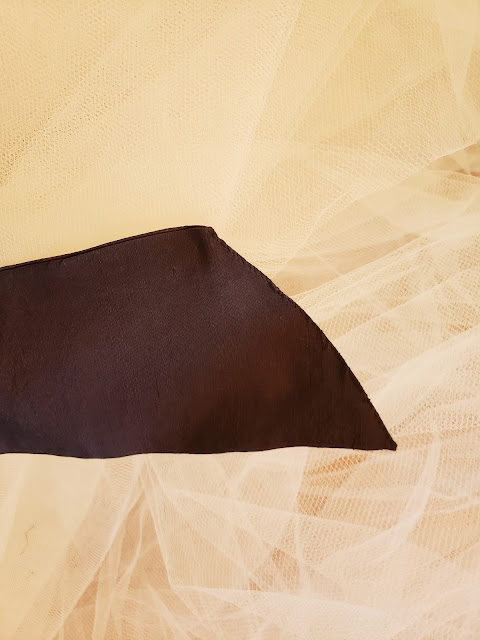
Not having found black silk in town for the outer side of the waistband, I dyed a remnant of the cream shantung I had from the 1895 petticoat project with RIT, and cut a wide waistband. For further strength as well as a luxe effect, I doubled the shantung, sewed the long edge, turned it right side out into a finished tube, and pressed it flat.

Then the black band, which is just slightly wider than the interior waistband, was prick-stitched as invisibly as possible to its outside, with the lower edge nestling as closely as possible to the puffed edge of the whipped-on tulle. That was tricky.

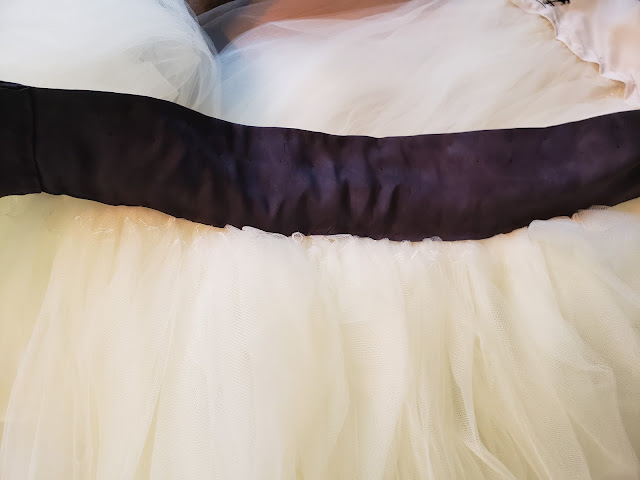
Here is the waistband. It only wrinkles because it is bent while it's on the floor. Worn, it's pretty smooth.


I had cut and prepared two 40" long pieces of shantung along with the waistband, into two more tubes of the same width for ties. 

One end of each was angled amd both ends were whipped closed as invisibly as I could.

Then they were set to the outside of the waistband a few inches from the closure so that they could be tied easily with room for the overlap of the wrap skirt. The straight end of each was prick-stitched to the waistband. I hand-sewed all of this because I wanted no visible stitching on the waistband to detract from the smooth, luminescent effect.

Another imperfection: somewhere along the way I had an issue with one end of the waistband and folding it was the solution.


Two heavy-duty steel squared hook and eye closures were added and the skirt was almost done.


The end of a tie, whipped closed.


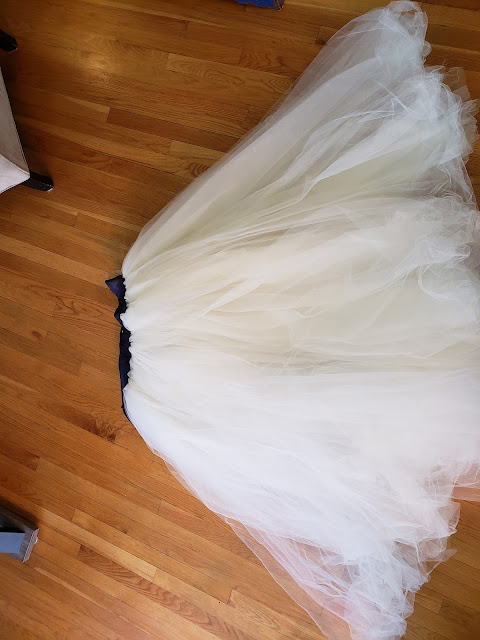
The completed skirt, laid as it would be worn, not flat.


When worn, the overlap becomes both invisible and remains closed because the tulle sticks together.

Below, the final skirt before being trimmed at the bottom...I am wearing those heels. It's really too bad that I had to cut the bottom to floor level, for I love the floaty feeling of the full length puddling on the floor and making a train in back, but this was simply not practical.

Unless the tulle were faced underneath with a balayeuse, which would have spoiled the feathery floating effect, it would stick to everything on the floor and gather detritus with every swoosh...I found a sweet gum tree seed pod at the bottom, picked up on the way to the car on the way home, I assume.

Also, my mother was adamant...nothing must get in the way of the feet for safety since I cannot see my feet at all or where I am going for many inches ahead of me, due to the depth of the skirt, all solid tulle. She was right, of course. 

In the end, I stood in my heels and mom measured the inches up from the floor to the proper level given how the skirt boufed all around me, and we cut away the excess. It wasn't easy to cut neatly and cleanly given the amount of fabric that is squished into the skirt's dimensions, and I see some tails in a few pictures (now removed), but it looked even when I cut it!

It would not be safe to precut to floor length before sewing, for that doesn't take account of take-up at the waist due to the gathering and resulting upward puff when sewn to the waistband, or due to the outer section needing to be a little longer given that it must flow over the fabric sitting to the interior. 

In the picture, I look quite short-waisted, as I hadn't set the skirt at the proper waist level. It looks interesting this way, rather 1960s, somehow, or 1790s.

Ah, the train before the trim.

So there we have the story of the Floofa Maxima Oscar's gown. It was fun to make and if a tad alarming due to its dimensions and tendency to attach itself to anything in the way, a joy to wear.

What's on for spring, other than the endless 1895 godet petticoat experiment? An 1810 ballgown in wine-colored fine-rib silk faille, really a bengaline. And renovating the 1816 Vernet dress for better fit and Mameluke sleeves.

Saturday, April 02, 2022

An 1895 Godet Petticoat With Boning and Stiffened Frills: A Wired Hem, Godet Plait "Extenders", and Hair Cloth Frills


When last I wrote about this project in spring 2021, I had tried a whole series of hem stiffeners to create the desired flare at the bottom of the godet-cut petticoat, while still allowing the large godet plaits, or organ pleats, or funnels, whatever you want to call them, to do their luscious magic at the back.

By the way, if you want to read about the whole project, see my 1890s Costumes and Research page and look under 1895 Silk Godet Petticoat With Multiple Hem Stiffeners and Stiffened Frills header. 

Just as a reminder, here is a sample of what godet plaits look like on an exterior dress. These are wired. 

From All the Pretty Dresses
blog

As I have explained in a host of research posts (for which, again see the 1890s Costumes and Research page), such plaits were also popular features of petticoats, at least on the pattern sellers and women's advice literature side.

At the end of the testing process, I'd ended up choosing flat steel tape repurposed from a mini tape measure to insert into the hem. 

The tape was inserted between the hem and the hem facing and a line of stitching added just above the tape to hold it in position. A second row of steel tape was added a few inches above, but only running from the front through the sides of the petticoat, because it had a tendency to create a hoop-like effect if it reached all the way around. 

Here is a shot of the process and a few of the results.

I have inserted the tape into the petticoat and am in the process of pinning
it into position, prior to hand sewing a line of stitching above it
to serve as a channel. There is already an interfacing of mid- to heavyweight
milliners buckram inserted between facing fabric and hem facing.

More pinning, and an example of the lovely rounded godet plait created by the steel tape.

The completed pair of godet plaits in the back, with the second row
of tape measure flat steel tape set at the top of the hem facing section.
It too was run into the facing and sewn in place.


Oh look! Nutmeg wanted to help me. I think, though I am not certain, that she has climbed under a pillowcase that I would cut up later for the fabric.

Nutty Nutmeg

Facing Facts: I Had Used Too Light a Fabric For the Petticoat Body

It was at this point that it was becoming clear that the silk shantung, which has a bit of body, was not stiff enough on its own to form the godet plaits such that they would support a fashion fabric skirt on top of them without collapsing.

That is why we experiment: my initial goal was a summer-weight petticoat in the godet style. However, not knowing just how stable godet plaits were or were not, I started with a fairly lightweight fabric, ignoring the advice literature of the day which harped on the need for a fabric with oomph.

I do not have access to the moreen that the Ladies Home Journal recommended for the initial petticoat, and nor did I have the funds to purchase a heavy silk taffeta, another option. Yards of hair cloth, an even more expensive option recommended for entire petticoats, was also out of the question, especially since LHJ reported that many women found such petticoats hot to wear. Taffeta in summertime is hot enough as it is, so haircloth, with its goat hair or wool content, might be a sauna. Those of you who are familiar with this blog know that I live in Kentucky, USA, where it can be hot and humid in the summer, and northern girl that I am, heat and I are uneasy with each other.

At this point, I made a risky, time-consuming decision: I would line the entire petticoat with muslin to add body. So I did, by hand, and discovered another mistake. When cutting out the back section of the petticoat, I had cut it single, rather than on the fold, a truly stupid error that had caused hours of irritation when my godet plaits hadn't lain correctly. Knowing that period garments, even those made by dressmakers, are rife with errors and hasty decisions was no solace.

Why I did not abandon the original petticoat and start over with fresh fabric, perhaps in a rayon or cotton moire mid-weight home decor fabric to mimic moreen and taffeta, I don't know. Was it block-headed, obstinate unreasoning stubbornness? Continued worry about heat? No clue. It's nearly 12 months later and water so long under the bridge that it was blended with the Gulf of Mexico long ago.

Adding Wired Rings to Shape the Godet Plaits

So it was back to all that research done over the last months and years. I settled on adding two sets of oval rings to the interior of the godet plaits/flutes, one set at one-third the way down the petticoat, and the second just above the knee. You can read about them in full in the section called Little Godet Hoops: "Skirt Extenders" in a previous research post.

Here is a teaser picture.
Joyce Godsey of The Time Traveler's Sourcebook group on Facebook
posted an 1897 Delineator pattern for making them, number 1257.

Sizing each ring was by guess and by golly, looking at pictures of these whatsamajiggets and their relative size to the rest of the petticoat. The top set of rings are about 5" wide, and the lower set about 7".

Each ring consists of two wires, made from that springy measuring tape steel, encased and sewn into muslin. Unlike the Featherbone commercial originals, these are rather loving-hands-at-home, but they are light, and they worked to hold the flutes in position fairly well.

A length of the steel tape and a folded piece of closely woven muslin,
repurposed from a worn-out pillowcase.

Encasing the first piece of steel tape in the muslin.
There will be a total of two steel tapes, with space in between them.

Stitching a channel for the tape to inhabit.

Once two tapes are inserted, closing the ring and stitching it shut.
No, it's not pretty stitchery.

The ends of the steels poked out and had to be worked back
in before being sealed into the ring with muslin.

A pair of completed rings. Handsome they are not.
Of utility they are.

The rings were pinned into approximate position. As of this juncture, they are still just basted in. They really do help shape the pair of godet plaits, but as you can see, the hem bottom is still trying to collapse. I hoped that the addition of the planned hair cloth frilling would solve that problem by imparting some stiffness. Mmm, I can see that I am remembering out of order, too. The hoops went in before the second row of steel tape was added around the petticoat hem.


Aren't we getting flare and godets reminiscent of a real mid-1890s skirt?
Alas that this is not an outer skirt in itself!

 Demorest's Family Magazine, February 1895, p. 207.


Adding Two Rows of Hair Cloth Box-pleated Frills

The original LHJ petticoat was of moreen, set with three rows of box-pleated haircloth frills to create the requisite skirt flair, with no attempt at real godet plaits, other than the overall godet-style skirt cut, which was considered, to use a popular term of the day "regulation". You've seen this image a lot, but it bears repeating.

Petticoat with haircloth box pleatings.
Ladies Home Journal, July 1895, p.25.

Following Miss J. E. Davis in The Elements of Modern Dressmaking for the Amateur and Professional Dressmaker, (p. 139), I decided to encase my haircloth frills in the silk shantung, for a more handsome effect. I had enough hair cloth [mid-weight Hymo from Vogue Fabrics] to make two rows of frilling. 

Cutting the hair cloth on the bias, which is its best angle for strength, hand-sewing each length together, and then encasing them in silk by cutting wider pieces of silk, covering the front of the hair cloth strips and folding the edges behind and stitching them down on my Willcox and Gibbs 1911 chain stitch treadle machine, took far longer than it takes to read this overlong sentence.


Can't see the embedded video? Here is the link to it: https://www.youtube.com/watch?v=Tl9JDmgpOCM.

Nevertheless, at last it was done, all 24 yards. 

How to box-pleat it, though? The resulting fabric strips were seriously stiff. I ended up creating each box pleat by eye right at the Singer 27 hand crank machine, quite literally folding a pleat, sewing it slow single stitch by single stitch, then pleating its fellow and sewing that in turn. Rinse and repeat. It took many hours, but pre-pinning was out of the question as the pins were tough to insert into the layers of silk and hair cloth without bending them. 

Sewing the second half of a box pleat in place.

I kept moving the sewing machine around. It was taking so long
to stitch the pleats that I'd be driven off the breakfast room table
and have to move elsewhere. At this juncture I was on the living
room coffee table.

The resulting box-pleated strips were so pretty! You can see it coming, though. How to get them on to the base of the skirt, which now consisted of shantung in front, mid-weight interfacing in the middle, and a shantung facing in the back, all covered by a layer of muslin? That's four layers in itself, not counting the up to six layers in the pleated frilling. All the while avoiding the two rows of steel. Oh. My. Goodness.

It wasn't a problem of the needle going through the fabric...hand cranks and treadles are famous for making their way through sail cloth and leather, provided the needle is strong enough. No, it was how thick the resulting pleats were, being each composed of two layers of hair cloth and four layers of silk shantung. That's some Dagwood sandwich. There simply wasn't vertical space on the machines to safely and evenly run them under the needle with the added layers of the petticoat itself.

Nothing for it but to hand-sew them on to the base of the petticoat, the bottom one first, and then a second one over it, slightly overlapping the first, one painful stitch at a time, with a mid-size embroidery sharp.

I spent several days on that as time allowed, first on the floor and then, bum numb, on a chair. :)

Stitch, stitch, stitch.


It's no wonder I dreamed of digging into some buttercream 
cake decorations. Can you see the similarity, or is it just me?

To help grip the needle and lessen the chance of being stabbed, I wore
rubber fingertips bought from an upholsterer's supply house.
Were they partly steel-backed, I'd have been happier, as accidental
stabs still were a self-administered plague.

However, the results are gorgeous, scrumptious, like pure-butter buttercream icing on a wedding cake. Sculptural. Delicious. One of the prettiest effects I have ever obtained, bar none. And all this to be hidden as a petticoat and never seen except when I accidentally on purpose reveal an ankle and the accompanying frillies.


It's too bad the petticoat cannot be worn as an outer skirt, but it's a tad shorter than mid-1890s street length, as it should be, and it's very obviously pieced in front. Oh well, perhaps someday I will reclaim the frilling and put it on another, outer, skirt.

Also. I am positive you have noticed a problem.

Giving In: Adding Hair Cloth to the Back of the Petticoat...and More Hem Steel Tape

And so we come almost full circle. Despite all of the takes on period wires and boning and frills to create a back with enough oomph, my petticoat continues too weak to hold its flare in the front and sides.

Once the frilling was added, the carefully created two godet plaits in the back collapsed into a single flute, and the wiring in front collapsed as well.

The petticoat is not animated and taking a step forward. The rows of 
frilling are interfering with the two rows of steel tape underneath and setting the shape awry.

One giant godet plait, and all heck breaking out across the back.

Oh, bloody H-E-double-hockey-sticks.

I worried this would happen, and sure enough, it did. No wonder dressmakers inserted as many as five rows of wire or boning into their hems!

What now?

I will tell you what now. This project started in October 2019. It's now two years and multiple months later. There's no giving in. The project has become an effort to figure out the physics of the thing and to show the way to others. I will keep going. So far as I know, nobody else has yet spent so much effort in experimenting with these period methods, and while I am doing an approximation of experimental archaeology, might as well be fully thorough about it.

The next steps are to pull off the lining in back and insert a layer of the Hymo hair cloth, expense or not, then re-add the hoops, making new godet plaits. Then add more wire on front and sides. This time, encase in cotton tape and sew to the lining. It'll just have to be visible underneath.

Lessons Learned So Far

We know now that for a godet-style petticoat, the 1890s advice still stands:

  • The foundation fabric must, by all means, have lots of body or the structure will collapse. Use as close to the original fabric as possible: all hair cloth, heavy taffeta, or as close to moreen as you can get. Or interline the back of the petticoat with haircloth and be prepared for a back-heavy petticoat that will need to hook to the corset or risk sliding down.
  • The lighter the fabric, the more rows of steel tape or wire you will need. 
  • Not so concerned with true godet plaits? Make the LHJ petticoat with a godet-cut pattern and gather the back and add the frills, and be done with it. The effect will be moderate, but LHJ was not targeted to fashionistas, but to more middle class women.
I leave you with a sign of spring from the Kentucky Bluegrass, which I wrote about long ago, when the boys were small. Amidst the new grass, the Spring Beauties have come, a Kentucky wildflower of grace and toughness combined. Outlasting the snow, they carpet lawns and medians wherever people value such signs of springtime over pesticides. Fortunately, in our old neighborhood, there are many people who do, and at the Ashland Estate, which has written about them, they grow in such profusion under centuries-old trees that they look like snow touched by Aurora's wings.


Claytonia virginica