Showing posts with label Regency era. Show all posts

Thursday, January 11, 2024

10 Years to Finish a Regency Reticule? Well, Yes

A Christmas gift? No, a Christmastime project.

Sometime in 2014, during the lilac-colored silk phase in which I made an embroidered 1790s sleeveless spencer, matching outer petticoat, and pearled headband after an original, I started a beaded reticule project. It stalled and was picked up and dropped again during the following decade, and only now have I finished it. During that time I went through several phones and it appears photos documenting the project's early days have gone missing, so the following is a somewhat truncated history of its making.

First, Why the Lack of Posts for So Long?

It's not for lack of making things, for I did manage a pair of 1790s stays, a velveteen spencer, and a pretty apron-front dress. Those projects, though, happened in short spurts that felt like shelter from repeated storms. There was another health situation, one in the long series that have punctuated the last 30 years, and then, the illness and passing of my darling and beloved father, followed months later by my sweet aunt. Last spring saw my sisters and I sharing taking 24-hour care of our daddy during his time in hospice and helping our stepmother/mother through, and then, the loss, the mourning... Losing a parent is a loss apart; it shakes the foundations. It's still too close for elegy, except to say that his community lost a dedicated volunteer and leader and we lost a mentor, a guide, a loving father and friend. Even now I can hear his voice.

The Finished Reticule

Nuts, I don't want to write again, but, he thought hobbies were key to mind and soul, so, let's go. Here is the completed reticule. It measures 9 inches at its widest by 9 inches tall and a measly 1.25 inches deep. It's deep enough to hold a small fan, a handkerchief, smelling salts and a phone. I suppose it's possible that you'd find lip gloss and some cash, too, were you to snoop. I wanted it big enough to be useful, but not big enough to become lumpy with the thinggummies that naturally accumulate in my own purse, for practicality and so I have the satisfaction of pulling out whatever's needed like a rabbit out of a hat when my sons or husband ask. Package of band aids, mini containers of sunscreen, lotion, and hand sanitizer, a pen, sunglasses, a scrap of paper for writing, a tiny measuring tape, lactose pills for the lactose-intolerant son, emergency migraine tablet, tissues, keys...all in the smallest package I can manage. Query: did Regency women do similarly? Were smelling salts part of a reticule's community of objects?

The front, natch

The back and the compound strap

The narrower-than-wanted interior

The reticule has stiff sides, courtesy interior cardboard on back and front, softened with millinery domette so that the surface doesn't feel harsh.

Intermission for Kitty Cuteness

"Why are you putting that thing on top of me?" asked Nutmeg,
who was on my lap.


How It Was Made

The shape is fairly common for the Regency period, interesting visually because most sides are at oblique angles. I saw an example in 2014 with similar beading and loved it. The photo once lost, I never found it or was able to track it down online again. Then, a year or so ago, one so like the original turned up in a favorite Etsy shop (GraceofTime) that it was quick like a bunny -- save the photo! Here it is.

Reticule from Graceof Time on Etsy: their photo

This reticule I think is padded, and soft-sided, and seems mostly to be beaded in white and silver, and the fabric may be a satin. Still, you see the resemblance.

I wanted flat sides as my other reticule gets so shapeless and lumpy when anything is put inside, plus the tailored look is attractive. Dangling beads were not to be thought of; a klutz, I'd catch a loop on something for sure and beads would fly.

The construction is invented because I'd no access to originals. It uses stitches common in the Regency period: back-stitching for strength, whipping of seams, hemming.

Materials

  • Exterior fabric: home-dyed silk shantung from Dharma Trading
  • Interior fabric: undyed silk shantung, ditto
  • Stiffener: cardboard from a discarded cereal box
  • Soft interlining: domette, I think from Judith M millinery in Shelbyville, KY
  • Beads: pearl seed beads, gold-interior clear sead beads: the color isn't warm
  • Embroidery silk: Au Ver a Soie silk ovale, a flat, untwisted filament silk (not spun and a joy to use)
  • Sewing thread: vintage British sewing silk in Heliotrope
  • Strap: tawny silk cord and silk tassels from a deconstructed remnant of antique passementerie whose connecting threads had shattered, from DuchessTrading on Etsy. The passementerie was too far gone to edge a gorgeous pillow, so...creative reuse.

The Beading

I drew the design on paper, then copied it on the home-dyed silk shantung. The fabric was tightened in an embroidery hoop: this sort of work cannot be easily done on fabric that isn't taut. Then I sewed the stems in elongated chain stitch.

Each beaded twig or frond was made in one go, by pulling the thread up through the fabric, loading the thread with the requisite number of beads, laying it flat, and running the needle back into the fabric. Then, with a second needle, couching down the longer threads every few beads as invisibly as possible. Otherwise, they became droopy and at risk of being pulled off.

The Assembly and Sewing

After beading the fabric, I sketched and cut out pattern shapes for the back, which included the foldover flap, and the front, which included an extra piece at the bottom to make the bottom a little deep, front to back. You know, for stuffing stuff into the purse. It's likely I cut out more than one pattern, to see which size felt most natural and useful.

Once happy with the pattern, the fashion fabric and lining were cut out, using generous 1-inch seam allowances.

I used a leftover breakfast cereal box, which is a single layer of cardboard, not terribly heavy, to cut a back (minus the foldover flap) and a front.

Lastly, I cut millinery domette according to the pattern pieces as a nice soft interlining to make the purse feel good to hold.

The lining for front and back were laid flat, the carboard laid atop, then the domette went on that, and the fashion fabric over all. The layers were pinned and basted securely in red thread so that I could easily see it to pull it out later.

You can see the three layers in the flap: fashion fabric, domette, lining. 

At this point there was a great deal of dithering and it's likely that the dithering precipitated one of the laying-aside periods. I had thought I was going to simply sew the front and back together. However, alert readers will envision me trying to reach into the reticule and finding it hard to insert more than a slip of paper, even with that excess bit at the bottom that was supposed to offer some room. Those hard sides didn't give. No room, no room at all! I'd need to add sides...

Eventually I determined to cut probably 2-inch wide pieces (1/2-inch seam allowance) to insert between front and back. At this remove I can't figure out what made me cut separate pieces for the long sides and the short sides, but that's what happened.

To seam the sides to the front and back, I chose to turn the seam allowances inward of all fabric pieces and whip them together with very close stitches, about 1/8 inch apart. This makes the seam stand in a little ridge, with little fabric bumps between each stitch that echo the beading. It's also good and strong. It does mean, however, that the interior lining has raw edges. The silk doesn't fray much at all, so am not concerned about that. I probably should have seamed up the lining separately and slipped it in, though...

Seaming together front and back. You can see the
side pieces have been whipped on to the front.

The fashion fabric, domette, and lining for the flap were laid together, then the fashion fabric seam allowance was turned in over the domette and basted. 

The strap, which is made up one long piece of cord folded into the three, was laid across the flap at the spot where it folds over from the back piece, and on top of the domette. The lining seam allowances were turned in, just a hair inside the fashion fabric so that it wouldn't show on the outside and laid atop. More basting to hold everything smooth. Puckering would have been fatal. That's too dramatic, of course, but by now it was at the end of 2023 and I didn't want to end on a whimper. The lining was carefully hemmed to the fashion fabric.

All that was left was to turn in the edges of the sides at the reticule's opening and hem them, though I did have to do a bit more seam whipping at the opening, since I winged (wung? Oh, those irregular verbs) the strap at the last minute. It had taken a year or two to find, hunting on and off, the right strap. I couldn't find any thick silk cord that was remotely affordable in the right color, found the artificial silk cords too bright and slick and shiny to work with the nearly matte shantung, and just didn't want ribbon.

Is a tasseled strap appropriate? Yes, but I've never seen a reticule strap so loaded with them. But, they're in the spirit of the 1790s: out-and-out luxury, outre attitudes, and caution to the winds.

So there it is. My only concern? The cardboard interior is just cereal box. If that's made of wood cellulose, which is likely, it may break down over time. With care, the rest is good for ages and ages.

All in all, this was a good project. Contained, full of challenges and design puzzles. I'd should have made the sides a little wider, and that cardboard should have been archival pasteboard, but that's small stuff. Here's to having a fun, fluffy, shiny reticule to carry.

Today I leave you with a little cat TV. Ciao until next we meet!


Monday, August 23, 2021

Renovating the 1795 Cream Silk Open Robe Ensemble for the Jane Austen Ball


My, aren't we fine, although blown about and rained upon by a storm getting to the ball.
The altered open robe and petticoat as worn to this year's Jane Austen 
Festival ball. That's Polly with me: we had
Such fun

Eleven years ago this summer, almost to the week, the costume I am most proud of -- self drafted, hand sewn and hand-embroidered -- left my hands and needle, was packed in a dress bag, driven to Louisville, and worn at the Jane Austen Ball. For several years after, I wore the circa 1795 cream open robe for different events and with different petticoats and accessories. I felt as elegant in it as in anything I've ever worn for any reason.

In 2019, when I thought to try on the robe, not only were the heavily boned stays to go under it unbearably tight, but it got stuck on my shoulders, half on, half off, and it took an awful deal of wriggling to work my way out. Phoo...phoooeeey, as Pogo would say. 

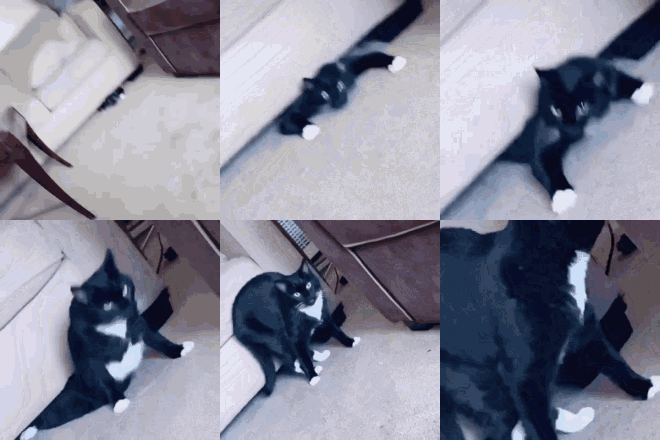
The pretty kitty in the GIF managed their extrication more elegantly than I did.

Well, here it is 2021 and the robe was still sausage-tight despite a few pounds gone. Walk away from my favorite outfit? No, no no. Time to enlarge it, much as people back in the day would have*. Here then is the tale of alterations.

* For example, see "The Multiple Lives of Clothes: Alteration and Reuse of Women’s Eighteenth-Century Apparel in England" by Carolyn Dowdell. PhD thesis, Queen's University, 2015.

Enlarging the Body of the Bodice, Part 1

This process suffered an initial hitch although the results ended up well. At first all that seemed needed was adding a narrow panel of fabric under the armscye, adding width where I was thicker than 10 years ago. So I disassembled one side of the dress, removing the sleeve and the front piece. 

Why just one side? So that

  • I could look at the hand stitches used originally, and replicate them -- each section is sewn using the seam and stitch best meant for the purpose, mostly lapped seams and spaced backstitch. Boy, did this reduce thinking and worrying time.
  • I could see exactly how much fabric was added and test the fit a little compared to the original. That plan worked just barely well enough.

I took as exact a pattern of the front piece as I could by laying it onto a large piece of newsprint and tracing around it, and worked out a little additional pattern piece to go next to the front piece under the armpit. Here it is, below.


The fabric for the additions was furnished from my old silk curtains, which had been saved for recycling into costumes, and which are made of the same silk shantung as the original dress, plus leftover linen from "cabbage" retained from past projects. I cut the lining and fashion fabric for the new little side piece, and closely prick-stitched it on as a lapped seam, the lap facing the back of the bodice. Here it is in process.


After pinning the front to the new panel, it became clear I had made a mistake...now the armscye was out of position. Oops...so much for a fast alteration. Had I just inserted a triangular piece with the width at the bottom and the point at the top, the alteration might have worked, but if you widen the top, of course that shifts the entire front and side of the gown. Plus, the fronts still didn't overlap for pinning like they were supposed to, so each side needed to be wider. Again, phooey.

There was nothing for it but to add a new bodice front piece with extra width, a corrected armscye curve given the new underarm piece, and proper fit with the bodice shoulder strap. That meant drawing a new front pattern piece using the pattern piece I had just drawn. You can see the pattern below. If you look carefully you can see that I tried to mark everything so as not to forget to create enough seam allowances, etc. I added a little extra fabric at the center front just in case it was needed. If you look at the original front piece lying above the pattern, you can see that in the original robe, I had cut the front too deep and had had to fold it over. Not this time around...

New front pattern piece with all of its markings.
Boy, are they hard to see in the photo. However, seam allowances have
been added all the way around. I've guessed at the center front seam
by sketching a dotted line from top to bottom: you can make that
out, at least, in the photo.

Next was cutting the fashion fabric and lining, basting them with red thread, and pinning them to the original garment to test the effect, per the below picture.

By the way, to preserve the existing pleats in the gown skirts, in case I needed them, I basted them in place with red thread. 

The new front piece, both lining and fashion fabric, basted together 
and pinned to the rest of the robe to test it.


Here I am testing the shoulder strap for fit by pinning everything. There's more basting...


Because kitty helpers must be recognized, here is Nutmeg napping while I am at work. Can you spot her? She tired of trying to get at the fabric. And say, isn't that the 1890s petticoat on the dressform, waiting to be finished? Yes. And it's still waiting.


I checked the nature and stitches used in the seams in the part of the robe that was still not taken apart, and copied them on the new front piece. The new bodice front piece is lapped to the new little side piece with another lapped seam: the front piece overlaps the new side piece, just as the new side piece overlaps the existing side-back piece. The front center edge was left raw until the time should come to try the gown on and fix where I wanted the closure to be. The bottom hem was left unsewn too, so I could adjust it when fitting the bodice.

Sleeves


Then it was time for the first sleeve. Adding a strip to the existing sleeve would have been ugly, although I could have done it, of course. Instead, because I had plenty of silk and linen, I made a new sleeve altogether. The robe's original sleeve was taken apart, laid flat on the silk, and an extra half inch or so was measured on each side of the long seam, plus another half inch for seam allowance: I drew tiny dots on the linen to mark the new cutting line. A little tiny bit was added to the armscye so the sleeve wouldn't be so all-fired sausage-tight, too. Normally I'd have cut the linen first, but I had more silk than linen. In addition, I decided to cut both new sleeves at once.

In the picture below, I have laid the new sleeve pieces on the what's left of the linen lining fabric to see if there is enough room in the fabric to cut the sleeves on the straight of grain without piecing...and there was enough.


The sleeve lining and fashion fabric were basted together and treated as one, slipped into the armscye, and the bottom half closely backstitched. Since the shoulder strap didn't need any fooling with, I had already attached the lining part of it to the front and back of the bodice. All that was left was to spaced-backstitch the rest of the sleeve to it, easing to top in carefully. The sleeves are tight enough that no pleating of the top of the sleeve was necessary, just gentle easing of the little bit of excess. 

Spaced-backstitching the sleeve into place.

Then I smoothed the outer fabric of the shoulder strap, which hadn't been stitched yet, on top of its lining, covering the sleeve stitching, and prick-stitched it down.


By the way, all the basting was going to use a lot of thread, so wherever possible, when I pulled out the basting, it was set aside for reuse. Here's one such set of threads ready to go. No point in wasting it.


What next? Making a new front, wee side piece and sleeve for the other side of the robe. This went quickly.

At this point the gown was slipped over my adjustable dress form, which fits no one well, to test the look, and I briefly slipped the new half of the bodice on over myself, in stays, to make sure the sleeve fit neatly, which it did. Phew.

Try-on and Completing the Sewing


Now to fit the altered gown closely. On went the necessary base to the dress, the recently enlarged stays.


Next came the bodice. I pulled the front pieces into position, smoothed them, and lapped one front piece over the other to the degree I wanted. In this case, I left plenty of extra on both left and right sides in case I gained weight. That's a delight with many 18th century gowns: since they're pinned closed, you can adjust where you pin rather than have to reset buttons or hooks and bars.

I also checked the bodice bottom to make sure that the hem ran straight to the sides, and didn't dip or angle; the position was pinned.


Once fitted to taste, off came the robe. The edges in front and bottom being turned in already, they were prick-stitched to finish them.

Re-attaching the Robe Skirts


Then I reattached the gown skirts. They needed re-pleating. You've seen that process many times for 18th century skirts, most likely, and all that needs saying is that the pleats were whip-stitched onto the bodice. That way if I add a little pad at the back, then the skirts of the gown can hinge outwards nicely.

The back of the gown narrowly pleated and whipped to the finished bodice bottom.

Re-attaching Lace Trim

After that, re-attaching the original lace. I can easily detach it for use in other garments. I had some more of the lace, which dates from the 1920s or 1930s and was recovered from a cutter slip over a decade ago, and so this go-round I doubled the collar lace. It makes for a much richer effect.

Figure numbers 97 and 98 in Heideloff's Gallery of Fashion (Bunka Gakuen library) show two ways in which lace can be applied: slightly ruched and tacked down to the outside of the dress through the center of the lace, and pleated and tacked inside the dress. 

Because my lace was edging style, with one decorative edge, I chose the latter option. The lace was very lightly pleated at intervals and then tacked, just inside the edge of the neckline. Because one row of lace was longer than the other, the shorter row went on first, centered at the back of the neckline; the second went over it.


Gallery of Fashion concert dress


The lace, tacked on


There, you can see the doubled lace better. 


Here's the dress from the back. It has yet to have the lace re-added to the sleeves and oh yes, to be pressed. Still, the silk does look luxurious in the way it puddles and trails. That's one of the things that's so appealing to me about it.


Done!

Worn to a Ball

And so I wore the dress to the ball-on-a-boat; my friend Polly and I attended together. For the event, I wore the gown with the silk voile petticoat I had embroidered with goldwork. The hair up in a chignon, I bound an ice blue long silk sash around it, pulled out a lock of hair in front and draped it, and added several short black vintage ostrich plumes. 

My hair had more loft before we left the hotel; you'll learn why in a moment. I have an aversion to looking at or fussing with my outfit or hair while out and about in normal life. That's probably not the attitude to carry to a ball, but there you go. It was only after looking at these photos after the fact that it became clear just how out of order I appeared. Had it been 1795, there might have been pointed comments and raised eyebrows.

Wrapping a vintage silk taffeta sash in the hair and draping a lock of hair over it.
Arrr, the wind blew the lace around.


The planned cut steel earrings would have rusted, so I wore the pearl earrings I wear daily. No necklace this time: it would have been appropriate but I preferred a quieter look than was ultra-fashionable. New red American Duchess Dunmore shoes on the feet; a tad too early, but I couldn't find ultra-pointed, high-vamped shoes with the right tiny heel.

What a wonder, the ball. We had a lovely time. Lively English country dancing, a fortune teller, wine, scrumptious desserts, and to watch the wide, wide Ohio slide past as evening descended.  I didn't dance, sadly. Perhaps next time.

Of course, it rained. It started with roiling dirty dark brown clouds on our way to the boat and a wind that threatened to blow our gowns around our waists and our feathers into the river, and then it thundered and started spitting great drops as we raced up the gangplank onto the boat. After that, for good measure it poured a while and left puddles on the decks, covered though they were. Gathering up the yards and yards of gown skirt over my arm, not realizing I had trailed it in the water already, lace blown by a naughty breeze, bodice gapping slightly, we had a moment for an as-is plein air portrait. It feels very realistic to me, rather as if I was gathering up skirts, not entirely successfully, in an attempt to remain dry on a boat on the Thames on a rainy evening. Only this was a boat on another river, on another continent, in another century.

Happy but attempting to remain dry
on the second deck


A little bit like this painting from a slightly later period, only my feet are primly together, while the painting's heroine might be taking a dance pose. So the general effect when you draw your skirts up in the wet is rather accurate. Sure wish I knew what this painting was called, and where it comes from...if you know, please tell me.


Here's Polly in portrait mode, too.


I've never been on a paddle-wheeler before and it was delightful in every respect. Here below, the paddle in motion: have just learned how to turn videos into GIFs and it's fun!


Now it's evening over a month later. My mother's Missy kitty is asleep beside me as this post is finished at long last. My husband and sons went to a family wedding in Nashville last weekend, and I couldn't go because of the immunocompromise issue. For safety, have come to visit my mother, a mile away from home, for 5 days and until a COVID test shows them in the clear, on the advice of the transplant clinic. It's lovely and quiet and so nice to be with mom. I'm bringing meals to my family and before heading out we did all the laundry and made sure the house was fresh. Still, I miss my family so...

Missy kitty napping in my mother's den. She's mostly Maine Coon, has
short little legs, big soft paws, an awesome amount of fur,
and a sweet, calm and affectionate nature.
Her fur curls on her tummy!


Friday, September 30, 2016

Vernet 1.0: Summertime Edition. Part 2: Evidence and Thoughts Behind the Dress Construction

First wear. Nice, but where's the bust-to-waist change?
Lauren Marks' dress worked out as it should in this
regard. Mine did not: that's what you get for wearing
the wrong stays. 
We know from last time that the Vernet 1.0 dress is a work in progress... However, 1.5 years into it, I have yet to write up how the first edition was actually constructed. At first, it seemed possible to pile everything into one post, but as I went through the notes compiled during 2015, it was soon clear that I'd have to break things up into background and evidence, and actual construction.

Time and Blogging and Less Time and Less Blogging

In years past, when a project would really take my fancy, I spent months researching and collecting whatever evidence I could manage to obtain from sources online - magazines, novels, fashion plates, an occasional manuscript, photos and documentation of extant garments. Then I'd muse all about it online, like so many of us do, as with the silly number of posts I made about the 1790s sleeveless spencer.

For a while, I was able to turn to actual garments from my own collection, as with the 1870 Bustle Dress. Despite Ohio's several excellent museum collections being just a few hours away, I've never had the freedom to visit them. My own stuff, obviously just study specimens and nothing special, was great fun to work with, but is now largely dispersed, gone to Cassidy of A Most Beguiling Accomplishment. If you read some of my earlier posts, you'll see the efforts of someone with more interest than proper background, and so it made sense to give things to someone with both the training and the equipment to care for them properly and make better use of what they have to tell.

In most cases, whatever research I did I wrote about nearly immediately, posting as the information came to light. It's frustrating that the Vernet project came along when it did, just when the life of our household, and my own life, was full of change.

Within the space of just a few years, my part-time job in public health, which I love, became more taxing than it used to be, the twins grew up enough to start piano, and YMCA soccer, and homework, and to dip into other fun that we could enjoy together -- fossiling -- a tee-niney garden, vacation Bible school. Chronic illness of one sort or another blossomed. It's common, you know: one chronic illness begets another; our bodily systems are all interrelated. I have a transplant, and the effects of long-term medications and transplant-related fatigue made it easier for other problems to arise: migraines, diverticulitis (now those episodes were fun, dangerous, and expensive), and now the formally diagnosed type of dyspepsia that makes eating a pain. Now I understand what novels mean when they describe a crabby person as having a dyspeptic personality. Try me when I am cooking dinner for my family, a dinner that I cannot eat, and you'll have a nice sample of it.

Then, you can't forget age. I don't mind it, aging. While crepey skin on my hands is creepy in one way, it's something that ties me to the many beloved people who have gone before me, and the years of living and suffering and just dealing with what comes have made me love what I have the gift of having right now the more, and make me more ready to share it, because really, what is a gift when it's kept to onesself? There's no point in that, as my own faith and that of others will readily tell you.

Meanwhile, ever after the roots of things that make up garments, I went after threads, and discovered spinning, and then fibers, then wool, and then -- SHEEP.  Oh dear, if ever there was competition for costuming, it's the fibers that make the fabric, and the animals that make the fibers.

The result? The inevitable sequela? I don't have much time to begin with, less energy to get on with, and I am splitting it umpteen ways -- job, children, husband, stupid illnesses, sheep and the world of making textiles, and costuming.

It's no wonder Vernet is taking forever.

So, if the following is less well researched than some projects, with less breadth of resources and iffy citation quality, well, you can see why. I won't give up, but, gee, it's after bedtime and I need to check on the new kitten, and tomorrow I visit Lana the Shetland and Nina her lamb, and then it's soccer...

So, how did I set up construction? What evidence did I use? Here is the thought process.

Dress Fabric

Let's start with the dress fabric or fabrics. We don't know for sure what fabrics were used. It could be cotton, and arguably might be. In Journal des Dames, just about all of 1814 is dominated by percale white dresses for promenade and morning. A few mousseline (a nice clear muslin) dresses appear -- they are sheer -- as well. The Napoleon and the Empire of Fashion exhibit’s Annette model wears a dress of percale and clear muslin that has several similarities. Although Vernet departs from norms in proportion and in accessories, he appeared to follow the mode in that he showcased so many percale dresses.

In this case I think the underlayer is percale, with a clear muslin overlay used for bust poufs, sleeves, and the skirt. That there is an overlay is apparent in several places: the arms show through the sleeves, the underdress shows through the bust puffs, and the green grass shows through the overdress hem at the horizon line.

A previous thought of mine was that the styling with the large bust poufs is usually seen in full dress, especially in ball gowns. Christina Barreto Lancaster's Hillwood Manor exhibition model (shown further down in this post) is an example.

If our Vernet plate were a more formal dress, a crisp silk would hold the poufs nicely and the skirt body would hold well, too. Perhaps the silk was what has been known since as a silk ninon, although I was unable to track that fabric back to 1814. If it were, Vernet may have been playing with words, associating the fabric with Ninon l’Enclos.

Looking at the dress plate, and how strongly Vernet indicated the join between the bodice and the skirt, it's fairly clear that the overlay is not an entire dress set over a slip.  Instead, the bust poufs and the sleeves are mounted to the bodice.

The Embroidery/Neckline Decoration

We already know what I imagined about the embroidery, based on when the dress came out, at the end of Napoleon's dominance over France.

Here's another 1814 dress, just about covered in the embroidery with cutwork; the idea was quite popular, it would appear.

Cotton and silk dress, French, 1814. Met: 1984.81.
It could also have been something else. At one point I thought the little indication of decor could have been  a bit of gathered ruching, as in Portraits des Soeurs, 1814, by Jacques-Augustin Pajou, from the Louvre.


Or it may simply be the pulling of the thin muslin on the drawstring, as in this dress from the Met.


Yes, It IS possible to have a drawstring on a straight neckline. Here is Cecile from Natalie Garbett’s blog. The strings could be anchored at the straps.


Another dress, from Augusta Auctions, this one in a plain muslin embroidered at hem.


This sort of neckline just isn't very exciting, and Vernet enjoyed trendsetting fashions, as we know from his other plates. I went with the idea of embroidery. After all, I had evidence that decorated underpanels or underdresses were fashionable. Here are two from Natalie Garbett’s blog, in her post describing her first dress of 2012.


Shoulder Straps

Note that in all the dresses shown so far, the shoulder straps are set very far to the edge of the shoulders. This is the norm for the entire year in both lower-necked dresses and high-neck dresses. I made sure that this would be a feature of the Vernet dress.

Their construction? We can see the bodice through the bust poufs just to the right side of neckline. This argues for flat panel to shoulders, which are set very far out, and very narrow straps on the underdress. They could be constructed two ways:
  • Straight straps attached to straight panel. They would be easy to modify if you have a fit issue, even though it means two extra seams. 
  • A single-piece for front with very wide curve, hidden by bust of overdress. They would be harder to modify if there were fit issues, and finicky to sew the drawstring channel that would accompany this type of neckline. 
I threw out the latter idea as less likely.

Bust Poufs

The bust poufs, I thought, might be made most easily with one piece of fabric. Not being privy to the construction of any dresses with bust poufs, I made a guess. I would use a single piece of fabric, either rectangular or shaped like an horizontal oval pointed at the two sides, accordion-pleated and divided by very thin thread band at center. Wider bands dividing the poufs appear on ball dresses of the period (see Christina Barreto-Lancaster's Hillwood Manor exhibition example below). The outer edge of the poufs would be turned under and tacked down to the strap lining, then covered by the sleeve fabric and the strap fashion fabric.


Here are far more tailored versions of the bust poufs (the same exhibition).


From earlier, a rudimentary bust decoration that later would become puffier.

Silk dress, American, ca. 1805.
Note clear variations in weft thread color and what are almost surely slubs,
plus relative thickness of the warp threads. 2009.300.2314
Sleeves

Our Ninon wears her sleeves quite full, the diameter gently tapering to the fashionable elongated wrists.

The sleeves are worn twisted, with the twist held in place at the wrist by what appear from the paintwork to be substantial satin or taffeta ribbon, very wide, but folded so that the band around the  wrist itself is not wide, but narrow. Only the bow is wide. La Belle Assemblee in 1814 notes that white satin ribbons are popular in Paris. (Oh, for Pete's sake: where did my citation for that go? This is what happens when you write up your notes so long after the fact.)

Annette, in the Napoleon and the Empire of Fashion exhibit, wears a more tailored version of the very long sleeve.


Another model from the same exhibit displayed more exuberant sleeves:


Ends plainly finished with rolled and whipped hem.

Dress Waistline and Back

In our fashion plate, the bodice waistline is plain: there is no narrow belt piece between bodice and skirt. The stress, then, would be taken by a lining, I would think. It is possible for unlined dresses to have a plain join too, though: witness Cecile on Natalie Garbett’s blog post about underpinnings in Napoleon exhibition.


As so common with Regency dresses, and with earlier petticoats, too, the skirt's upper raw edge could be simply turned to the inside and the skirt whipped to the bodice.

At this period it was common for dresses to be back-closing, with two wide back panels hung on drawstrings that simply tied at the center, allowing for changes in fit. I went with the popular mode.

Skirts

There is really not really much to remark upon here, except that the dress dress ends two inches or so above the anklebone. Rather a trendy length. Note too the rather significant hem on the overdress. I've marked it in the plate. The double layer would help the hem round out nicely, and almost forms a decorative touch, in that the doubled fabric will create a shadow effect.


That's that. Next time, and really, I do mean it - construction. I figured out the construction and wrote it all out before making the dress. It was a good plan to do so, and it worked, even if I did spoil things by wearing bad stays. The roots of the dress are still good.