 |
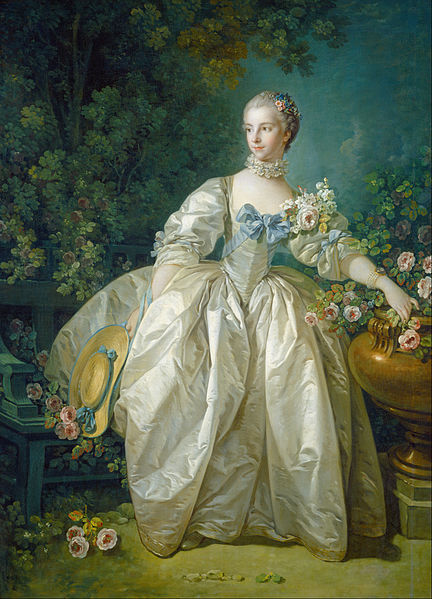
| The type of look I am planning to emulate. |
Longing for some years for a longer-waisted 18th century silhouette suited to 1740s-1760s half-dress wear, this January I finally found the gumption to attempt a pair of stays to create the look.
Stays weren't something I wanted to make, particularly. The local landfill now hides an aborted pair of 1790s stays, and I was never wholly happy with a pair of hand-sewn 1790s transition stays I spent a whole season hunched over and that bear specks of blood yet where a needle went AWOL mid back stitch and bit me more than a couple of times.
Yet plumbing Etsy, Ebay, and everywhere else of an evening -- okay, lots of evenings :) -- looking for a pair to purchase with the proper styling, turned up nothing in my range. There aren't that many pre-1760 18th century stays out there to begin with.
It was either make them or remain restless and fidgety with what I have.
Frankly, in the time I spent browsing, I could have made a couple of mockups. Pfff.
To write as
Kitty Calash sometimes does in homage to early heroines: Reader, I was afraid.
Obsessing over an artificial silhouette
Then, over the winter, I read
Patterns of Fashion 5, and became a little obsessive about the pre-1770s stays in the book and how they could be designed:
- the tendency for a long front point, or "peak", to stretch the front of the torso to a truly long-waisted silhouette
- the long, steep rise from the peak at bottom front to the top of the hip at the side of the stays
- the frequent use of horizontal boning to create a gentle bowed shape at the top of the bosom and down the front
- frequent packing of paper, cardboard, and buckram into the front to build out the bowing, especially towards that bottom peak.
It's an unforgiving, stiff, and entirely artificial look. As if a lady were a ship's figurehead and her stays an oaken prow on the charms of which her admirers were dashed aside like an ocean wave.
The plunge had to be taken: I am making such a pair of stays, whether they succeed or fail.
The silhouette in the painted portrait record, 1740s to early 1770s
The way we tend to do these days, what with so many museum collections online, I disappeared down a deep rabbit hole repeatedly, looking at portraits of roughly the middle third of the century and saving them, with notes, to a swiftly growing Google Docs file. I won't bore you with it, as rereading it, I bored myself with the same revelations, still apparently revelatory four or five screens and iterations later. Well, yes I will. If boredom strikes, please roll your eyes and skip the mass of this post.
A note: I'm perfectly aware that artistic conventions and the wishes of sitters to appear as close to sartorial ideals as possible affected the way painters portrayed their sitters in this era. Even so, I believe that painters would frequently portray fashion details in this era because they were parts of the accepted social world and because the little details were important to sitters' senses of themselves, whether for status and respectability, pride -- whether tamped down or allowed to flourish -- or other reasons that we don't know.
As you will see, the outlines of the stay shapes that POF5 displays, have a great deal to do with the silhouette of the outfits the women are wearing.
Image No. 1: Woman in Blue, by Jeremiah Davison

1740s. The highly elongated line of the stays and thus the bodice is clear.
The stays fronts are bowed out a little all the way down.
It seems that the entire skirt dips in front so that it's tilted a bit, to ray out round the front peak, and make the wearer look even longer-waisted. Whether that's the artist's conceit or whether the skirts could be shorter in front and then rise along the waistline, I don't know.
Do you see how the little stems of the posy she is wearing appears to be woven into what look like close-ranged stay laces?
See
http://www.costumecocktail.com/2015/08/01/woman-in-blue-1740s/.
Image No. 2: The Staymaker, from The Happy Marriage series, by William Hogarth

1745. A mostly similar visual situation applies here as in image no. 1, but the steep vertical rise from the stays' front peak to the high hip is quite obvious, because we are seeing the woman's figure from an angle. The stays
do appear to just barely shift outwards just at and below the waistline.
See
https://www.tate.org.uk/art/artworks/hogarth-the-staymaker-the-happy-marriage-v-the-fitting-of-the-ball-gown-n05359
Image No. 3: Mrs. John Edwards (Abigail Fowle) by Joseph Badger

1750s. Stays delineate the end of the bodice. The front appears very flat, but long.
See
https://www.mfa.org/collections/object/mrs-john-edwards-abigail-fowle-32156.
Image No. 4: Sarah, Lady Innes, by Thomas Gainesborough
Circa 1757. Very long stomacher, with bowing down the center all the way to the bottom of the stays. The stomacher does not curve out or flap out over the belly: it is clearly following the line of the stays. The gown robings are set quite far to each side of the stays, so that from the front the stomacher might have looked a bit wider than in the 1740s.
See
https://www.mfa.org/collections/object/portrait-of-horace-walpoles-nieces-the-honorable-laura-keppel-and-charlotte-lady-huntingtower-524274.
See
http://www.historicalportraits.com/Gallery.asp?Page=Item&ItemID=1106&Desc=Mary-White-|-George-Romney
Image 5: Three daughters of John, 3rd Earl of Bute

1763-4. While the overall line is not terribly long, and it's impossible to tell if the eldest child's stays are bowed down the front, her apron is clearly pulled down below the end of her stays/stomacher, to achieve a low end point, and there is no outward bending or flapping of her stomacher apparent.
See
https://www.tate.org.uk/art/artworks/zoffany-three-daughters-of-john-3rd-earl-of-bute-t07864
Image No. 6: Portrait of Horace Walpole's Nieces: The Honorable Laura Keppel and Charlotte, Lady Huntingtower, by Allan Ramsay

1765. Again, a longish waist in stays and bodice in the case of Charlotte, Lady Huntingtower. The gown robings and stomacher are wider at the top and perhaps narrower at the bottom, for a more pronounced vee shape. There is a bit of an outward bowing down the front of the stays. The effect is still long-waisted, though less strongly so than in earlier decades.
See
https://www.mfa.org/collections/object/portrait-of-horace-walpoles-nieces-the-honorable-laura-keppel-and-charlotte-lady-huntingtower-524274.
Image No. 7: Mary White, by George Romney

1760s. Here the stomacher ends with the stays, and so do the robings. There is bowing across the stomacher all the way down. The line is still long, but less forcefully so.
Se
https://www.allpainter.com/george-romney/portrait-of-mary-white-handmade-oil-painting-reproduction-250963.html.
Image No. 8: Queen Charlotte of Mecklenburg-Strelitz, by Johan Zoffany

Here is Queen Charlotte from the 1760s. She may have been long-waisted to begin with, but again, the long line is emphasized -- it helps her look willowy -- but without the willow's tendency to sway!
The stays fronts are shown relatively flat.
The artist's perspective seems to be a little odd or off when you compare the left edge of her stays to the right edge (looking at her). The right edge shows a more vertical line than does the left
The Queen's stomacher appears to slide a little -- a very little -- outwards at its base.
See
http://thedreamstress.com/2017/12/queen-charlotte-detail/.
Image no. 9: Madame Bergeret, by Francois Boucher
This 1760s portrait of Madame Bergeret shows her wearing what I believe to be covered stays (stiff bodice), I would think, but it’s in the 1760s, and again, the line is long, with a bowed front all the way down, coming to a bit of a sharp edge in the center. French and English fashions varied a bit, but it's still useful to look at more than just English works.
See
https://www.nga.gov/collection/art-object-page.32681.html.
Image 10: Queen Charlotte with her children and brothers, by Zoffany

1771-2. It is difficult to see details, but I am pretty sure that the mother's stays are straight to the bottom and that the stomacher is not allowed to flap outwards much, if at all.
See
https://upload.wikimedia.org/wikipedia/commons/2/20/Charlotte_children_brothers1771-72.jpg
;
https://fr.wikipedia.org/wiki/Fichier:Charlotte_children_brothers1771-72.jpg
Image 11: The Gore Family, by Zoffany
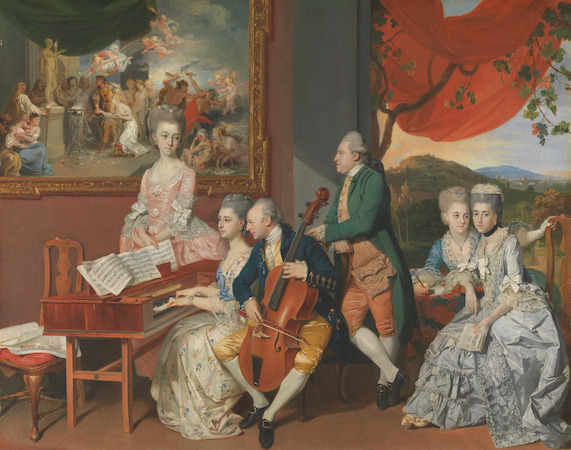
Circa 1770s. Even then there are long-waisted, bowed front, high hip-rise looks. I rather think this is a formal fashion.
See
https://commons.wikimedia.org/wiki/File:Zoffany_Gore_Family.jpg.
Not all paintings and drawings show this particular fashion, but many do, especially among more fashionably attired women.
Towards a stays concept
As shown in the selection of paintings above, a long, rounded or sometimes flat torso appears to have been a fashion. Many of the bodice sections are so long in the front that room for the hips must be created by raising the line at the stay's sides acutely to the top of the hip. When painted in dresses that do this, women sometimes look nested down in their skirts. To emphasize length and narrowness further, the stomacher is narrow and acutely isosceles-shaped.
The stomacher often, but not always, shows outwards bowing right the way to the bottom. The bowing can be a a gentle curve or even seem to have a bit of an edge at the center vertical line. Is that a painter's conceit or way of showing the bow front?
By the way, if you examine the way the gowns are worn, it appears that the stomacher, pinned to the stays, and the stays, sit atop the top of the petticoat. We know that to be the case with covered stays, as in Madame Bergeret's portrait. This ensures that the long front bodice line is not interrupted. I suspect that the pinning must be very careful indeed so that the stays will not show to the sides or at the bottom of the stomacher.
The stomacher can stop at the bottom of the robings, if robings are worn, or fall below them. An apron, if worn, may be pinned to the bottom of the stays so it dips and does not interrupt the line, or it can sit under the stays...it can be really hard to see details in the paintings.
The petticoat may be cut to dip in front...although that is a subject for another time. We know from research that
Hallie Larkin has done that aprons were cut in this away. Alas that her "Da Dip" post is no longer online!
So.
To attain the look, I must not only build a pair of stays with the characteristics listed at the post's beginning, but also make sure that any gowns and petticoats I make, are designed and put on carefully to achieve the look in the paintings above.
What I most definitely do not want is the silhouette I displayed last fall while playing a shepherdess for Halloween.
The stays under this dress are 1770s. They come just past my natural waist and the front doesn't cover the belly area too far. The dress built over them has a relatively natural, or even a slightly high, waistline. The crescent-shaped hip pads sewn to the sides of the stays are set just below the natural waist, and force the gown and petticoat out at a higher position than I'd like them to sit. The apron, tied over the top, sits at the natural waist and cuts the vertical line short.
The effect is undress, as befits a shepherdess, but it's not, well, it's less slimming than it could be.
I could, of course, have tied the apron under the stomacher, but the stomacher is simply a flat, lined piece of fabric. I don't think the visual effect would be lengthened much, if at all.
Time for another approach.
The Concept: Pattern and Pattern Additions

Oddly enough, I didn't feel that any of the
POF5 stays patterns were right for the project. Instead, I returned to the Norah Waugh's
Corsets and Crinolines and her 1740s stays pattern. The picture below comes from Pinterest and has no attribution. The pattern has the requisite length, enough of a pinched waist and a relatively narrow front with a bowed stomacher, and it closes both front and back for greater ease in dressing.
If you'd like to see some made by costumers, may I direct you to
The Merry Thimble and to
Isabel Northwode and
Before the Automobile, of course.
I have kept to the pattern itself in the main, but now that the initial fitting of a boned mockup is complete, I am making some changes to the pattern. All of the changes are in response to the stays shown in
POF5. I am sorry not to be able to show pictures from the book, but surely that is understandable.
- I must make the straps sit further out, and more horizontally, more like court stays. This way the straps will not show in the neckline area.
- I will round the bottom peak (point) a wee bit so that it better matches the bottoms of stomachers, which are usually rounded.
- I will add two small wings (see below for photo), one to either side of the point, reinforced with buckram. They will, I hope, hold the petticoat inside, while allowing the point of the stays to sit outside the petticoat. Several 18th century stays in POF5 include them and I think they are useful.
- Add a pocket for a stomacher bust to go from the top rail almost to the bottom. The busk suppresses the belly and reinforces the stomacher to enhance its vertical line.
- Increase the curve of the horizontal rails as they near the bottom of the stays.
- In the bottom fourth of fifth of the stays, add multiple layers of buckram to strengthen the area. In the peak itself, add a balsa or paper-mache piece that holds the shape. Again, there are stays in POF5 that do so.
- Wrap all skirts (tabs) except the front two in leather rather than bind them. They won't be seen and will be stronger so. Again, per POF5.
Here is a pair of late stays with little wings to the side of the front peak. I do not know the provenance: the picture was posted in LiveJournal (
https://corsetmakers.livejournal.com/2174560.html). Note the very long, lean, straight line.
Exactly what I am going for.

Side subject: examples of dresses mounted in exhibitions
I did look at 18th century ensembles as mounted in exhibitions, but on the whole, did not find that the effects mirrored the straight-lined stays we have been looking at, and so, I did not spend an inordinate amount of time on them. Here are three examples.
Example No. 1: from Casanova Exhibition
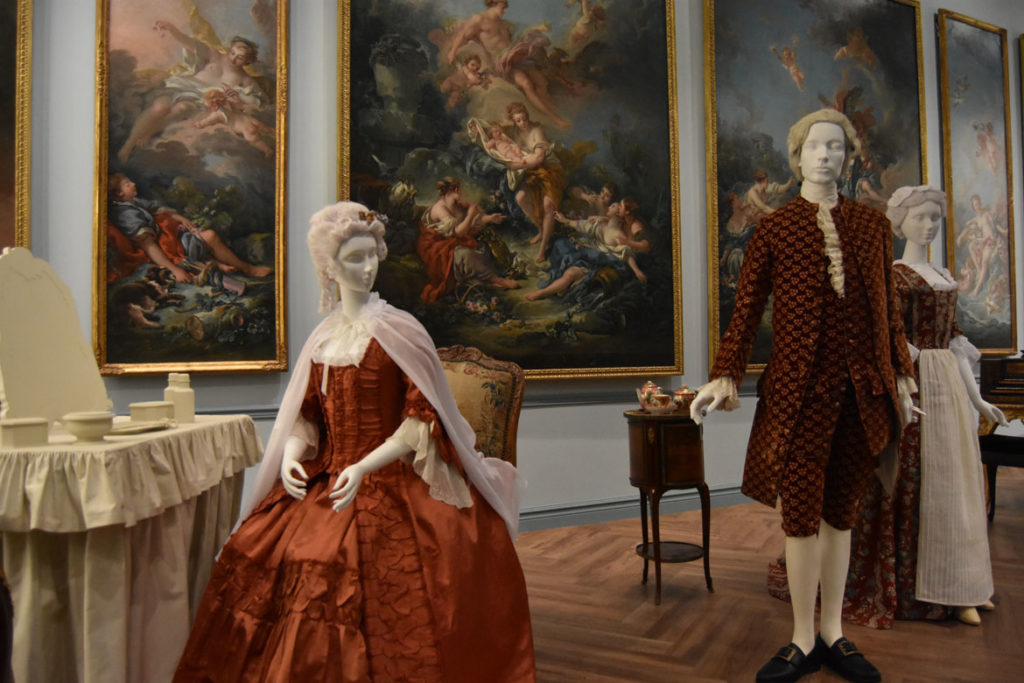
The line is long and relatively narrow. However, notice that the robings and stomacher are allowed to bend -- either the mannequin has a shorter than wanted waist, or the severe line is beginning to change to a rounder, shorter one.
See
https://gregcookland.com/wonderland/2018/10/05/casanova/
Example No. 2: Woman's Dress and Petticoat, Europe, circa 1745. LACMA
The way this dress is mounted on the mannequin, it is hard to tell how the dress should actually sit. The waistline appears natural, and the dress has a more pronounced vee shape than I would expect from paintings of the period. Furthermore, the stomacher is allowed to curve out on the belly.
See
https://collections.lacma.org/node/214636.

Here is a detail from the same dress, focusing on the embroidered stomacher. If you have read Patterns of Fashion 5, you will have seen examples of the tabs (known in the book as skirts) and the spade-shaped front point, which mimics the points of early stays.
I might well be in error, but I'd wager that as originally worn, the stomacher followed the line of a longer-fronted pair of stays, so that they did not bend at the waistline, or bent barely at all.
Example No. 3: Dress, 1750, Metropolitan Museum of Art
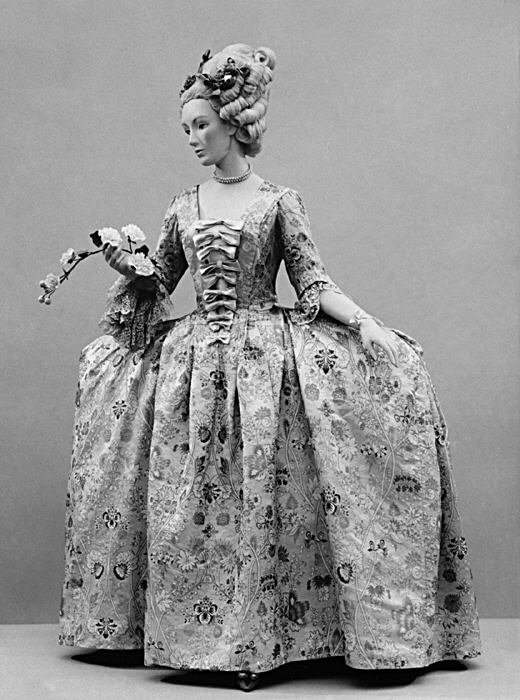
An old photograph, styled differently than we might do today the lines of this dress still seem quite clear to me. The stomacher area is narrow, given the narrowness of the ribbon echelle. In this mounting the echelle curves out towards the front a bit at the bottom.
Once again I would think that when the dress was first worn, the stays would have been rather long, and bowed down the front, coming to a narrow point covered by the last bow in the echelle. This would throw the echelle and the entire torso into greater relief, and make the waistline appear narrower than it already is.
Mountings similar to the above are common throughout museums. It is not my place to criticize them. I worked at the Metropolitan (in Membership, typing up ledgers for a living) for a few years just after of college, and remember that even then, in the age of blockbuster exhibitions and fabulous expansions, money was an issue. Today the situation is even tighter in many places, and the prospect of tweaking underpinnings to match the projected stays style under each dress mounted would be quite a project.
Next time?
Building the boned mockup, and its first fitting. Boy, was the work worth it.
Morgan Donner, thank you for the recommendation to make that effort...
Now, outdoors to sort Nina's new fleece so I can send it and several others to the mill to be made to roving!
 |
Nina, a year or so ago, in full fleece, playing corn dog.
Actually, she is feeling very Soay sheep-ish, and so all frisky and fluttery.
Okay, her fleece may flutter. Flying corn dogs don't. |


 Where the Stays Don't Fit, and What To Do


