Next weekend is our annual Ladies' Tea Guild annual retreat, and I am in a hurry to finish a big-brimmed Edwardian hat for the occasion. In usual fashion, I procrastinated on completing what I thought would be the difficult part of the hat preparation: steaming a plain hat into the required shape. What a surprise, then, when the steaming and shaping process took less than 10 minutes, and was completed with burns or tears.
The Effect for Which This Hat Aims
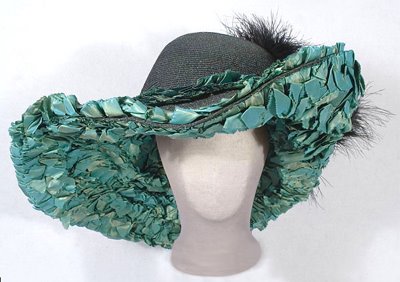
One of the prominent antique clothing dealers offered a mousquetaire-style hat recently. Oh, for a glimpse of D'Artagnan! One side of the wide brim is turned up raffishly, while the rest of the brim turns down to frame the face. The requisite plume fluffs out the back, too (although if you look closely, the plume is actually an entire, and I hope artificial, bird). After the reference to dashing young bloods, the milliner turned from 17th century France to tastes entirely feminine, for she, and I am quite sure it was a she who added this extra bit of drama, ruched the
entire underside of the hat in iridescent peacock-blue shot silk that goes copper in some lights. To balance things out, a row of ruching adorns the top of the hat as well. Voila...a marvel.
Above: ruched Edwardian wide-brimmed hat. Image from Vintage TextileThe Hat Base, Pre-SteamingFor the hat base I am using the High Crown Straw Hat (SH-955) sold by
Jas. Townsend and Co. It has a 6-inch brim. The hat is quite well made, as advertised, although one should be aware that it's still a country hat...the straws are coarse-ish. This not your couture hat with straws as thin as buttonhole thread.
Steaming the Hat
To steam the hat I followed suggestions made by kind members of the Sense and Sensibility Patterns Forum.
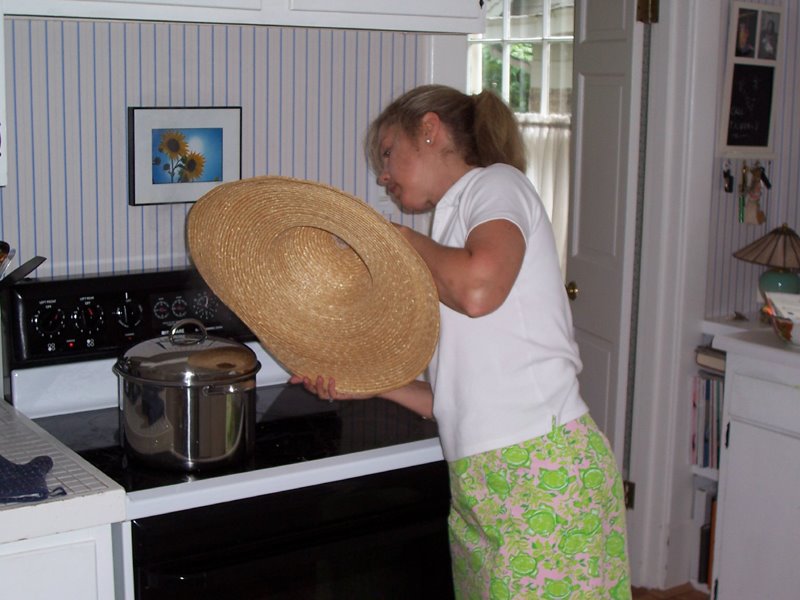
At left: steaming hat brim to soften straw fibers so they will bend. The steam is escaping from a small hole in a pasta pot. Click picture to see larger shot...it shows amount of steam coming out.Here's what I did:
Not having a teapot to create steam with, I found a large pasta pot with a tight lid but a closable hole cut in it to let excess steam escape.
- Filled it 1/3 full with water, and heat it until it was at a fast boil, and steam was merrily purring out of the hole.
- Held one small section of the hat brim up very close to the escaping steam to soften the straw.
- About 10-15 seconds later, pulled the hat away and tested the straw's ability to be shaped by gently forming an inward curve. What do you know? The straw obeyed.
- Bit by bit, held more sections of the hat brim to the steam and shaped them.
- Every so often, ran my hand around sections already bent, and bent them again just to make sure the bend would stay.
- Note: it's good to wear an oven mitt if you keep your hands near the steam long. You could get an awful burn quickly if you're not careful.
- As the straw cooled, the shape remained.
- For the upward tilt on one side, I held the hat brim over the steam again and bent the straw up instead of down. Had to hold the tilt in place for several minutes while the straw cooled.
- Re steamed and inward-bent the sections of the brim closest to the upward tilted part so they'd not start to tilt up too.
- Let the hat cool completely, upside down, so as not to stress the new curves on the brim. Will not start trimming it for a day or two.
The whole process took 10 minutes.
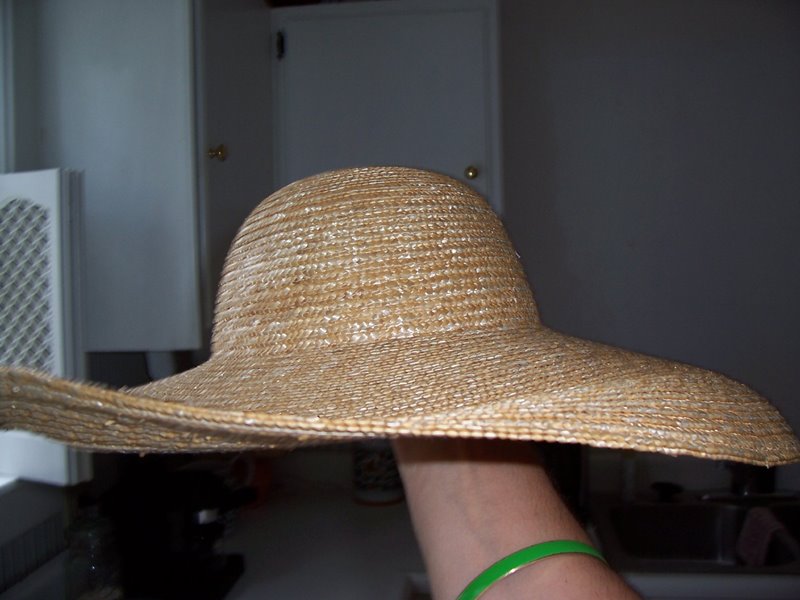
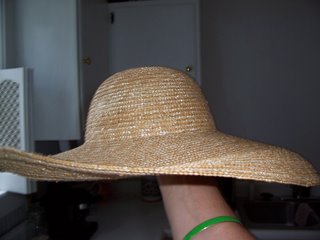 Here's the result! Next step: trimming. That's for another post.

 Oh, seven or so months after I finished and wore this straw hat to tea with our society at Flag Fork Herb Farm, here finally are pictures. Over a year and a half ago I'd started the hat and steamed it into shape, and had begun the laborious task of pinking and then ruching cream-colored dupioni silk to the entire underside of the hat brim and a bit of the top.

 Since the hat design is meant to evoke 1910-1910, the era of enormous, grand, over-the-top hats, the era which also saw a pencil-thin dress silhouette to balance the wide toppers, I wore a narrow-lined dress. However, since I'd had those twin boys two months before, the silhouette was less slim and appealing than planned. Ah well.