
 |
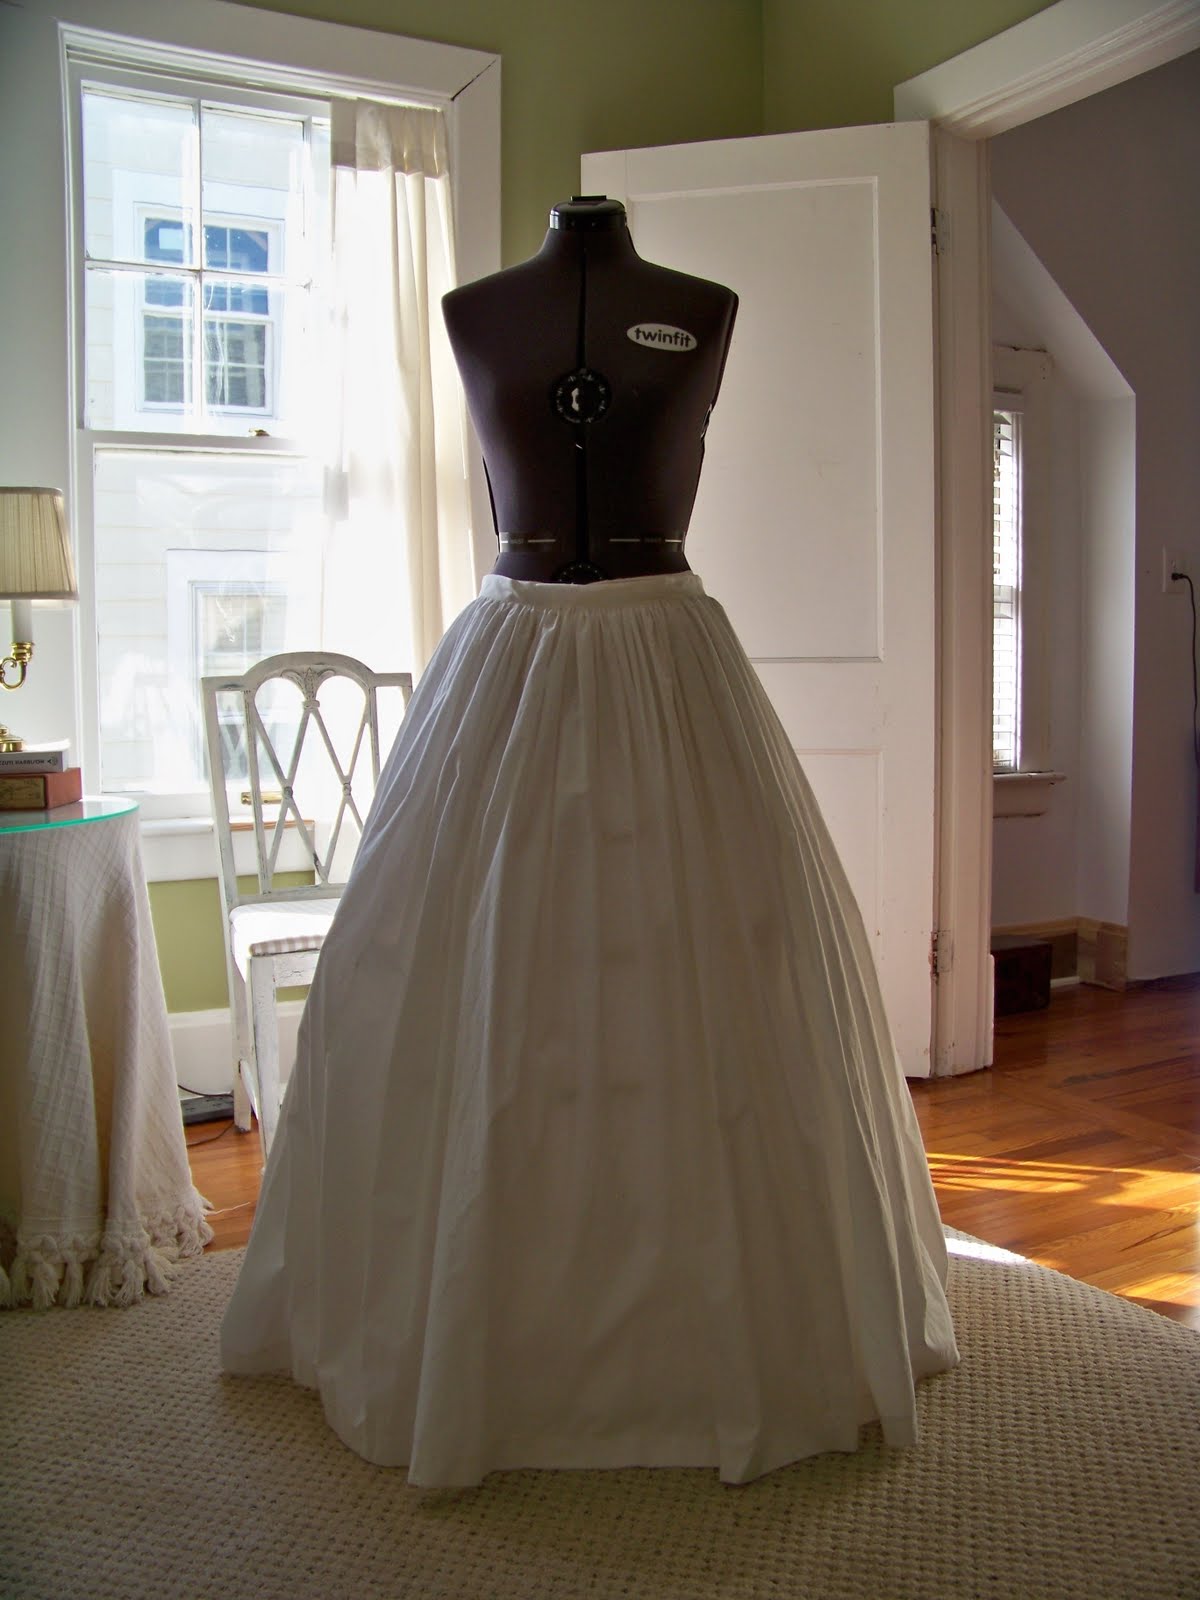
| Yes, the petticoat needs shortening. |

The petticoat serves as the top petticoat, and thus is designed sans tucks or flounces, which might mar the skirt surface above.
As always, click on the photos to see them full size.
A plain muslin petticoat does not sound like the most exciting garment, on first blush, and surely, with no whitework embroidery or period rick-rack lace treatment at the bottom, it looks severe. What it does have, however, is beautiful lines, created by the stroked gathers that are whipped to the waistband.
The stroking and process creates the prettiest eensy-weensy, teeny-tiny pleats imaginable, while the whipping process helps to reduce bulk in the waistband.
Photo: the completed petticoat. It's too long; I was making two petticoats and cut one long to add tucks to, to serve as a second, under-petticoat, and believe that I sewed that one up as the top petticoat by mistake.
Plain gathering, stroked gathering, gauging, and pleating are all methods that were used to take in the fullness of skirt panels to make them fit a waistband. The stroked gathering results in a tailored, clean look rather like gauging.
In the rest of this post I want to demonstrate, in pictures, how I made these stroked gathers and completed the waistband.
Photo: detail of the petticoat waistband, showing the stroked gathers whipped to the waistband.
Until recently, it wasn't terribly easy to find out how to do this. While there are descriptions of stroked gathers in a number of period sewing manuals, how they could then be set into a petticoat waistband was not clear at all. I ended up reading and rereading a series of threads on The Sewing Academy board run by Elizabeth Stewart Clark, as other people were having similar questions. Then, I made my petticoat, and checked with the board to see if the process I followed was accurate. Sure enough, some of the expert folks on the board replied that based on their research and examples in their collections, it was. Phew!
 While I was making the garment, Elizabeth's rewritten manual, The Dressmaker's Guide: 1840-1865: Second Edition came out, and I ordered a copy. I had just finished my petticoat and found in the book, to my happiness, complete and clear directions, illustrated, for creating the same sort of waistband. The book also detailed several other methods of achieving a low-bulk waistband. Therefore, this little tutorial I consider as a sort of unofficial supplement to the method Elizabeth describes so much better than I can.
Bye the bye, I cannot recommend The Dressmaker's Guide enough. It is beautifully and good-humoredly written, the illustrations are incredibly clear and useful, and while it does not cover outerwear or millinery, it does instruct the reader, step by step, in drafting/draping and making undergarments, including corsets and cage crinolines, and dresses, with several options for each undergarment and a wide array of treatments for dresses. There is also a very long, very detailed section on hand-sewing construction techniques the way that the Original Cast, as she calls them, would have done them. The book has become a favorite adjunct to my sewing, not just for midcentury garments, but for period sewing in general.
The Tutorial: Stroked Gathers
A little background. I used Elizabeth Stewart Clark's free petticoat pattern at http://www.thesewingacademy.com/wp-content/uploads/2011/04/2010Petti.pdf (PDF file) to make up the basic petticoat. (In the new book, the petticoat section stretches from p. 153 to 184, and includes a myriad of details!) I seamed four 45" wide panels and hemmed the skirt, and got to the point of setting the gathers. The method described in the free pattern is the most basic one that was used, and does not produce stroked gathers.
Here begins the tutorial.
Step 1
At this point, I measured the raw petticoat top into eight sections by folding it in half, then half again, then half again. I marked the divisions with pins. I decided that rather than try to run two very long gathering threads along 180 inches of fabric, I would take on the task in these eight sections. That way I would have less trouble handling long threads, and I could easily break up the task into parts to be completed over several days' or weeks' (as it proved) time. Elizabeth does the gathering in one step; this is where what I did varies from her method. The potential downside of my method is that you have to be very careful at the ends of sections to make them perfect so that one section's gatherings blend in with the next sections, with no obvious break.
So I ran a gathering thread a quarter inch below the raw top of the petticoat, through the first section, and eighth of the petticoat. I filled a needle with 4-6 little nips of fabric before pulling the thread through. I measured the first stitches with a hem gauge to make sure that they were about 1/8" long, and memorized what that length looked like on the needle.

Then I ran a second row of gathering stitches a quarter inch beneath the first row, matching the stitch length as exactly as I could. (You have to do this or your little gathers won't fold into even pleats.)
Then I ran similar gathering stitches through the rest of the panels. First rows always went fast, about 10 minutes per panel, but second rows were slower. Since I had memorized how much fabric to nip up each time on the needle, I let my muscles keep the stitching regular and regulated, but kept an eye on what I was doing and if the stitches in the second row stopped matching those above in length and position, I pulled them out.
I reckon that the whole gathering stitch process took a half hour per panel, times 8 panels.
Step 2
Next I prepared the waistband. Per the suggestions on the ESC board, I took the waistband fabric and turned up a half inch to one side. I basted it down so it would hold. When period sewing, I am usually far from an iron, so use finger pressing and basting and pins.
Then I measured and marked it into eight sections, leaving extra at the end for the closure per the original directions.
Step 3
Now it was time to attach the petticoat to the waistband. As with the gathering process, I handled this a single panel at a time. So for each panel, I pulled up both gathering threads together, and the material collapsed into even tiny pleats, as you see in the image.

Once the material for that panel was gathered, I pinned it to a section of the waistband, wrong side to wrong side. This means that the right side of the waistband, with the raw edge of the fabric turned under, faces you. The gathered fabric is put up underneath the waistband and pinned. Yes, I used a needle to pin it with: it was what was handy.

Then I fit the gathers in the petticoat to fill the space on the waistband. Almost invariably this resulted in very tightly packed gathers. In this photo below you are looking at the underside of the waistband and the underside of the gathers.

Then I stroked the gathers. I worked on the back, wrong, side of the waistband and gathered petticoat. I stroked the head of the needle in the little valley between each gather, dragging the needle head lightly downwards from the top of the petticoat towards the body of the skirt. Just to reiterate, I used the head of the needle, not the point. If you use the point, you could possibly damage the fabric a bit.
I noted that not every gather needed stroking, because most gathers fell into neat straightness by themselves. Only a few gathers were bent, or caught under another gather, or were poofing out instead of valleying in like they should.

I then turned the petticoat over so that the front of the waistband was on top (with the turned-under edge to the back: you can see the shadow of the edge through the fabric) and the gathers underneath. Not all gathers looked even from this side, but of course the top of all those gathers is underneath the waistband. I knew I needed to do some more stroking further down into the skirt. Yes, that is a needle serving as a pin.

Here I stroke each gather again from the front side. I am using a size 10 needle, which is very small and narrow, so it's hard to see, and the picture is blurry to boot because I was using the camera timer and holding the camera with my chin :) It may look like I am pushing the needle upwards, but no, I am drawing the needle head downwards.

Next I turned the petticoat so that the gathers and band were pretty much perpendicular to me, and started to stitch the VALLEY of each gather to the waistband. To do this I first caught a tiny bit of the fabric in the valley of the gather onto the needle, then pushed the needle through the top of the waistband down through it, bringing the needle up through the underside of the next gather's valley. I am left-handed, and for some reason couldn't manipulate the needle any other way.

I followed this process for all eight panels. It was time-consuming, but pleasant work.
Step 4
After attaching all of the panels, I turned over the waistband, and attached it to the other side with small (1/16" to 1/8"), even running stitches, again per the ESC board's advice. I could have achieved an even better result by repeating the whipping process on the back side of the petticoat, but I was out of time and needed the petticoat for an event.
Then it was time to add the closure, and I was done with the petticoat.
Once again, my great appreciation to the ESC board for their warmth and advice.
11 comments:
I'm going to have to read this a number of times to be able to follow it, but Elizabeth's book has just made my Christmas list, and I'm very excited about making one of these petticoats.
If I read this right, they are basically just little tiny, unmeasured cartridge pleats. Does that sound correct?
wow! You amaze me, Natalie! I was exhausted from just reading about the process! The petticoate is beautiful...
What a marvel you are! This looks so challenging and intimidating to me....
Happy Thanksgiving to you and the family:-)...and a Happy belated Birthday as well...
Great job on the stitching and this tutorial! You've also done a great job on adapting the way you hold your work and angle the stitches, to get the right process in a manner that's comfortable in your hands.
From one OCD stitcher to another: good work!
Thank you, everyone! The work actually isn't difficult at all, once you figure out how to do it. It's just time-consuming. If you like delicate handwork, such as embroidery or beading, you may truly enjoy doing stroked gathers.
Aloha Aroha, indeed, stroked gathers are a close relative of gauging! if you can gauge, you can do this easily. It's just on a much smaller scale, and without a turn of the fabric at the top.
Many thanks again,
Natalie
You put my poor petticoats to shame! Wow, once again I am awed at the detail you put into your work - even a humble petticoat. Yours is truly a work of art. Thanks for explaining the process so very clearly. I've only used stroked gathers on small things before, never anything with lots of gathering like a petticoat. I will need to try this over the winter as my last petticoat is now biting the dust.
Dear Sarah Jane,
No, not to shame in the least. Can I draft my own patterns, based on images from a book? No, not yet, and maybe never :}
Really, stroked gathers are a lot like gauguing, and can be a pleasure to do, in that as you focus on the work, the rest of your mind can relax. That is, if the tads are asleep. When they're awake I do not attempt detail work :}
Very best,
Natalie
It looks very similair to cartridge pleating except for the way you attach it to the waist band. I've always avoided cartridge pleating just because of the time of handsewing, I'm not a big fan.
Dear Katy Rose,
Yes, stroked gathers have a lot in common with cartridge pleating. Many people find doing them infuriatingly precise and so very slow, so there are lots of people who avoid doing it like the plague, but it's those two features that I like, perhaps because for me this sort of task is a stress reliever. It's small scale, I can control it, and the result is pretty. :}
For Regency projects I pretty much handsew everything anyway. Again, I like the control, the feel of the fabric in my fingers, the slight puckering in the result that subtly says "handsewn". Plus, it's eminently portable.
It's a different story with other eras. For Edwardian? The treadle is my very good friend. :}
Very best,
Natalie
The link to Elizabeth’s page is broken, here is one that works: http://www.thesewingacademy.com/shop/
Thank you, Aimee! The heads up is most appreciated, and I will repair the link right away. Hoping that you found the tutorial helpful.
Very best,
Natalie
Post a Comment