
 |
| Laura wears her open robe at the Jane Austen Festival Ball. She is on the far right. |
Now it's time to do so. Over the last few days the original post (Part 1) has been seriously expanded, with a great number of details about construction.
This post will finish the robe's construction.
A reminder note: this was a dress that Jenni and I designed and figured out the construction methods for together, but that Jenni constructed. Our deal was that she'd do the initial reporting on the dress on her blog, Living with Jane, but that I would complete a detailed post on it here later.
It's mostly machine sewn, but with hand-sewn details. The construction methods were taken from Costume Close-Up, Costume in Detail, and Fitting and Proper. The conceit on this robe is that it is quite the transition gown, showing the high waist and flowing silhouette of the mid to late 1790s, but constructed using methods already in use for many years.
As always, please click the image to see a larger version.
The Sleeves
The elbow-length sleeve pattern came from the Sense and Sensibility ELC pattern. It's in one piece, with a small dart right over the elbow to curve the sleeve into the typical lightly bent shape of the eighteenth century. By the way, this cut leaves fewer wrinkles when the arm is bent.
Jenni fitted the sleeve toile rather tightly to Laura's arm so that there was little ease, for sleeves during the period we designed for usually were worn tight.
The sleeves are lined with linen, just like the bodice. To construct them, the darts are sewn. Then the lining and fashion fabric are treated separated. First, the lining piece is seamed up, such that the seam allowances are on the outside, away from the skin. Second, the fashion fabric piece is seamed up, right sides together, and then turned right sides out. The lining sleve is slipped inside the fashion sleeve, the seams matched up, and the seam allowances turned inwards, as below.
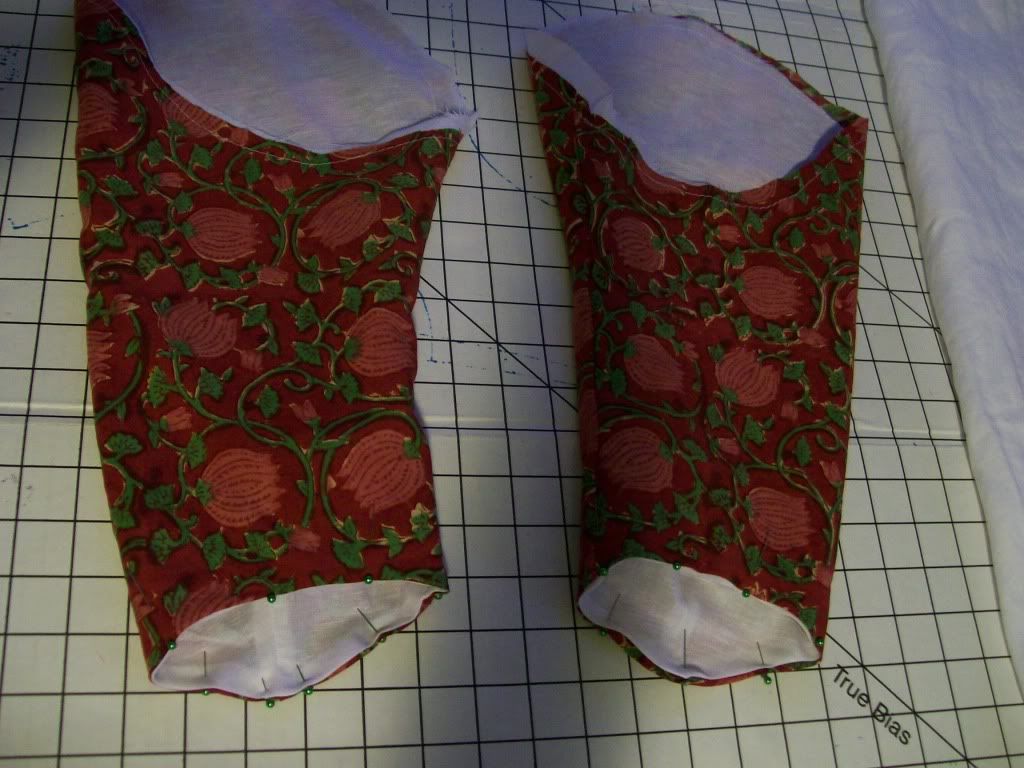
She could have folded the lining in a little bit more so that from the inside, a narrow band of fashion fabric would show and from the outside no lining could ever show, but we did not know this at the time.
I cannot recall how she finished the wrist edges -- perhaps with a small running stitch. I have since learned a special stitch, called in French le point a rabattre sous le main, which is a nifty top-stitch-cum-hemming stitch all in one. Clever needlewomen...one stitch performs two functions and saves a step! More on this stitch in another post, for I have prepared photos for a tutorial.
The sleeves were fitted into the armscye such that the sleeve seam is on the inside of the arm, perhaps a little above midway through the arm's thickness. Jenni then sewed them in place as you would a sleeve today, but leaving the inner seam allowance edges raw. This was common.
Finishing the Bodice
Finishing the bottom edge of the bodice was straightforward: turn the raw edges in, and whip stitch.
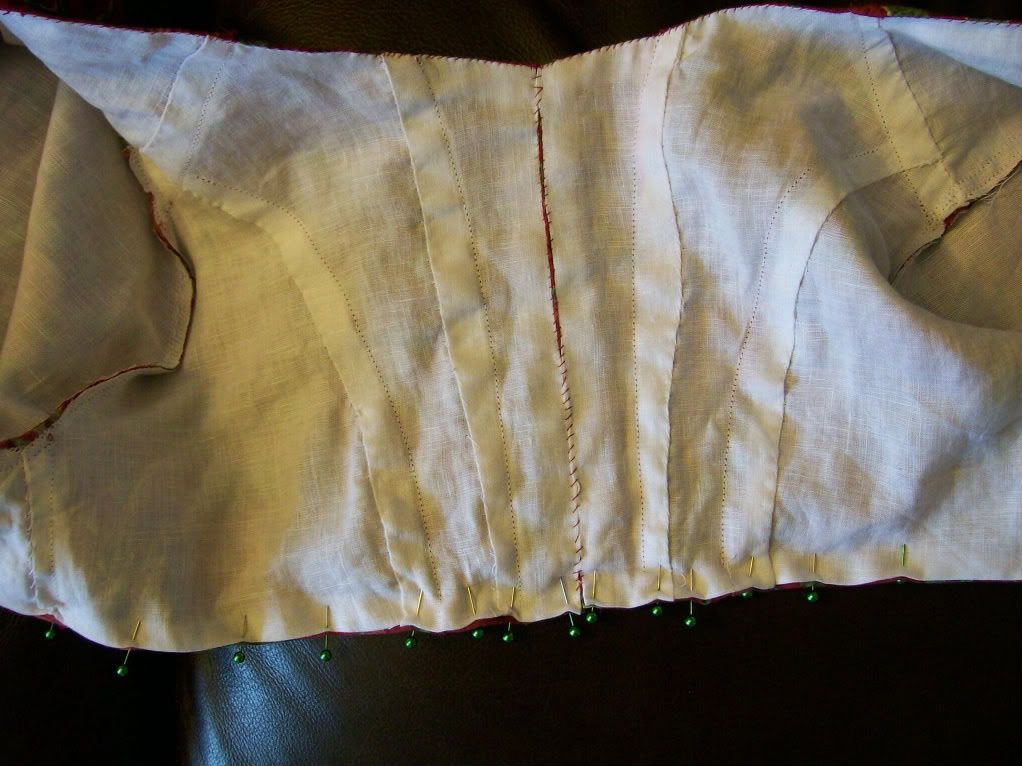

Again, a common treatment, and clever. The skirt could be taken off and renovated or redone without mussing up the bodice.
The Robe Skirts
The robe skirts are straight two panels of unlined fabric, seamed up the center back, and hand-hemmed at the edges: the edges turned under about half an inch, then turned again and hemmed down. Unlined, the robe flutters when she walks. Here is Jenni hemming the skirts while Laura looks on, at a sewing meeting morning at our friend Caroline's house, this spring. It was one of the first warm days. Funny that I should look at the photo on the evening of what is probably the last balmy, Indian-summer day this year.

Jenni cut the skirt such that there is no real train, for Laura wished ease in walking.
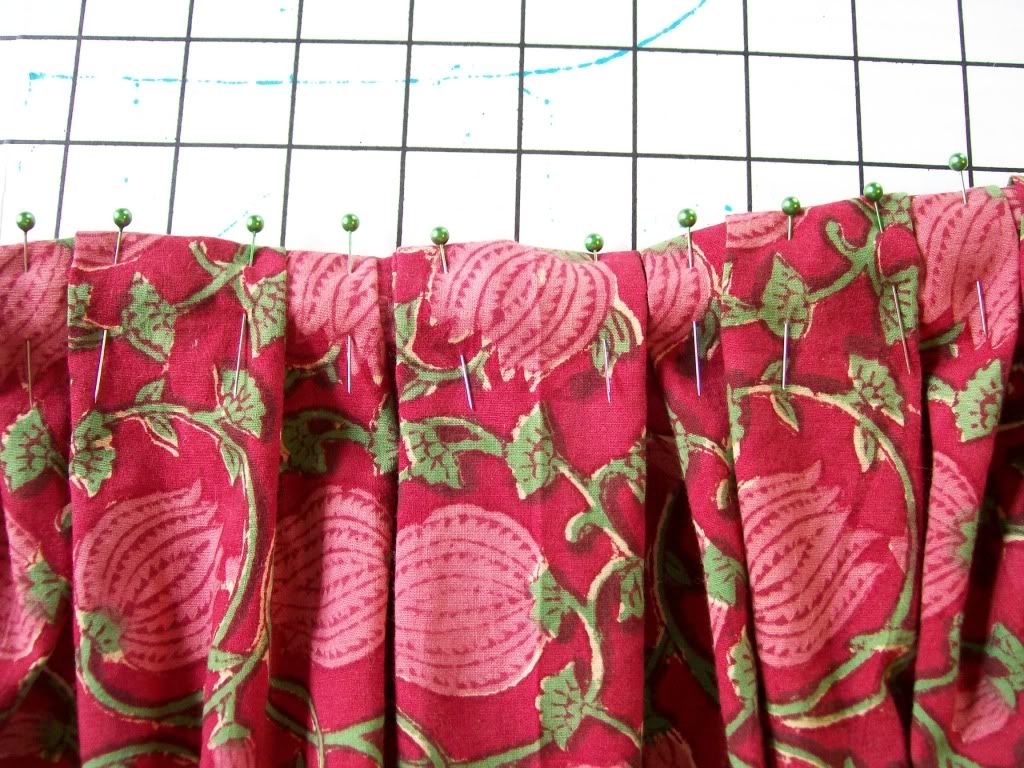
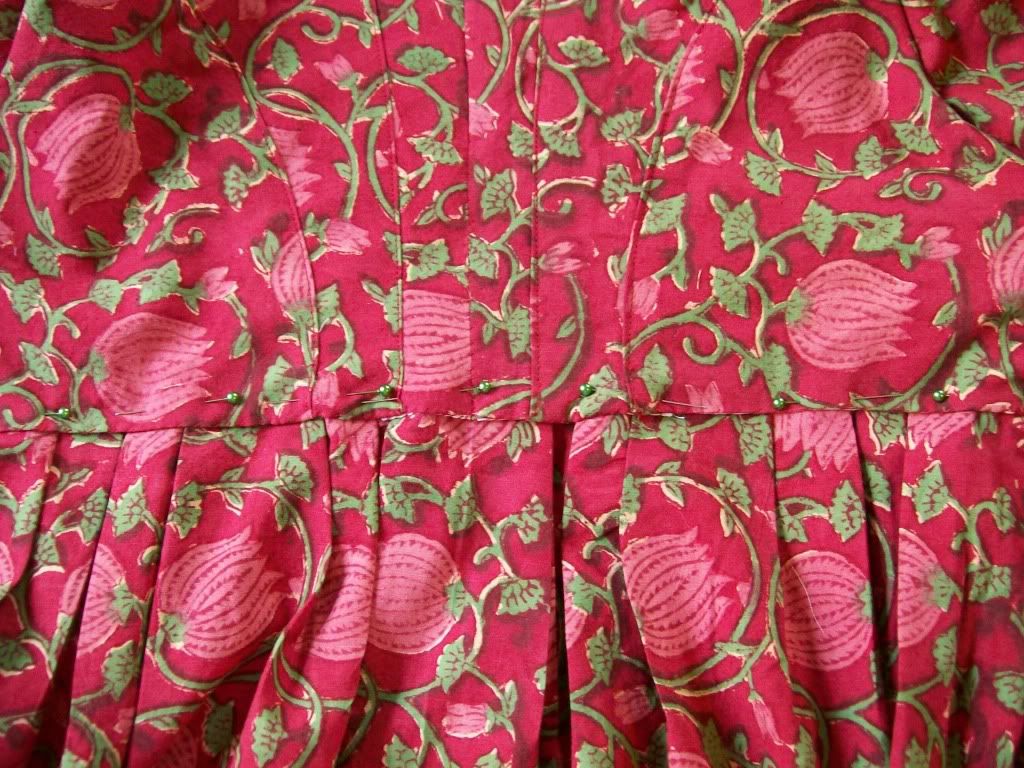
To attach them to the skirt, Jenni box-pleated them. She did so by eye, as many people do, using lots of pins. Here is a close-up photo:
Then she placed the pleated skirt on the outside of the bodice, and test-pinned it.
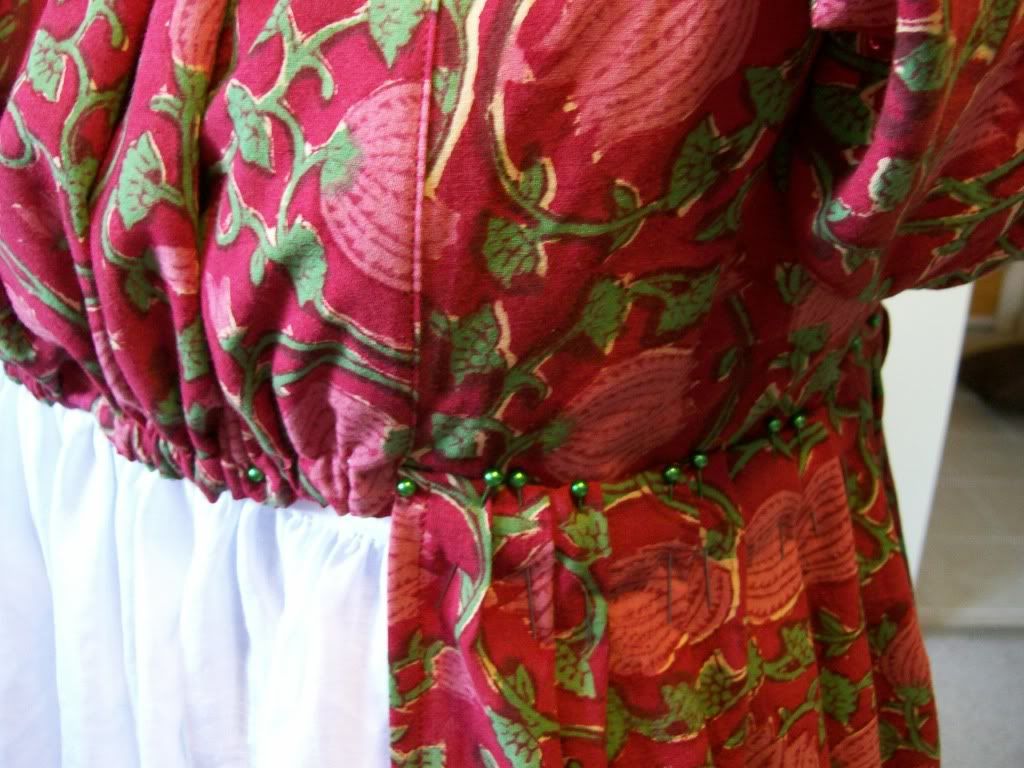
She then re-pinned it to the inside of the skirt. The pins set horizontally give you some idea of the depth to which the skirt is set. Then she top-stitched the skirt on to the bodice.
The Petticoat: A Separate Dress Diary
Because an open robe is just that -- open -- an outer petticoat must be worn with it. Jenni designed a white linen one for Laura.
The petticoat dress diary lives on her blog. A note: we are unsure at this point if petticoats worn beneath mid-1790s robes would have had the straps we used -- the underpetticoats certainly could be done this way. However, given the raised waistline, the straps would make sense, for without them, unless one boned the waistline or tied it unreasonably tightly, or pinned it tightly all the way around to the stays, the petticoat would have kept falling down. As for the placement of the placket at the back, this is simply the solution for now.
The Final Ensemble
Here is Laura in her robe and petticoat, with proper supporting garments, and a pretty turban. I very much like the portrait of her with her husband.


Here ends the dress diary. Next up, completing the documentation of the feather-light open robe I made for Polly, for which you have seen the first part, in 1795-1797 Printed Indian Muslin Open Robe for Polly, Part 1. I started documentation during its construction, and just as with Laura's robe, am only now finishing it. After that? As complete documentation as I can manage for my own white robe, both pre- and post- alterations...you may find lessons galore in the treatment of bulges and gaposis.
4 comments:
Just lovely!
Hurray!! It's finished!
Very pretty!
Thank you all! Delighted to see you here, Isis: I've been a happy reader of your blog for ages now.
Jenni, it took a bit to remember all we did. Very glad to get it all written down before it escapes the brain again like ether in a stiff breeze.
Belle, good to see you here, too!
Very best,
Natalie in KY
Post a Comment