Monday, August 21, 2006

A 1909 Edwardian Fitted Corset Cover Dress Diary, Part 1: Drafting

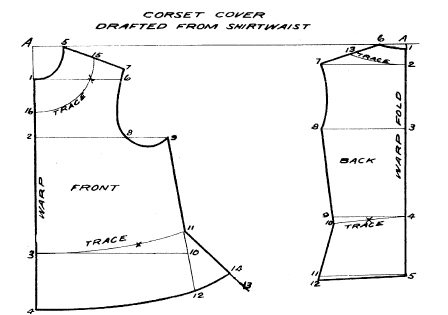
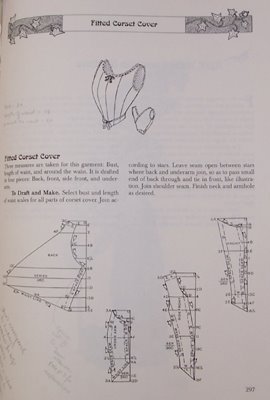
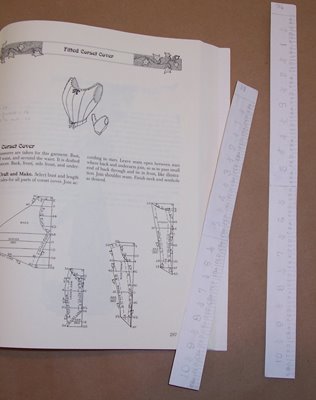
A more form-fitting corset cover being needed for an ensemble nearly completed, I decided to construct a fitted sleeveless corset cover from the January 1909 issue of The American Modiste. The pattern is reprinted in full in Frances Grimble's The Edwardian Modiste. So far, the project has gone amazingly well, excepting one silly mistake on my part. This Part 1 of the dress diary covers drafting and cutting the pattern. Left: The corset cover diagram and its pattern pieces. The cover fits snugly in front, and has no front closing. Instead, the two back pieces end in long ties; the back pieces cross over one another and the ties come around front and are tied. This means that the cover can be eased or fitted as needed. I liked that simplicity. Using the American Modiste Pattern The American Modiste patterns were designed to be used with a set of special proportionally scaled rulers. They are marked in proprietary units made of numbers and letters. Frances Grimble's book supplies you with printed copies of the scales in the back of the book. You pick the particular rulers that fit your measurements, and then use them to draft copies of the pattern up to your size. Since Frances didn't have access to the curved ruler, she suggests using a French curve to make up the curved parts of the pattern. Drafting the pattern proved to be much, much, much easier than I thought. Certainly easier than trying to size up the pattern on the computer and then printing out and matching bits of paper to one another. I don't have a big projector and so couldn't project the pieces up on a wall. Creating Scaled Rulers This pattern required a bust measurement ruler, called a "scale", and a "length of waist" (neckbone to waist) measurement scale. Mine are 36" and 18". Left: The corset cover diagram and the two scaled rulers. Therefore, I needed the 36" scale ruler for the bust. According to instructions, I doubled the length of waist measurement and came out with 36" again for that scale. I traced the 36" scale onto a sheet of paper. I pasted that to a piece of cardboard, and then cut it out carefully, and taped to a housepaint stirrer. Voila: scale ruler! Drafting the Pattern Pieces You need a big sheet of nice, stiff Kraft paper, a pencil and eraser, a French curve, that special scale ruler, and an L-square marked in inches. Each pattern piece is marked onto a sort of grid, with a "baseline" across the top, the 0 point at top right, and a vertical axis running straight downwards from 0. The result looks like a backwards, upside-down L. Each pattern piece is laid so that the straight of grain runs straight up and down. At key points in the pattern piece, such as a left edge or the top of a curve, horizontal lines are measured out from the vertical axis. For example, if you're looking at the pattern piece for the back, there is a horizontal line drawn at 11 units+D sub-units down from 0. It is drawn out to the left 15 units+C sub-units. It marks the extreme left edge of the pattern piece at the waistline. Above: Drafting horizontal crossline points on the Kraft pattern paper with the special ruler. What you do for each pattern piece is to:
  • draw the baseline and vertical axis with the L square.
  • Then you use the scale ruler, and working from the copy of the pattern piece in Frances' book, measure where each of the horizontal grid lines meets the vertical axis.
  • Then you use the scale again and draw out each horizontal grid line to the length marked on the book's copy of the pattern piece.
  • Then you connect each end of each horizontal line like you would dots, following the outline of the pattern piece in the book. You use a French curve to help you with curved sections.

Above: drafting a curved section of the pattern. Not having my own French curve, I copied one on paper and cut it out.
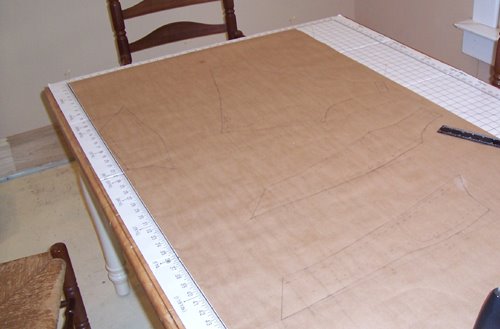
The pattern pieces have a certain amount of ease built in, but not much. Some hems are built in and some aren't, and some seam allowances are marked, and some aren't. Frances Grimbles' directions tell you to add extra for seam allowances and ease, and so I did...ended up having plenty and to spare, and was able after fitting the cut pieces, to re-mark the pattern pieces with adjustments so next time I have a good fit for me right off the bat.

Left: The pattern pieces drafted.

Wednesday, August 02, 2006

Vintage Dress in Motion

Ever wondered what attending a Civil War ball or an Edwardian soiree might be like for most of us, that is, those of us not priveleged to be either Keira Knightley or a movie extra?

These days ordinary people are filming events like this and posting them on sites such as YouTube.

Take a Civil War-era ball, for instance. You can hear the strains from a live band playing country dance and ball dance tunes, and watch rows of happy dancers from Maine perhaps, or Maryland, or wherever it is, rustle and turn and step to the music. The sounds of colorful skirts swishing mix with laughter and chatter. It's neat. See http://www.youtube.com/watch?v=ibtkNuGvg9A

The Edwardian soiree is a smaller affair, but still fun to watch. See http://www.youtube.com/watch?v=kgpnYUKlctA.

Then there's some plain fun. A band out of Europe -- Cibelle and her man have such lovely accents -- reinterpret a luminous, funny song while promenading their way through London, dressed in late Victorian garb.


For more videos and to see what one costume maven has bookmarked, see jenniloves2sew's YouTube page at http://www.youtube.com/profile?user=jenniloves2sew.

Friday, July 14, 2006

An Edwardian Ruche-Trimmed Hat dress Diary, Part 1

Next weekend is our annual Ladies' Tea Guild annual retreat, and I am in a hurry to finish a big-brimmed Edwardian hat for the occasion. In usual fashion, I procrastinated on completing what I thought would be the difficult part of the hat preparation: steaming a plain hat into the required shape. What a surprise, then, when the steaming and shaping process took less than 10 minutes, and was completed with burns or tears.

The Effect for Which This Hat Aims

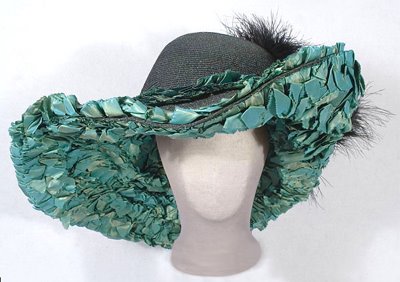
One of the prominent antique clothing dealers offered a mousquetaire-style hat recently. Oh, for a glimpse of D'Artagnan! One side of the wide brim is turned up raffishly, while the rest of the brim turns down to frame the face. The requisite plume fluffs out the back, too (although if you look closely, the plume is actually an entire, and I hope artificial, bird). After the reference to dashing young bloods, the milliner turned from 17th century France to tastes entirely feminine, for she, and I am quite sure it was a she who added this extra bit of drama, ruched the entire underside of the hat in iridescent peacock-blue shot silk that goes copper in some lights. To balance things out, a row of ruching adorns the top of the hat as well. Voila...a marvel.

Above: ruched Edwardian wide-brimmed hat. Image from Vintage Textile

The Hat Base, Pre-Steaming

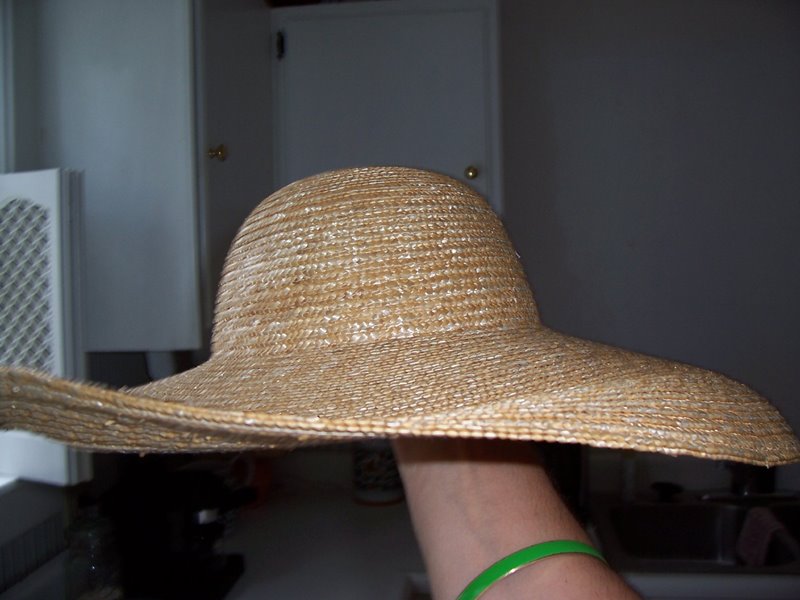
For the hat base I am using the High Crown Straw Hat (SH-955) sold by Jas. Townsend and Co. It has a 6-inch brim. The hat is quite well made, as advertised, although one should be aware that it's still a country hat...the straws are coarse-ish. This not your couture hat with straws as thin as buttonhole thread.

Steaming the Hat

To steam the hat I followed suggestions made by kind members of the Sense and Sensibility Patterns Forum.

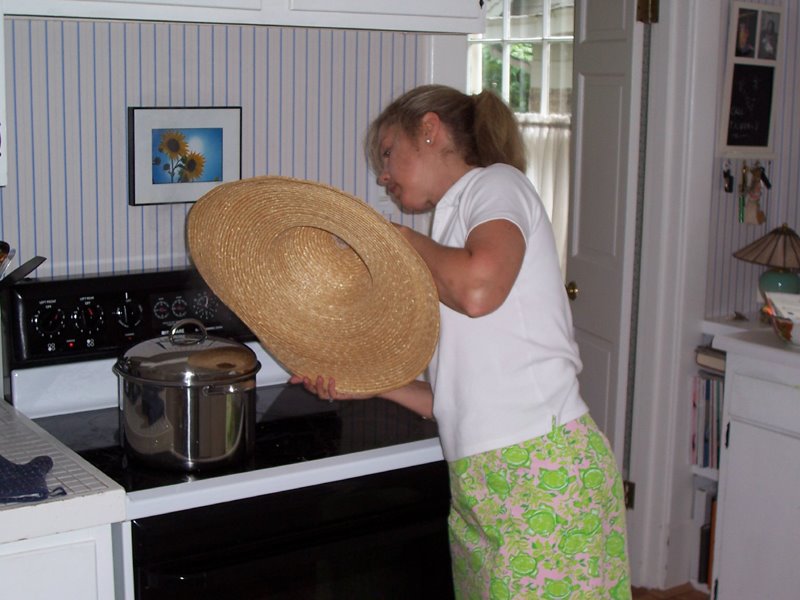
At left: steaming hat brim to soften straw fibers so they will bend. The steam is escaping from a small hole in a pasta pot. Click picture to see larger shot...it shows amount of steam coming out.

Here's what I did:

Not having a teapot to create steam with, I found a large pasta pot with a tight lid but a closable hole cut in it to let excess steam escape.
  • Filled it 1/3 full with water, and heat it until it was at a fast boil, and steam was merrily purring out of the hole.
  • Held one small section of the hat brim up very close to the escaping steam to soften the straw.
  • About 10-15 seconds later, pulled the hat away and tested the straw's ability to be shaped by gently forming an inward curve. What do you know? The straw obeyed.
  • Bit by bit, held more sections of the hat brim to the steam and shaped them.
  • Every so often, ran my hand around sections already bent, and bent them again just to make sure the bend would stay.
  • Note: it's good to wear an oven mitt if you keep your hands near the steam long. You could get an awful burn quickly if you're not careful.
  • As the straw cooled, the shape remained.
  • For the upward tilt on one side, I held the hat brim over the steam again and bent the straw up instead of down. Had to hold the tilt in place for several minutes while the straw cooled.
  • Re steamed and inward-bent the sections of the brim closest to the upward tilted part so they'd not start to tilt up too.
  • Let the hat cool completely, upside down, so as not to stress the new curves on the brim. Will not start trimming it for a day or two.

The whole process took 10 minutes.

Here's the result! Next step: trimming. That's for another post.

Monday, June 12, 2006

Anatomy of an Edwardian 1900-1911 vintage white heavy cotton skirt

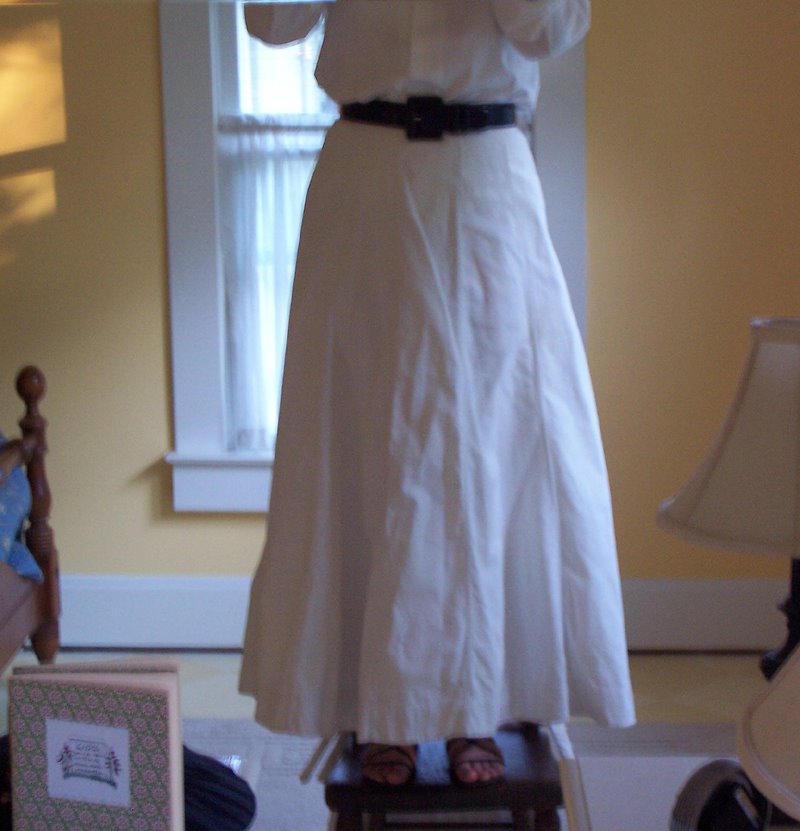
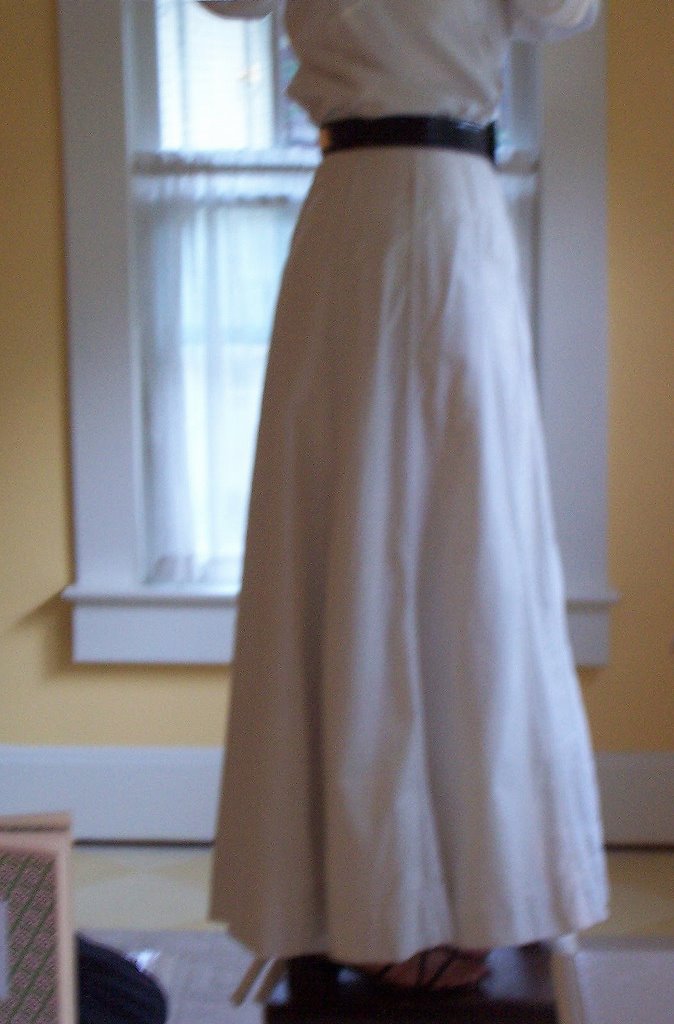
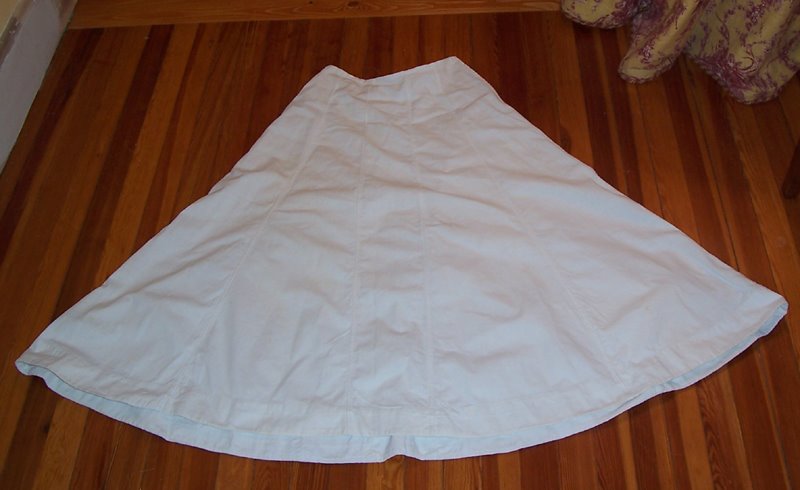
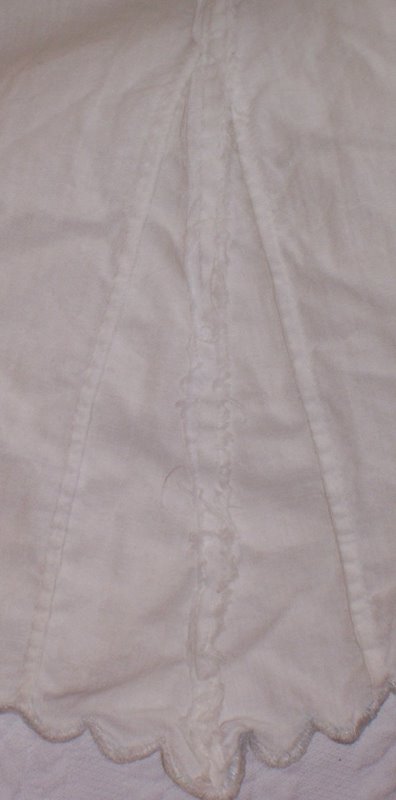
Yesterday I was fortunate enough to purchase a truly nifty circa, I am guessing, 1900-1911 day skirt. It's made of heavy white cotton or cotton-linen blend (for a linen drape and wrinkle, but without the linen sheen), and is cut with 9 wide-flaring gores. It fits very smoothly across the waist and hips, and then flares gently and evenly to almost the floor to create an elegant line. 

In the pictures here it's worn over a double-flounced petticoat drafted from a 1911 textbook (see previous blog entries). The design is sophisticated: the seams are felled, but instead of the double stitching showing on the exterior, the single stitching does, and the raised effect of the seams accentuates the vertical lines and even creates attractive shadow lines.

In addition, the front gore is very narrow, and barely seems to narrow towards the top. This creates what appears to be a straight narrow panel right in front, that again subtly elongates the figure. 


Dating the Skirt

Dating is a puzzle, but I argue for a date after 1900 but before 1912. Why?
  • The narrow front panel was popular after 1905 or so.
  • The elongated lines and emphasis on decorative seaming also date to this period.
  • So does the smoothness of the habit-style back: there is no pleating or gathering in back, as was common in the 1890s.
  • Habit-style day skirts often had back-closing skirts and this skirt is back-closing; the side closing wasn't the only popular closing during the Edwardian period.
  • The waist falls at the natural waistline, as it might on a plain skirt after 1905 but before 1912-1913; it is neither raised nor cut so that the back waistline is higher than the front to fit a straight-front, S-bend corset. At 37 inches long in the front, it would fall to the shoe tops. In back it falls to 39", but when worn the hips and derriere cause the back to raise a bit so that all around the skirt falls to the same 37-inch length all the way around. After 1905 this length and hemming style was favored for day wear.
  • On the other hand, the skirt has approximately 3.5 yard (125 inches) sweep. I will have to research closely to see how the recommended sweep varied during 1900-1911, but there were periods when it was narrower. I do know that wider sweeps were prevalent in the 1890s.
  • The skirt almost surely doesn't date before the 1890s. There is no room for a bustle or other skirt enhancer or any sort, and the heavy goring and butter-smooth fit around the hips came in the with Edwardians.

What Was This Skirt Worn For?

My suspicion is that this was some sort of plain day skirt or traveling skirt. The sturdy fabric would wear well and wash easily...and this skirt certainly was worn; there are wear marks on some seams and one tiny wear pinhole at the bottom. Or perhaps this was a sporting skirt used for golf or long walks, although it is full length, and some pictures of the period have women wearing slightly shorter skirts for these activities. The cut is too neat and attractive, in my mind, to be just a utility or house-work skirt. 

Further, the inside is fully finished. Homemade skirt seams were often just overcast: these are strongly felled to prevent fraying. 

The skirt is a delight to wear. I tried it over a double-flounced petticoat I made following the directions from a 1991 textbook and it fits beautifully. The fabric slides over the petticoat to create a clean line, the vertical panels and shadow lines from the seams give the fabric a strong vertical, architectural, sporty, natty look, and the fabric is stiff enough and the hem heavy enough to give it body so that it does not cling to the feet or get in the way when one walks or leans. It's easy to see the value of a good wide hem in performing this function. The double flounce of the petticoat helps hold the skirt away from the feet too. 

Construction 

Nine gores. The front nearly straight and forming a subtle vertical panel, as mentioned, then two side front gores, wide-ish side gores, wide-ish side back gores, and two quite wide back gores with a seam at center back, habit style. 

The two back side gores just a teeny-tiny scant gathering in them, so slight as to be barely discernable; all other gores are eased flat into the 1/2-inch plain waistband. The placket stitching continues the line of stitching of the back seam in standard hidden-back placket style. However, the invisible effect is spoiled because there's another row of stitching about quarter inch away that betrays the rest of the placket. 

The skirt closes with three hooks and eyes; the bottom two have the flat bar-shaped eye, while the top eye is circular- or hoop-shaped for a secure closure. This hook-and-eye treatment is in approved fashion for this period. 

The skirt has a two-inch faced hem; the facing is the same material but it has been pieced in places, so we know the skirt is homemade. Other homemade touches include some less-than-perfect seaming: the hem varies a bit in width and bits of the stitching are not quite in a perfect line. 

The fabric is a heavy straight-weave cotton. It may have been dead white when new; it's the color of fresh heavy cream now. 

The front gore is cut on the straight grain. All other gores are cut so that the straight edge is on the straight of the goods, while the gored edge is on the bias. This means the back two gores meet on a fully bias seam, which produces an attractive, subtle drape, again in the approved fashion for this period, according to several contemporaneous texts of I have read. (See the texts referred to in previous blog entries.) 

Measurements 

All measurements are approximate, having been taken when the garment was laid flat. 
  • waist: 27" 
  • waistband: 1/2" 
  • wide front gore: 37" long 6" wide at bottom 3 3/4" wide at top 
  • side front gores: 37 1/2" long 14" wide at bottom 3" wide at top 
  • side gores: 38 1/2" long 15" wide at bottom 2/12" wide at top 
  • back side gores: 38 1/2" 12 1/2" wide at bottom 2 1/4" wide at top 
  • back gores (2): 39" long 18" wide at bottom 4 1/2" wide at top barely discernable gathers only in these two gores. 
  • Back center seam is between these two gores; it's 39" long 
  • Sweep: approximately 125 inches (about 3.5 yards) 
  • Placket: 8 1/2" deep 
  • Hem: 2" deep, faced with same fabric as exterior.
  • Seams: felled, with single-stitch side on exterior of skirt for nice raised effect, and double-stitched side on interior for full finish (no fraying) 

Sunday, May 07, 2006

Derby Day Henhouse Hat Dress Diary


Yesterday we Kentuckians celebrated Kentucky's greatest day of the year, the Derby Day, when all the world visits Churchhill Downs to watch the Run for the Roses.

As we all know by now, Barbaro, a Kentucky born and bred horse, won handily, with another Kentucky horse, Bluegrass Cat, taking second.

And, as every year, most of us spent a goodly time considering our Derby Day sartorial situation, most especially The Hat.

This year I attended our Ladies' Tea Guild Derby Tea, and as instructed, constructed a hat worthy of the august event. It must be springlike, large, and just slightly over the top. The creation at left takes a bow to the Edwardian love of feathers, and is christened the Henhouse Hat. Why should be clear to you, as an awful lot of chickens contributed plumage.

Hat Construction

I requisitioned a favorite hat for this effort, and so constructed it that I can remove all the new trimmings without harming the original. All trims are attached with white thread using the Tie Stitch, a traditional millinery stitch...easy as pie to do, harmless to the straw hat base, and less messy than glue.

The hat itself has a four-inch brim steamed to turn inwards at the edge to frame the face.

About 2-3 inches in from the edge I applied a chicken feather boa about 4 feet long. The feathers in the boa are inserted into a loosely twisted soft cotton string core. I wound the boa around the hat in a spiral pattern. I threaded a beading needle, long and very slim, with white thread and knotted the end. Every 4-5 inches I ran this thread through the boa's core, then slipped the beading needle under a single straw -- never through a straw so as not to weaken it -- and then pulled the thread back up. I wound it once around the boa again, then tied off the thread, making sure the boa sat close to the straw. The boa managed to cover the entire top of the hat.

At the hat brim I attached a maribou boa in the same fashion, wrapping it around the entire brim and then working the remainder into the brim closer to the crown. The maribou softened and lightened the chicken feathers.

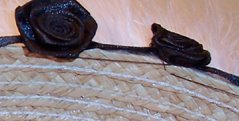
For a final touch I used Chic Boutique black rose trim...individual fabric open roses strung on a black ribbon. I sewed the strip just on the inside of the brim, taking overcast stitches at every rose and trying to ensure that the thread followed the line of the ribbon so it wouldn't be too visible. The roses anchor the feathers somehow so that the hat ends on a crisp note. Naturally the roses are a play on the roses that drape the Derby's winning horse. Hancock Fabrics carries the Chic Boutique trim line, and also the chicken feather and maribou boas.

Overflying Bird Does on My Hat: What Are the Odds?

The hat took about an hour and a half steady work. I trimmed it outside in the sunshine. What are the chances, I ask you, that while I was working a bird flying over would do on the hat in progress? But somebody did...perhaps in protest, perhaps in fear, perhaps to add its own touch. I had to cut out the offending poop with scissors and scrub my hands several times.

Wearing the Hat

When wearing a hat in the Edwardian manner, it should sit straight on the head, or be tipped to the side, and even be pulled a bit low over the eyes. The hat should never sit back on the head like a halo ready to slip off. This mode is also appropriate for wearing modern hats. Wearing it so requires you to stand straight, pull up your chin, and walk tall, which is good carriage anyhow.

Our Tea Guild members all made such pretty, dramatic, face-framing hats. If I can persuade them, I'll post a group portrait here.

A bit about the dress. The pattern is a Butterick reissue number 6582, View E (full-skirted version). Dress features crossover bodice, gathered skirt, self belt (yesterday I wore a contrasting belt to match my hat and shoes). Fabric is a feather-light Indian cotton lame in shot salmon, from Hancock's. Dress is worn with double-layered net petticoat. The inner layer is slightly shorter and features full hem. Outer layer is finished with a wide lace border sewn in binding fashion...top edge had to be sewn down too to keep it from flapping, and bottom was folded down to create scalloped edge. Pattern: Simplicity 5006, view E. Note I made drawstring waist instead of elastic, which I don't care for.

The dress is a bit loose on me this spring: the bodice should be fitted. Had I had a dress form last summer when I made it, I'd have known to alter the bodice so that the neckline was a little less high as well, perhaps by an inch or so. That way necklaces worn with it would sit better.

Instruction in Millinery

How many times have I pointed you to http://www.vintagesewing.info/? Nevertheless I'll do it again. That site offers several millinery texts online in full, illustrated. Hat design, blocking, and trimming are all covered. Texts date from the 1920s to the 1950s.

Friday, March 31, 2006

Narrow-Hemming the Bottoms of Seamed Garments: Advice from TreadleOnions

In the Corset Cover Dress Diary posts I wrote about having trouble creating fine machine hems around the bottom of the corset cover. The seams connecting the fronts and backs of the garment kept clogging the hemmer because the amount of fabric was too much. I wrote,

"It's impossible to do around the seams, though, so you have to stop near these eges and hand hem them afterwards. Not terribly efficient. Once you have a well-fitting pattern, might as well hem each piece BEFORE you seam the pieces."

So I asked the folks on TreadleOn, a super-duper online community for those who use treadle machines. Always warm and helpful, several Onions gave me tips on how they deal with the issue. I've reproduced several of them here, with a few edits for context.
  • The way my grandmother taught me to do this is to clip a triangle off the seams with the widest point being at the seam itself, and the point being about 1/4" up into the seam. That leaves less fabric for the hemmer to have to turn and stitch, and works about 99% of the time. On lightweight fabrics, batise or light cotton, it works 100% of the time because there isn't that much bulk there in the first place. By just snipping 1/4", almost the entire snipped area is inside the hem, and if you press the seam open before running it through the hemmer, it's even less bulk.

    If you're doing heavier than light fabric, you should hand-crease the narrow hem at the seam so it will feed through the attachment properly.
    Marilyn S.SE TX
  • I'm not sure how they did it in the bad old days, but when I cross seams with my narrow hemmer, I first make sure those seams are trimmed to reduce bulk. I usually cut a triangle from each one, such that it tapers from regular width to nothing at the raw edge. Then when I am sewing along and get close, I stop and remove the hem from the "curl" of the foot. Using my fingers, I fold the hem as narrow and as flat as I can over the seam, then stitch across it as neatly as I possible, with the foot riding totally on top of the hem. Once past the seam, I stop and re-insert the fold into the "curl" and proceed to the next obstruction.
    Jennifer, Calgary, AB
  • I usually [do] the tuck[ing] or hem[ming] before sewing the seams. Recently I tried it the other way on a petticoat and it just didn't work. I usually finish my seams by pressing the seam open and then turning each seam allowance under and stitching down the folded edge. Not period authentic, but it looks nice and wears well.
    Annie, Pennsylvania
Thank you, Onions!

From the Rag Bag: a Scrap Quilt for a Baby

My sister Julie and her husband are expecting a baby boy, so I thought they might need a quilt for June Bug, as they're calling him.

Not a fancy quilt for display, but a hard-working utility quilt that he can play on and drag around, and that can be tossed in the wash. So, taking a page out of the past, I resorted to the rag bag and have assembled the simplest of quilt tops.

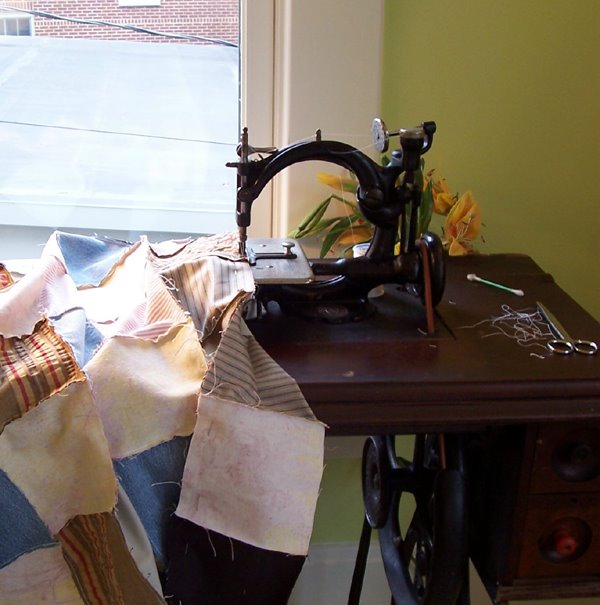
At left, the completed quilt top

Rag Bags

Rag bags used to be common: when clothes and other textiles outlived their original uses or began to look tatty, they'd be recycled. Small pieces would end up in a rag bag to be pulled out later to live again as cleaning rags or quilt block pieces.

Over time I've filled quite a fat rag bag. Any piece of clothing too ratty to be given to charity was cut up and the buttons and zippers saved for reuse. For this quilt I pulled from the bag remnants from some of my husband's old striped oxford shirts, a couple of pairs of jeans and other slacks, and bits of fabric left over from a skirted table project.

Piecing the Quilt

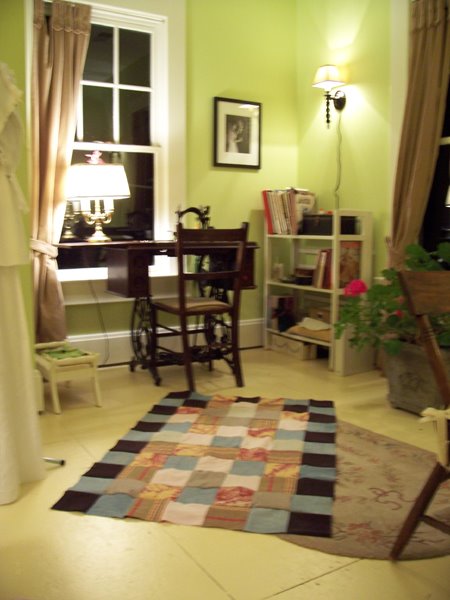
Each quilt block is just one piece of fabric, cut 5 inches square. Once all the pieces were cut, I laid them on the floor and played around until I got a pattern I liked.

At left, two samples of blocks sewn together into strips.

Then I sewed strips of blocks together, making the seam allowance the width between needle and edge of the presser foot, which is about a quarter of an inch. After that I sewed the strips together.

I only had to pay careful attention to a few things. I had to line up the blocks on each row when sewing the strips of blocks together. No matter how careful I was, not all blocks were exactly 5 inches square. After all, I used scissors when cutting them, not a rotary cutting wheel, and they were cut out of bits of fabric, not nice neat "fat quarters" meant for quilting. To make up for this I pinned the each strip to the next very carefully, easing each block to fit to the next, easing just like I might a curved seam on a collar. It worked pretty well! Only one row is rather too far off.

At left, the strips of blocks are sewn together on the Willcox and Gibbs chainstitch treadle machine.
  • I also had to make sure all the seams butted up to one another in the same direction throughout. Careful pressing of the seams all to the same side before sewing helped.

Now it's time to embroider "June Bug" on a block and then add a thin cotton batting and a backing of plain blue check fabric. I will bind the outside edges with a heavy-duty quilt binding.

Wednesday, March 29, 2006

An Edwardian 1911 Corset Cover Dress Diary, Part 3: finished!

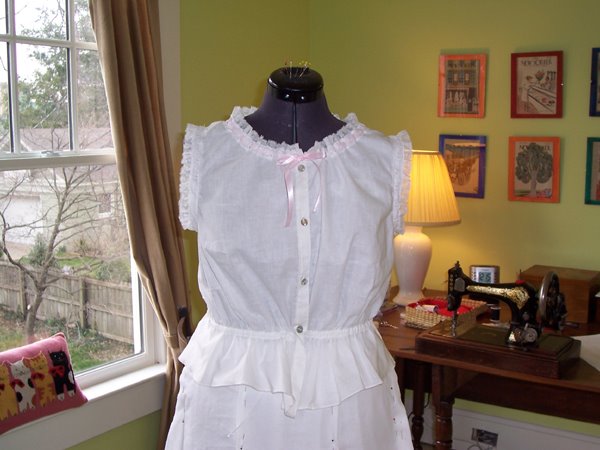
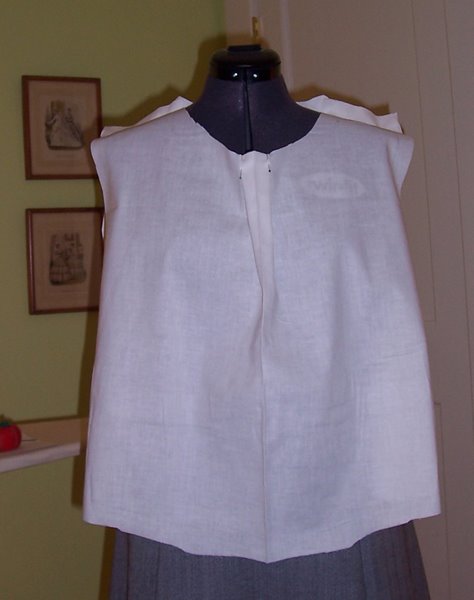
The corset cover is complete. Here it is at left. Compare this image to the photograph of the original in the 1911 textbook I drafted it from, which appears below. I think they are quite close, with one exception. I have a 30-inch waist, and the original was for a 24-inch waist. The cover is comfortable to wear, and fits as it should, which is a relief! I believe this is a typical schoolgirl-type corset cover, utilitarian and effective under opaque shirtwaists or bodices, but not meant for dress-up wear by any means. 

Lessons Learned...for Next Time
  • Unlike many popular corset covers of the period, on this one the shoulders are quite wide. Next round I would cut them in so that the lace and fabric didn't come out over the shoulder curve. When wearing a tight sleeve the extra fabric would tend to get in the way.
  • I would retain the front fullness in this pattern. Worn under an original sheer batiste shirtwaist of bloused cut, the cover helps to hold out the front fullness nicely. By this point some shirtwaists still had a bit of blousing, while others were smooth-fronted. Speaking of which, those shirtwaists are awfully fashionable in 2006. The lace, the sheerness -- worn with a cami (just a modern version of a corset cover) it could have been made today! CAbi in fact has a blouse in their line this spring that could have been made between 1912-1920.
  • The peplum is also useful as it helps to hold the cover in place under a skirt waistband. Practical!
  • For this trial piece I used plain, 99-cent 100% cotton muslin. Next time I would use a fine 199% cotton batiste. The muslin is too heavy, and the threads and weave too coarse to be attractive under a lawn, handkerchief linen, or batiste shirtwaist, especially a vintage one. All of these fabrics are really, really sheer. So the inferior grade of the muslin beneath is apparent. Further, it's too stiff by comparison and again, you can actually see that the two "don't go" when worn together. Above, the original corset cover, from Text-Book on Domestic Art, 1911, p. 87. Available on Cornell University HEARTH site.
  • The lace I used, while cotton, is also too stiff. Washing it a great deal might help, but in future I will use a finer, thinner lace that won't frill so aggressively under a fine lawn shirtwaist.
  • I'd wear this sort of pattern only under bloused shirtwaists. A much smoother, lower-fronted, and closer-cut version would be appropriate with a dress.

Tuesday, March 21, 2006

Digitized Collections of 19th and 20th Century Catalogs, Manuscripts and Ephemera

If you are interested in period advertisements, catalogs, magazines, scrapbooks, diaries, and ephemera, do see the digitized collections that Harvard and Duke University have online.

Women Working: 1800-1930, Harvard University Open Collections

As Harvard describes it:

Women Working, 1800 - 1930 focuses on women's role in the United States economy and provides access to digitized historical, manuscript, and image resources selected from Harvard University's library and museum collections. The collection features approximately 500,000 digitized pages and images including:
7,500 pages of manuscripts
3,500 books and pamphlets
1,200 photographs


Includes such representative items as


  • Dorcas Magazine (crocheting and knitting, 19th c), (some issues)
  • Ladies Home Journal, (some issues)
  • Woman's Home Companion, (some issues)
  • Abercrombie and Fitch 1913 Styles catalog,
  • and the diary of Delia Kinglsey, school teacher (1906-1910).

Visit the site! See http://ocp.hul.harvard.edu/ww/

Above: Ivory Soap advertisement from Woman's Home Companion, January 1909, Harvard Digital Collections

Digitized Collections, Duke University

Part of the Rare Book, Manuscript, and Special Collections Library. Includes items such as

  • "9,000 advertising items and publications dating from 1850 to 1920"
  • 19th century sheet music!
  • writings and diaries of African-American and Civil War women

Visit the site! See http://library.duke.edu/specialcollections/collections/digitized/index.html

Super resources for researching and understanding fashion!

Thursday, March 16, 2006

An Edwardian 1911 Corset Cover Dress Diary, Part 2

Hooray, almost finished with the corset cover! Just have to add buttonholes and the internal waist tape, and it's done. Meantime, I have added the lace to the neckline and armcyes (armholes), which was a bit of an adventure in itself. At left, the corset cover as it stands now. The internal waist tape is not pulling in the waist as much as it will, and the front is pinned together. 

Adding Lace, the Long, Hard Way 

Perhaps I was a bit silly, but I was bound and determined to have as finely finished an effect inside as outside the corset cover. No raw edges, nothing to fray, and everything as neat as neat. 

Even after reading the directions out of the 1917 guide American Dressmaking Step by Step (on vintagesewing.info) that say that you can hide raw edges on beading, I didn't "get" it. 

So here's how to do it the long way. Hem the edge to be decorated with as tiny a hem as you can manage. My Singer handcrank has an attachment that can do a 1/8 inch full hem. 

It's impossible to do around the seams, though, so you have to stop near these edges and hand hem them afterwards. Not terribly efficient. 

Once you have a well-fitting pattern, might as well hem each piece BEFORE you seam the pieces. Above or left, the Singer VS 27 handcrank with the small hemmer in operation. 

Measure the lace so that it reaches 1 and 1/2 times around the edge to be decorated. Gather it by sewing in the little margin (it's about 1/8 inch wide and looks like a mini selvedge edge). I ended up arranging the gathers so they looked a little bit like open inverted box pleats or ruching and very much like the effect! 


Then baste the lace to the the edge of the area to be decorated, with raw edge of lace on top of right side of fabric, and its selvage next to the outer edge of the fabric. 

After that, cover this tiny basted seam with beading (sewn with a seam to each side of it) so there are no edges showing. You have to fold out the lace so it sticks out over the edge of the fabric. This is fiddly work! Too fiddly, I say. Above or left, the lace being pinned to the neckline. 

Adding Lace, the Easier Way

The easier way also results in no hem inside and probably a flatter, slightly less bulky result. If only I had read those instructions more closely! Here's what you do. 

On the fabric to be decorated, say a neckline, fold the raw edge from the inside to the outside and baste it flat against the right side. Now inside you have a perfectly smooth surface, no hem, no edges. 

On the outside, now gather the lace and once again baste it to the edge...but this time, face the lace so that its pretty edge already falls out over the edge of the garment, and the selvedge edge is sitting on top of that raw turned-in edge. Baste down.

Then baste and sew the beading (one row of stitching to each side) over the combo of the basted lace selvedge edge and the raw edge of turned over neckline hem and voila...all nice and neat and tidy. 

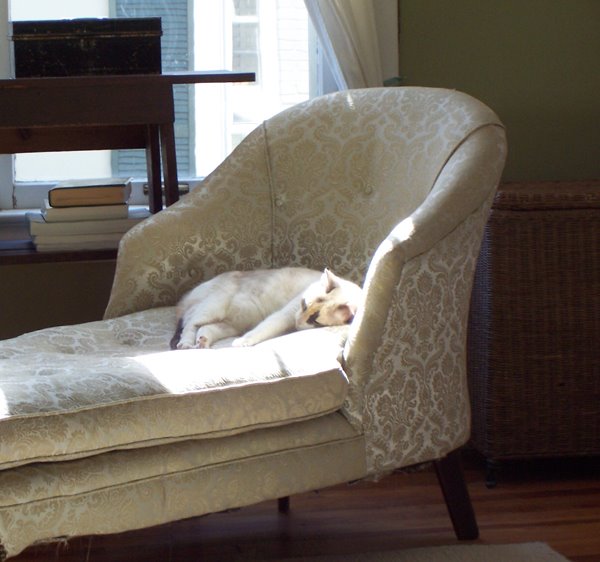
Man, did I feel silly! I was just fixated on internal hems and didn't realize I could do them externally as neatly. Oh well. Next up, the buttonholes and buttons. Until then, bye now! At left or above, my kitty ZipZip asleep on a chaise in the March sunshine. She's in my lap right now, too.

Tuesday, March 07, 2006

An Edwardian 1911 Corset Cover Dress Diary, Part 1

The latest project: drafting and constructing a circa 1911 simple corset cover of muslin. 

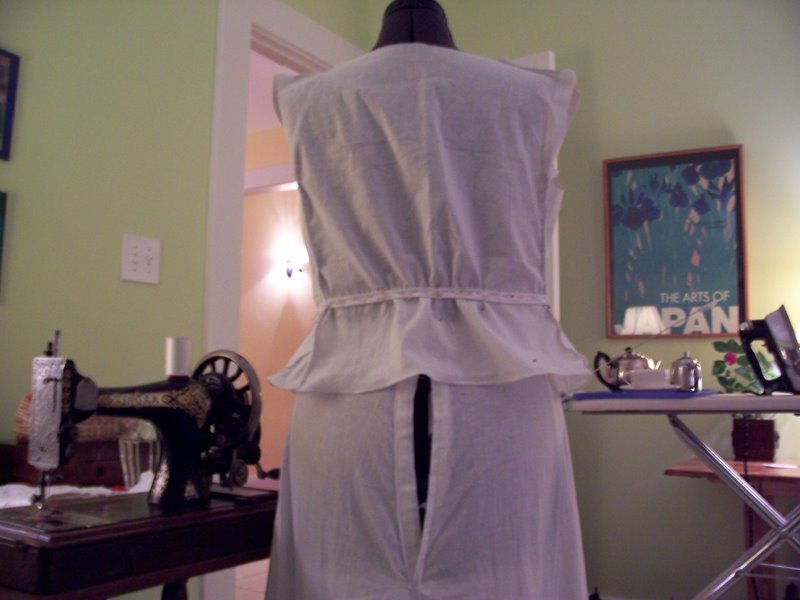
Just a reminder of how someone might have worn one. The 1905 Butterick sewing book I have a reprint of states on p. 33, "for ordinary waists [shirtwaists]...a well-fitted corset cover answers about the same purpose as a lining [on a fancy bodice]." So one would put on a chemise and knickers, or a "combinations" instead, then the corset, then one of these corset covers and a petticoat, then the shirtwaist and skirt on top. (Above, the corset cover partially assembled. Set on the stand inside out, I have basted the channel for the drawstring tape over the waistline gathers.) 

Once again, I am using the 1911 manual, Textbook on Domestic Art, as the source for making up this garment. See the Cornell University HEARTH site, and browse for it. You can view and download each page. The directions appear on pp. 86-96, and comprise
  • measuring for a basic shirtwaist pattern,
  • drafting it up into a pattern and adjusting it to a corset cover,
  • cutting the fabric,
  • and step by step construction and finishing;
  • a photo of the finished product is included.

This particular pattern produces a corset cover with an interior waist drawstring or "tape", and then a short peplum that helps keep the corset cover in place. Many corset covers don't have such a peplum; you can easily find them on Ebay. 

The textbook photo shows a simply trimmed garment with modest lace at neck and armholes, and the directions say that armholes could be simply bound with bias tape, although you could make a corset cover with all kinds of decoration from tucks to beading, or make it of eyelet fabric.

(Above, the corset cover with waistline tape channel pinned to it, from the back)

Drafting the Pattern

The pattern only requires two pattern pieces, front and back...but the front is split into two pieces for a total of three pieces. I drafted it in about two hours, including checking it and cutting it. Remember though that I am a slow worker; someone with a bit more experience could knock it out rapidly. There is also an oblong piece of fabric that you cut out to make the channel for the interior tape or drawstring to go through.

The "model" measurements for this pattern are about 15" across the shoulders and and a 24" waist. My 30" waist circumference resulted in a more boxy-shaped pattern, but the result on the mannequin still looks good.

(Above: the pattern draft sample as it appears in the textbook. The numbers are drafting points you use to build your own draft, not measurements.)

Notes on Cutting and Construction

  • If you're unsure of your drafting skills, leave about an inch or so all around as seam allowance so that you can alter as necessary.
  • When you have cut out both fronts and backs, mark the right side of the fabric carefully (with something that will wash out) too. Then pin the shoulders and sides, with the right sides on the outside, wrong sides together. Now, most directions would say, do this on the wrong side of the fabric. Not this time! You'll be sewing French seams, for which the first seam is on the right side of the fabric!
  • Once it's pinned and you're happy with the fit, then baste it, again, wrong sides together. Um, I didn't pay attention, and on autopilot, pinned and basted wrong sides together. So when it came time to make French seams, I had no markings to work with. I had to take everything out and start over. Whoops. Don't make the same mistake! (Above, the corset cover pieces pinned up for initial fit. I have yet to cut the front into two halves; a tester box pleat is set up to mimic the button hole pleat.)
  • I found that pinning and basting on the dress form felt good after a first few minutes of feeling strange.
  • The corset cover closes in front with four small pearl buttons. The right front, that holds the button holes, is constructed with a "box plait", which turns out to look an awful lot like the narrow sewn-down pleat (sewn down on both vertical sides) that seems to make up the fronts of many men's and women's shirts. The result is that you have several layers to support those button holes so they won't rip.
  • After you make up the box pleat, do up the French seams on sides and shoulders. To make these seams: run the first seam 1/4 inch out towards the edge of the fabric. from the seam line. Then, trim the seam allowance pretty close to that seam stitching. Then, turn fabric so that right sides are together, and run a second seam on the real seam line to enclose the raw edges inside it. Press the resulting seam so that it faces towards the inside back of the garment. Whoo! Yes, after awhile it seems more natural to do this, and it sure has a nice, tidy, luxe effect.
  • Put the corset cover back on the dress form, this time inside out. On your pattern draft, you'll have made a series of X's that mark where you should gather the waist together. Silly me, I didn't follow directions. I gathered the full back, instead of just in the center of the back. Silly me again, on the front I gathered from the sides halfway to the front, instead of just across the center of the front. Once again, had to pull it out and do it over. (Above, closeup of front, with waistline gathered and tape channel basted. Note that gatherine is not heavy because you don't want the garment to be too poufy.)
  • The text asks you to do two rows of gathers, 1/2 inch apart. Couple of good reasons for this. First, that's the width of the narrow strip of fabric that is sewn from one side of the waist to the other that forms the channel to put the waist tape through. Voila: automatic markings for placing it. Second, you get a more even gather. Just try to make sure that the positioning of your gathering stitches match decently one to the other. I'd tie off the gather at the end you'll be pulling from. On the other end, leave a long string so you can pull your gathers together.
  • Gather as the text suggests, and use the photo as your guide. Then make up that channel strip from the directions, and pin it to the waistline, placing on top of those two rows of gathers. Arrange the gathers one last time, and baste in place.

(Above, the Singer 27 handcrank sewing machine used for this project. It does wonderful tiny stitches and uses really neat attachments, sans electricity.)

That's where I am to date. Back with the final product soon as it's done!

Wednesday, February 15, 2006

Edwardian and Victorian Skirt Plackets: Where to Find How Tos

Skirt plackets: who knew they could be so complicated? Or such a royal pain?

These days we put zippers in everything, even new-fangled invisible zippers that continue the seam line with no annoying and revealing extra stitching around the zipper slash.

It used to be all so very different. Women relied on hooks and eyes sewed into long plackets to hide outer skirt openings. Petticoats frequently had nothing but a plain placket with strings at the top...so that placket opening could gap! You can see an illustrated example of one of those in one of my previous posts. Oh well, at least the gap was invisible to outsiders.

Anyhow, in making up a 1911 skirt from online textbook instructions (see previous posts for details on that textbook), I was told to make a continuous placket. See the image of a placket turned inside out, at left (courtesy Vintage Sewing.info).

Well, such a placket looks awfully thick and amateurish on a worsted wool skirt. At least mine did. I hated it and ripped it out.

Finding a Whole New World of Fancy Placket Knowledge

Don't bother in looking at most modern sewing books for fancy plackets. Most of them pay more attention to sleeve plackets. Blech.

Instead, have a look at American Dressmaking Step by Step by Mme. Lydia Trattles Coates (1917), on http://www.vintagesewing.info. See lessons 188 to 197. The text and illustrations take you through invisible plackets, extension plackets, and so on...all plackets that will look a lot more professional on an outer skirt than the one pictured above. That's an extension placket at left.

The lessons cover everything from setting in facings to handling the hooks and eyes neatly.

The date may be 1917, but the techniques should be good for quite a few decades prior to that time as well.

Friday, January 06, 2006

An Edwardian 1911 Flounced Petticoat Dress Diary, Part 3: Completion

It's done! A muslin petticoat made in 1911 style with a double flounce! I decorated the outer flounce with tiny tucks and lace insertion, threaded with pink ribbon. 

The petticoat was sewn primarily on a Willcox and Gibbs treadle sewing machine, and the garment's construction features the incredibly narrow, precise machined hems that the Willcox and Gibbs hemming attachments make possible, plus the equally precise tucks. 

This marked the first time I'd used these attachments, and they clear up the mystery of how finely sewn many antique garments are. Old machines such as the W&G make that sort of work quite straightforward. 

I used a Singer 27 VS handcrank machine to produce small gathers at the waistband and on the flounces. Only the finish on the waistband lap is handsewn. 

I drafted and constructed the petticoat following instructions from Textbook on Domestic Art, 1911. You can too! Previous posts on this blog tell more about the textbook and how to find it on the Cornell HEARTH site. 

Additional Views

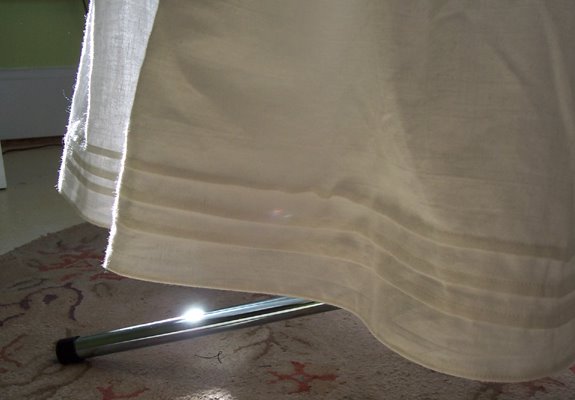
The petticoat is triple-tucked. The hem on bottom is 1/8 of an inch wide, and is a double hem, that is, the raw edge is turned to the back of the garment, then turned under again to fully hide it. 

The Willcox and Gibbs attachment did that in one smooth motion, which left me rather amazed. I can't get as clean a hem on my electric machine.

The garment has two flounces. That means extra volume when you wear it. The lower flounce starts about shin height, which means the skirt fluffs at your feet when you walk, but leaves your knees unencumbered, and is cooler generally.

Closeup of the placket. It's a bit hard to see, but the stitches are tiny: chainstitchers like the Willcox and Gibbs generally make incredibly small stitches. Second, between one stitch and the next, the line is very straight. The stitch guide helps, and the precision of the cast-iron parts that drive the machine, but it may be the needle that has the most effect. I didn't know this until a few weeks ago, but the standard needles many people use on electric machines are ballpoint...that is, they're not too sharp. When the machine makes a stitch, the ballpoint edge slides into the next available hole in the weave. The commercial Schmetz needle I am using, by contrast, has a very sharp point, so the needle goes right through the woven threads, not between them. Eh voila, each stitch follows the next perfectly straight, not in a slightly offset pattern. And I thought it was my skills:} Oh well.

And last, a side view of the petticoat. Behind it you can just see the Willcox and Gibbs. Yes, that is one very small machine.

Tuesday, November 08, 2005

Anatomy of an Antique, Probably 19-teens Petticoat

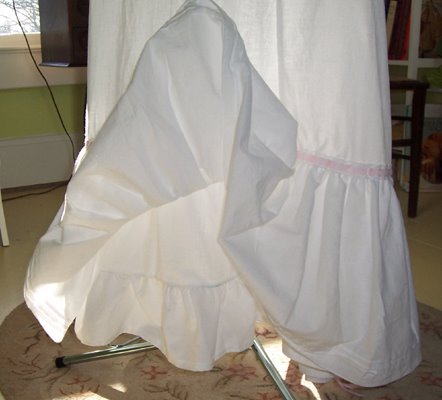
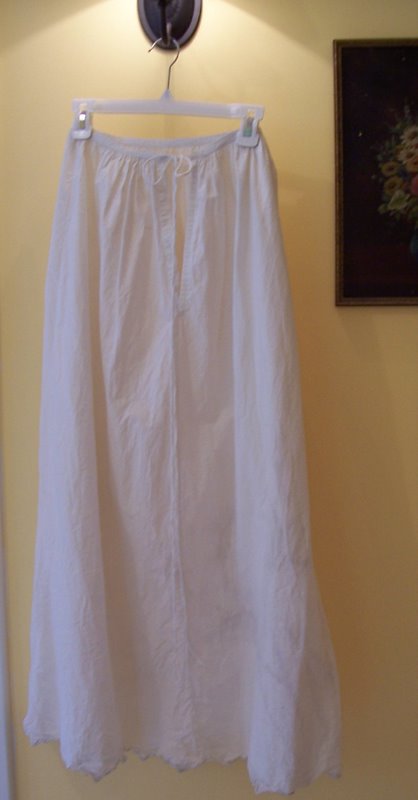
A few weeks ago a vintage white cotton petticoat came into my possession. Don't ask me how old it is...I am still trying to figure that out! However, it's likely that the skirt is late Edwardian or early teens, given the approximately 2-yard sweep. It's not very full at all. 

How it is constructed is really interesting and some things about it I find puzzling, although they probably would be crystal clear to a real expert. If anyone can set me straight on a couple of points, it would be most appreciated. 

 How It's Constructed

This is a 5-gore petticoat. Three gores up front, and two in the back. When worn, at the top the front gores at the edges rather wrap to the back a bit. Perhaps the way the gores are set will help date it? The gores in front are very scantly gathered; those in back more so but these gathers are tiny, fine and stroked, not chunky. 

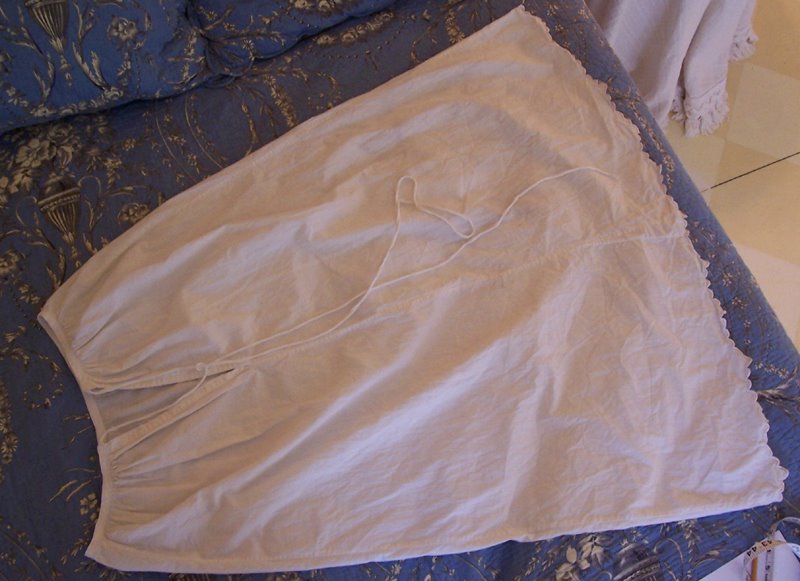
 At the back a gusset in two pieces has been inserted. See the picture below.

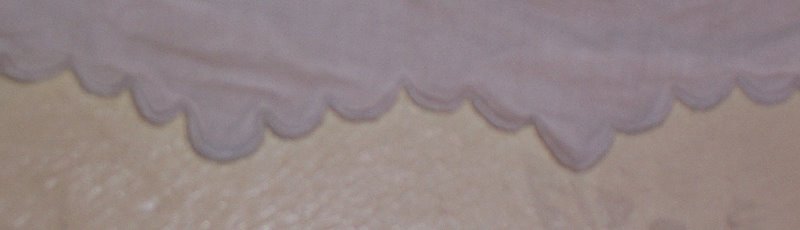
The petticoat is scalloped at the bottom. The scallops are set in a nice, complex rising and falling pattern. I can't entirely tell if the scallops were handmade or not: if they were machine made, they were not the most perfectly done. If they were machine made, the fabric was sold such that it was long enough widthwise to make a full-length skirt without piecing on the scallop pieces. I cannot tell the lengthwise grain on the fabric so that doesn't help: it's a plain tabby weave. Were such fabrics sold in such wide widths...kind of a la disposition

The skirt is set on a narrow waistband and the placket in back closes with extraordinarily long tape ties. Surely these wrapped around the waist once or twice before being tied, else, whoops, the lady treads on a tie and she goes head over heels or flat on her face. 

The Measurements

Waist, by gore measures at the top:
  • left front=5 3/4" I measured several times :}
  • center front=6"
  • right front=6"
  • left back=5"
  • right back=5"

Sweep (bottom gore width) measures:

Approximate sweep is 76", or just over 2 yards. That is quite narrow, but when worn feels roomy and does not constrict movement.

  • left front=12.5"
  • center front=12.5"
  • right front=12.5"
  • left back=17.5"
  • left back width to top of gusset=17"
  • right back=17.5"
  • right back width to top of gusset=17"

Length of skirt, top to bottom=38" (highest point of scallops), 39" (lowest point of scallops)

Waistband=1/2" wide

Placket=5/8 " wide, 9" long, not including waistband.

Tie tapes are each 40" long!

Handmade, and Not Always Neatly! 

All you hurried seamstresses out there can relax; it'd appear that what we'd call semi-sloppy seam finish work was definitely out there. Now the Williamsburg Foundation book, titled something like "What People Wore", says that 18th century clothes were often ill-finished on the interiors. Having to be completely hand sewn, and often reused and retooled until the poor garment fell apart, there was little point in finishing each seam. I understand from Elizabeth Stewart's excellent board, The Sewing Academy at Home, (see http://www.elizabethstewartclarkandcompany.com/Forum/index.php) that simply overcasting the edges of seams was a quick and effective and common way to finish seams at the mid nineteenth century. The sewing machine's wide adoption may have helped to make neat finishes not only more common, but more a social standard, or at least that's my personal suspicion. By the time a lot of teaching texts roll around at the turn of the 2oth century, nice, even fancy seam finishes were expected. However, as with ettiquette and cooking and fashion sense, what was expected was probably far less than universal on handmade clothes.

On my petticoat? No fancy finishes there! The interior seams are simply overcast, and loosely at that, with not terribly even stitches in a fine thread. I was shocked, shocked! Rather hard to see on the picture of the interior of a back gusset at left, but you could try... 

Look at the way the waistband is sewn on, too. Nice tiny machine stitches, but look up close and you see, what's this? Edge stitching that wanders a bit and falls off the edge of the band? Quel horreur!

What It's Like to Wear This Petticoat

The petticoat is surprisingly roomy. You'll laugh but we have no full-length mirror that doesn't suffer from an advanced case of silvering. So the only shot I have is taken in front of a small mirror propped on the staircase landing, and shows only my feet. You'll note the roominess and how nice those scallops look.

Monday, November 07, 2005

An Edwardian 1911 Flounced Petticoat Dress Diary, Part 2: A Puzzle of Proportions

Currently I am drafting a 5-gore underskirt or petticoat, with dust ruffle and flounce, according to instructions in the 1911 textbook, Textbook on Domestic Art

It has been an interesting process. The instructions rely on sizing up or sizing down a draft based on proportions taken from a model skirt. Since my body no longer follows the suggested proportions of a waist 15" smaller than the hips, whoops, well, something interesting happened to the results, and I am still mulling over my solution and whether it was the right one. 

Instructions for drafting and then making up the skirt appear on pages 74-85. You can find the original source materials, in full, on the Cornell University Home Economics Archive (Hearth), at http://hearth.library.cornell.edu/. By the way, the text bases a street skirt on the same draft...you learn how to do variations to make a pattern endlessly useful. 

Drafting the Petticoat

Here is the skirt draft illustration.

I found the instructions to be clear and simple. First, the textbook discusses the proportions necessary. From these, if you like, you can calculate the waist measure for each gore, the hip measure, and the length to the skirt bottom (minus the dust ruffle). 

However, you don't have to do this: the step-by-step drafting instructions have you make these measurements as you draft up your pattern on paper. I laid long lengths of freezer paper on my big Hancock's measuring and pinning board and drew the drafting dots and lines with pencil and ruler. 

The Proportions Problem Appears

When I finished the back gore, it looked too narrow compared to the model drawing, which had quite a flare on it. 

What was going on? 

Remember that the draft is based on proportions, right? Well, oh dear, I have a thicker waist of 30" compared to the model's 24". So when I drew the oblique line from waist to skirt bottom that forms the back of the gore, I got less of an angle than a woman with a smaller waist would have. What to do? The text states on p. 76 that "(t)he average width of an underskirt on lower edge, before dust ruffle is attached, is between 2 1/2 and 3 yards, for the average person, unless very wide skirts are in vogue". For the model that's 90" inches of "sweep", as the term has it. Well, I bet mine wasn't any 90". It didn't have the right flare at all, and I had checked my math, I hoped. 

 What Textbook on Domestic Arts Suggests Doing

The textbook writer knew that some girls would have thicker or thinner waists. So on pp. 83-84 it says,

"If more fullness is desired at bottom of skirt, increase width of each gore by starting 1/3 of its length below the waist line, on each bias side. [If you read Harriet Pepin's Modern Pattern Design on http://www.VintageSewing.info, you'll see this mode of splitting the angle of the gore into two parts in action.] For less fulness, decrease....(T)he width around bottom should be in good proportion to the height and size of hips of each individual, even when extreme fashions are in vogue." 

Aha! So I was supposed to add inches to the sweep by adding width at the bottom of each gore. Okay, how to do it?

Solving the Proportions Problem...With Algebra?

So I rummaged in the brain and remembered the simple algebra formula for coming up with a proportion. The model waist of 24 is to model sweep of 90", as my waist of 30" is to X. I solved for X and it said I needed 112" of sweep, distributed around each side gore and the back gore. By the way, that comes to the 3 yards circumference maximum suggested by the book. 

I measured the bottom width of the side gores and the back gores with a ruler...but didn't know how to distribute the inches needed to make up 112". That's when I had a, perhaps, bright idea. Using the proportion formula again, I calculated the waist/sweep proportion of the model back gore, and compared it to my waist/sweep proportion. 

Aha: I was 4 inches short on my back sweep measurement. Surely the side gore would have the same problem, but it didn't. The results were the same, no matter how many times I redid my math. Further, the four inches I needed in back, when added to the sweep of the other gores, added up to the ideal 90"! 

So, suspecting I had drawn my lines wrong on the gores, I redrafted them. (Oh, how boring that was.) But no! I had done it right. 

 When That Doesn't Work Perfectly, a Middling Solution

Frankly, I don't know what error I made or what principle of geometry is in effect that causes the bottom width of a gore to come out differently when you do it by math versus drawing it out. But I did decide what to do. I kept that 90" sweep, as being befittingly narrow for 1911. Then I distributed 2 inches of extra to the back gore and 1" each to the side gore. If when I build it in muslin it makes me look dumpy, well then I'll redo it with a 112" sweep, and I will have learned how proportions affect the line of a dress in a visceral way. 

I'll see how it turns out! Oh, by the way, had someone back in high school applied algebra and geometry to something interesting like sewing instead of to endless drills, I might actually have liked math class. [Note as of September 17, 2021: our twin sons have had algebra and these days, their teachers have them work out problems based on all kinds of applicable situations. Nor more plain drills. Yay!

An Edwardian 1911 Flounced Petticoat Dress Diary, Part 1: Neat Tips on How They Were Worn

My cool 1911 textbook Textbook on Domestic Art has given me some key knowledge into how people fitted and wore their underthings. In reference to what they call an underskirt and I call a petticoat, did you know:
  • "An underskirt should be 1" shorter than the outside skirt, as well as narrower, except the flounce."
  • The outer skirt length for the high-school girl audience was set at 4 inches above the floor...that comes to right about instep. The petti would be one inch shorter than this.
  • "The flounce is added for flaring as well as beauty." Note that the flounce was a second layer to the petticoat added towards the bottom: the text's model has a 12" flounce set on such that its bottom is even with bottom of the dust ruffle.
  • "A dust ruffle about 4" deep is generally put on to prevent wear."
  • (The) "width around the bottom (of an underskirt) should be in good proportion to the height and the size of hips of each individual, even when extreme fashions are in vogue."
  • A petticoat could have a gathered back, a pleated back, or a "habit" or straight back. The text recommends a fuller back, as opposed to the habit back, for those whose "figure" needed it to sit well.

By 1913, the situation was a little different. Garment Construction in Schools (also available on the HEARTH site) writes:

  • "(The) petticoat is intended to fit closely around the hip, and is narrow at the lower edge also (2 yards)."
  • "The fulness at the lower edge is supplied by a scanty frill of material..."
  • Embroidery is suggested as being a pretty and effective alternative to a frill. Naturally it wouldn't pouf out the skirt either, in this time of severely vertical skirt lines.
  • The top was faced with a "false hem" cut on the bias, in calico for a cotton petti, and sateen or calico for a woollen one.

Both texts recommend quite a variety of materials. Petticoats could be cotton, either plain or in colored prints with "a deep frill of material", or in flannel. Wincey (a type of wool) was used for summer wear, at least in England.

Friday, November 04, 2005

A Glimpse of the Antique Treadle Machines I Use

Part of the fun of sewing period- or vintage-style clothing is making up the pieces using vintage sewing treadle machines. At least it is for me. I find antique machines pretty to look at. My boxy, modern Bernina with its single bland pink and blue decal is a visual yawn compared to my Warwick, with its romantic hand-painted tendrils and mother-of-pearl decor on the bed, or to the elegant classicism of the legs, or "irons" that support the Willcox and Gibbs.

That's just a start, though. Most antique treadles were designed to take on a wide variety of materials, some of them very heavy and dense. They power through heavy-duty tasks that will wear out a motor on an electric machine. They won't whine if you want to go one-slow-stitch-at-a-time-in-a-really-delicate-spot. 

Granted that this is not a vintage sewing example, but I am proud to write that when I constructed floor length silk curtains recently, the Willcox managed sewing through four layers of silk and cotton lining, all together, and topped off by sticky, heavy commercial curtain header tape, without an issue. I turned to it after the Bernina refused to operate on such a heavy load. Silly me. Should have started with a treadle. 

 Then too, a vintage machine will produce vintage effects. My handcrank Singer 28k is a whiz at setting up gathers in heavy materials...it was built to do it. The Willcox (mine dates to 1911) will produce stitches so fine you can barely see them. A chainstitch machine, it was popular for making underclothing, among other things. As one contemporary guide explained, the stitches have more stretch and give than do lockstitches. You can produce simple chain stitch embroidery with it too, or sew on soutache braid just as such braid was originally meant to be attached. The "tuckmarker" produces perfectly aligned tucks of all sizes. 

There are many of us out there who love these machines, who conserve them and rescue them from being broken up for lampstands or other uses. Some of us collect them, others of us collect and use them, too. Most all of us feel that we are custodians of an important part of sewing history.

Where To Learn More If you have the least bit of interest in learning more, try these sites.

  • TreadleOn, "headquarters for a group of almost a thousand people who collect and sew with 
  • antique sewing machines". See http://www.treadleon.net/. This is a truly amazing group of folks from all over the world.
  • The NeedleBar, "A reference site for collectors of antique and vintage sewing machines". See http://www.needlebar.com/
  • ISMACS. "The International Sewing Machine Collectors Society caters to those interested in collecting and learning about full size and toy sewing machines". See http://www.ismacs.net/
  • Photos of the vintage machines in my possession, at http://community.webshots.com/user/inkspot106. My collection is very small. There are many sites across the Web belonging to folks who have collected and conserved dozens and dozens of machines.

How 1910-1911 Clothes Really Looked When Worn

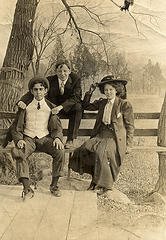
I've stumbled upon a truly fascinating series of photos of a young woman and her friends and family, circa 1910-1911. A number of them are snapshots as opposed to posed shots, of this young woman, Pauline, and her friends on a park bench, or mugging for a photographer, or Pauline posing thoughtfully in a meadow.

Formal posed pictures can show you someone's outfit at its best; a snapshot shows the outfit as it actually lived on the person...lapels awry, buttons straining fabric, hat flapping in a smart breeze. Then too there are the intangibles: in Pauline's photos you glimpse how people walked and sat or lolled in their clothes, and how they felt in them.

If you look carefully at these particular photos, you will see a long coat that Pauline favored, for instance, and didn't mind wearing out to play in. You'll see exactly how she wore it, sometimes with a hat, but no gloves in evidence. You'll see a handsome suit she sported one fall or winter day, and in one special snap of Pauline and her classmates, you'll see how a group of women all differently approached dressing for an occasion. How they wore sashes, or whether they choose plain skirts or ones with buttons or pleats, what neckline treatments, and how they did their hair to complement their outfits, is all crisp and clear.

See the Pauline set, maintained by BigBrownHouse, on Flickr, at http://www.flickr.com/photos/93468869@N00/sets/807535/. With kind thanks to BigBrownHouse for those shown here.