Monday, April 11, 2011

Selling Some of My Collection

My Mad Men dress -- for sale!
(edited to note: all garments gone at this point.)

It finally had to happen. I have quite a little collection of clothes now, many of which I collected between 1987-1989 when I lived in New York City and worked at the Metropolitan Museum of Art. One dress I bought earlier than that, a very special Mad Men style black lace dress bought vintage in college for a formal -- in 1982 or 1983.

Some are antique, some are vintage, and none are styles I wear now, so it is time to share them out to other costumers, people who love clothes, and people who know how to care for them. So here we go. I've never done this before, and so we will see how it goes.
I will add $5 for shipping via USPS to each garment, unless it's less than that, in which case I'll charge just what it costs to send.

Plus, I'll consider barter, especially for some of the more luxe items to come. Am seeking 1770s-1780s stays, for example.


As always, click on the images to see a larger version.

Circa 1940s Padded Shoulder, Double-Peplum Dress with Double Cap Sleeves and Decorative Neck

Made of either rayon or silk, this navy and white floral dress has light green pink accents in the flower design. It zips at the side, and is relatively form fitting, without being tight...in other words, it tends to slide over the curves without over-accenting them.

It features a double peplum at the waist, with matching double capping at the sleeves, shirring on the shoulders to soften the bodice line. There is a cutout at the neckline that closes with a self cord tie.

Measurements:
31" waist
34-36" bust
41" long

It has one sign of wear that I can find, three tiny worn-through holes the size of grains of rice below the back neck. I have worn it twice, and it's otherwise strong.  $35.00.


Very Late 1950s or Very Early 1960s Black Lace with Brilliants Fitted Dress

Here is the current piece de resistance. It's a stunning, highly architectural "little black dress". Made of black Valenciennes lace in a repeating arch pattern, mounted upon synthetic taffeta. Rows of midnight-blue and diamond-colored brilliants set into prongs are individually sewn on top of the lace in arch patterns, repeating the pattern in the lace. More pictures below.

Below the very fitted waist, the skirt is cut with two sort of not-really pockets, following the arched tops of the lace, for a sort of tulip effect when you wear it. High, tight darted bustline, and slit cap sleeves at the top, a tight round neckline in the front, and shallow vee in the back, with a self bow at the back zipper opening. In the back, a reverse pleat allows you to walk. Otherwise, the dress is extremely fitted, although the stiffness of the fabric ensures that, unless the dress is entirely skin-tight, it will slide over figure defects.

The hem was repaired at some point with hem tape; other than that, the dress should be in almost mint condition.

I bought this dress in 1982 or 1983, wore it to a formal and felt fantastic, and have carried it everywhere because I loved it so much. At 47, I have aged out of it in size and style, and now it's time for it to be cherished by the next generation. $55.00.

Again, I can get better pictures in better light, if you are interested in the dress.

Measurements:
26" waist
37" hip
32" bust
44" long


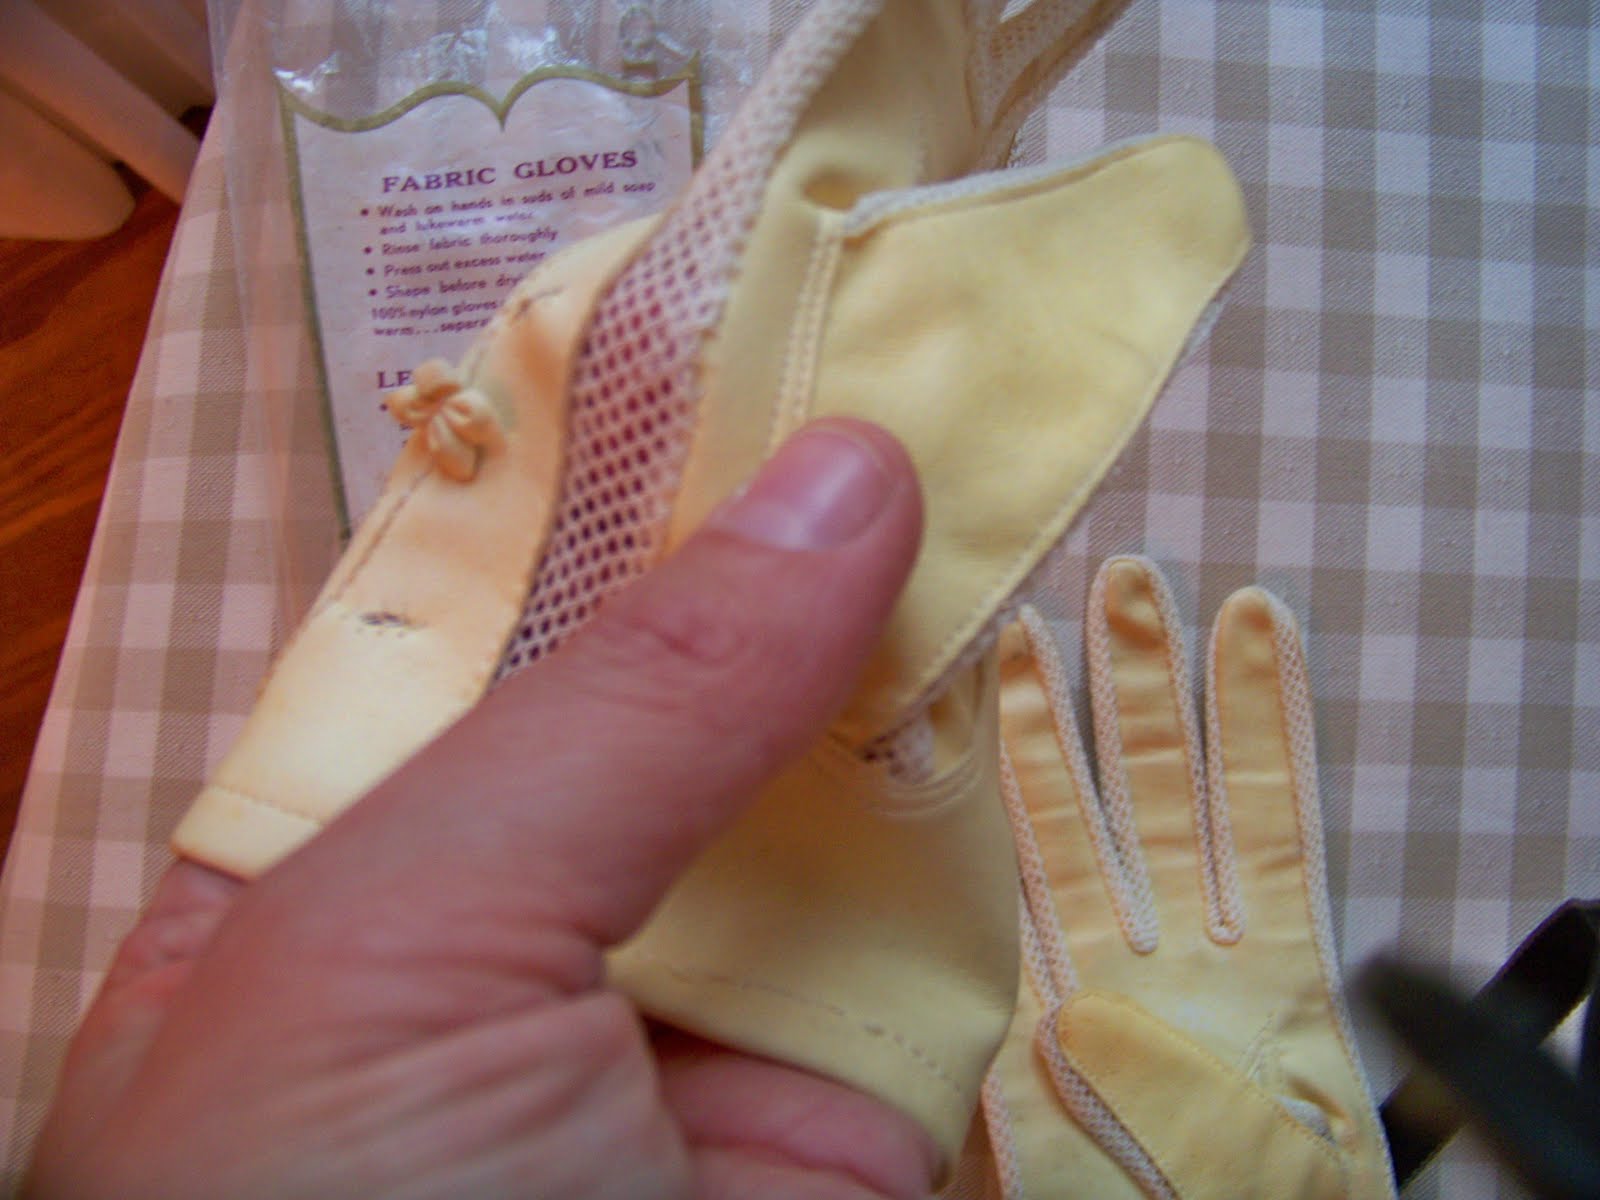
Yellow Leather Gloves with Net Insertion and Leather Floral Accents, in Original Sears Packaging

Wearable! Cute! Springy! One tiny break in the seam where net meets leather; easily fixed. $5.00.




Neo-Edwardian Waist Made of Antique Fabric

This little waist fooled me when I bought it several years ago, at the beginning of my fascination with all things Edwardian. It's not the real deal, but a 1980s reproduction very carefully done with all the details, from the teeny-tiny French seams to the tiny tucks in the sleeves. The lace looks coarse but is nicer than average vintage lace.

It's about a size 4-6, and wearable with care, though the fabric has worn through in pinholes in a few spots. It would made a pleasant tea waist for an informal Edwardian tea. Tons of pictures and measurements in the original posts about it. $20.00.


Circa 1920s German Show Towel of Thick Cotton, Trimmed with High Quality Lace

Bought 12-15 years ago in Atlanta, from an antiques importer. It's meant to hang on a towel rack such that the bottom is in back of the rack, and the front hangs over the top to the front and displays a narrow band of embroidery. Hand-embroideredn naturally. Measures 23" wide x 34" long, including the lace. $15.00


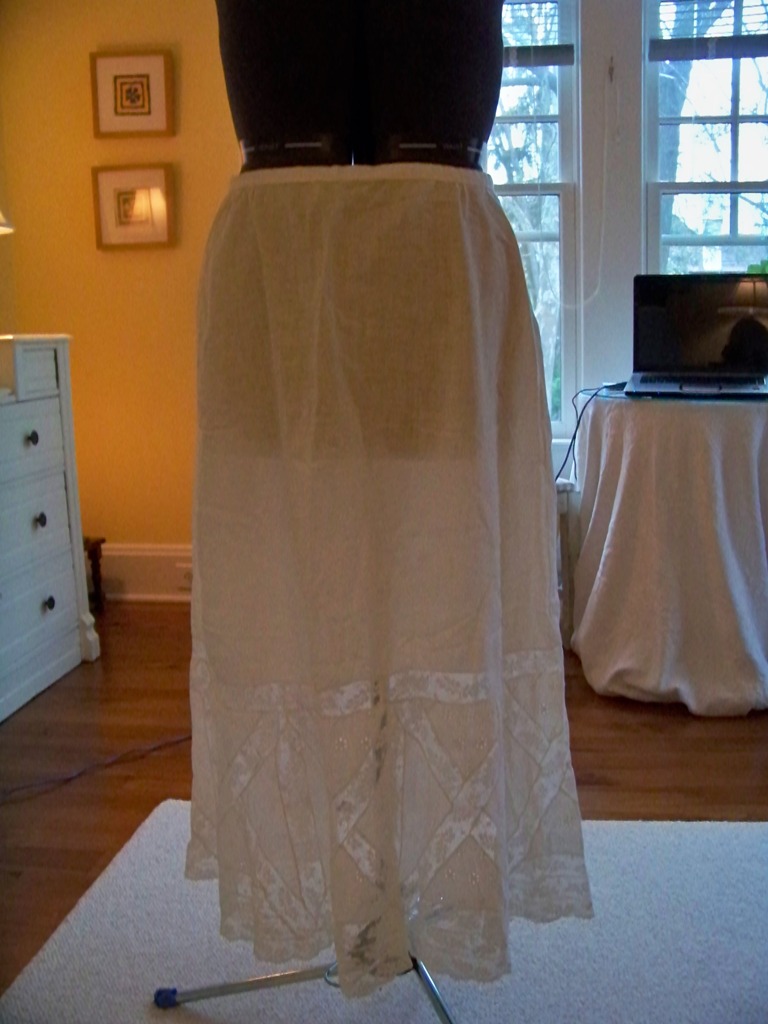
Nice Cotton Slip with Quality Insertion and Eyelet Lace

Handsome slip. Age unknown, but I wouldn't say earlier than 19-teens and later than 1930s.
Waist is bound with tape. Back top button missing, but the tiny mother-of-pearl one midway down the short back placket is still there. There are a few smallish tears in the lace, but I've repaired such before without much trouble, so this is eminently wearable.$15.00

 Measurements:

30" waist
32" long
The pictures aren't too great: if you are interested in it, I will post better ones.


Sunday, April 10, 2011

1795 Sheer Wrap-front Dress Update

Grandmother and the boys arrange violets
they picked in a vase.
A short note only to assure you -- and myself -- that progress is still occurring. Last week Jenni from Living with Jane very kindly helped me fit the back more closely around the armscyle, a spot where it's nigh impossible to do your own fitting without endless trial and error. We also discussed sleeve renovations and I cut a third toile for that.

I have been able to partially hand-stitch together the bodice, but am not done due to family and to household responsibilities, and to my horror this afternoon, discovered that with an ill-advised nip of the scissors I had cut away the curve of one side of the back neckline. So, I am having to piece in a teeny-tiny piece of linen and ditto voile. What a royal pain.

Springtime is a busy time: the outdoors calls, and dinners with friends, and the garden, and spring cleaning, from paint touchups to washing all the down pillows and duvets to washing windows and scrubbing windowsills. So the teeny-tiny moments I have are usually only long enough to stitch a single, or even a part of a single, seam.

Meanwhile, Jenni has made some very good progress on her dress, a close take on the famous Tidens Toj dress, collar and all.

Very best to you all on this first truly warm spring day,

Natalie

Friday, April 08, 2011

Solving the Coverage Issue on the 1795 Wrap-front Sheer Dress

Obviously no kerchief. Quite daring for daytime, even
these days.
Edited May 23, 2011

While lady in "my" reference portrait miniature cheerfully wears a deep decolletage on her wrapfront dress, she may be wearing evening dress, for which decolletage was expected.

I am not so comfortable wearing a deep decolletage. Daytime looks were more usually covered up, although not always. Here's a September 1796 example of a wrap-front dress with no kerchief indicated in the text, and the Gallery of Fashion was normally very careful to mention all items of dress.

Original text: FIG. CXII. The toupee cut short and combed straight, plain chignon; cap of clear muslin, the cawl drawn behind into the form of a rose, trimmed with a double border of lace, broad green striped riband, forming a large bow in the front and behind; lappet of plaited muslin round the chin. Round gown of thick muslin, with a narrow plaiting of lace round the neck; narrow pink riband tied loosely round the neck. Sash of green striped riband. Cloak of thin muslin, trimmed with the same. Necklace of large beads. Yellow gloves and shoes.

How to obtain coverage? Most miniatures were no help this time round, so I went back to the standby Gallery of Fashion, and some museum sites, and found some handsome options.

Option 1: A Tucker, High or Low

Tuckers were a standard item for dress, although the brave might go without them, as we see above. They were so common, in fact, that in the Gallery they are not often mentioned unless they are out of the ordinary in design. The high tucker mentioned further down in this section is an example.

Standard tuckers were more like this:

First, from December 1794, cold-weather evening dress. Figure 35, on the right, wears a wrap-front dress with a double-layer high tucker; this would have been tacked into the neckline. Alternatively, I could substitute an edged kerchief and get the same effect. I read in other descriptions that "clear lawn" is a good foundation material for such a kerchief, and this would be appropriate for the tucker too.

As reported in Cathy Decker's Regency Fashion site, the original text read:

FIG. XXXIV. HEAD-DRESS. The hair in light curls; double chignon, the ends returned in ringlets. White and coquelicot striped Barcelona twisted turban, the end falling very low behind. One white and purple ostrich feather placed behind. One white and purple ostrich feather placed behind. A purple silk round gown, drawn in the waist; long sleeves, and trimmed with white fur. Coquelicot-coloured sash. Swan-down tippet. Handkerchief within the gown. A string of white beads round the neck. Gold loop pattern ear-rings. White gloves and shoes.


FIG. XXXV. HEAD-DRESS. Chiffonet made of white embroidered lawn, black velvet bandeau set with pearls. One white, one black, and two white and lilac feathers, with a large diamond pin placed on the right side. Petticoat and robe a la Turque of white satin, trimmed with gold foil, and a black fringe intermixed with gold. High tucker of blonde, double plaited. Diamond ear-rings. White shoes embroidered in gold. Party-coloured fur muff.


Option 2: A Cravat, Plus Small Handkererchief Around Shoulders, Tucked to Follow Neckline of Dress
 
The middle figure of the June 1794 plate of morning dresses worn in Kensington Gardens is wearing a cravat. Her kerchief, which the original text calls a handkerchief in reference to its size, goes round the shoulders and ties behind, but I would tuck have it go round the shoulders and tuck in along the neckline edges. Since I'll be in a garden setting in July, perfect...
 
 
Again, from Cathy Decker's June 1794 page:
 
Fig. X. (leftmost): Straw-coloured gipsy hat, trimmed with lilac riband formed into a large bow in the front, and into a very small one behind; tied under the chin with a lilac-coloured silk handkerchief. One white, and one lilac ostrich feather, placed on left side. The hair in light curls, falling down behind, bound with a white half-handkercheif, tied in the front into a large bow. Round gown of fine Indian callico, trimmed with a narrow flounce; long sleeves trimmed at the wrist with lace. Lilac-coloured sash tied into a small bow, the ends as long as the train. Lawn handkerchief, over it another of lilac-coloured silk, turned under the arms, and tied behind. Yellow shoes. Jonquille-coloured gloves.

Fig. XI. (middle): Plain chip hat, trimmed with purple ribands. Hair lightly frizzed; chignon turned up in a loose plait. Plain muslin gown and petticoat. Short sleeves, trimmed at the elbows with lace. Full cravat round the neck. Small lawn handkerchief tied behind. Black silk cloak, trimmed with very broad lace. Lead-coloured gloves. Green fan.


Fig. XII. (rightmost): Demi-gipsy hat, trimmed with green ribands, forming a large bow in the front, and a very small one behind. A narrow white net, plaited round the edge of the brim, its two points tied with narrow green ribands, passing under the ringlets, and forming behind a small bow. Two party-coloured feathers on the left side. Hair in easy curls; chignon turned up plain and the ends returned in ringlets. Chemise of spotted muslin; the sleeves tied in two parts with green ribands. Cross-striped green and white sash. Jonquille-coloured gloves. Yellow shoes.

You can see another cravat in the detail from an engraving, below. The fashion also appears in other Gallery of Fashion plates (read the Gallery of Fashion online at the Bunka Gakuen Library to see other examples).

Visual References for Tucking in One's Handkerchief at Neckline

August 1794: Morning Dresses


Leftmost figure, original text (Cathy's site again): "Headdress: white stamp-paper hat, trimmed with a green riband and tied down with the same. One green and one yellow feather placed on the left side. Green gauze veil. The hair in small curls; plain chignon. Plain calico morning dress with long sleeves; the petticoat trimmed with a narrow flounce. Plain lawn handkerchief, green sash, lawn cloak trimmed with lace and tied behind, york tan gloves, yellow shoes."

What the neckerchief could look like from the back:

This is a detail from an ironical engraving, dated 1796, titled "A promenade in St. James's Park, or, Fashions of the day", and available in full in the Lewis Walpole Digital Library collection, call number 796.08.01.05+.

The figure on the far right is wearing her neckerchief tucked inside her dress, and following its neckline. By the way, her dress is ornamented with a long ribbon wrapped and crossed in the back in a fashion known as "a la enfantine", which was popular in this year (read the Gallery of Fashion online at the Bunka Gakuen Library to see other examples.) It was usually worn in tandem with a chemise dress...what look like pleats here are probably gathers, given that the gathers on the arms are drawn with thick lines too.


Option 3: Full Coverage

There is always the option of covering up most of the neckline. Although the watercolor below, by Anne Frankland Lewis and in the LACMA collection, (AC1999.154.21) shows a lady wearing a round gown, the image is still useful. She is wearing a large kerchief wrapped in the manner common for years and years -- thrown over the shoulders, and pulled together in front. In this case, instead of a fichu brooch or some other mechanism, she appears to have tucked the ends into her dress front, which appears to be front-opening.


So, I think we have solved this issue...next?

From the Collection: Feather and Horsehair Aigrette

Front of aigrette
Today, something a little different. In preparation for the Jane Austen Festival Ball this July, in Louisville, I've been looking at aigrettes which can be added to turbans. I happen to have one in my collection, and thought you might find it very interesting not only in terms of looks, but also in its construction.

The images are really big, so please click on them to get details. (In fact, if you are on a Windows machine, click again on the big version to see them huge.)

The aigrette is made of a celluloid comb, very flexible, with two gold-painted and curled feathers (species undetermined) and horsehair. Each feather is divided into small sections, each of which is individually curled.)

Construction: the comb has two small central holes in the top. The feathers and horsehair are gathered into a bunch, wound with tiny wire, then fixed with pitch-like glue at the base, then black thread-wrapped, with the thread carried around the glued base, through one hole to the back of the comb, through the other hole, and back round the base of the aigrette again. The thread is carried this way many times through the holes.

The aigrette is worn such that the base is in front. It must be hidden by hair or some other decoration in order not to show the base.

Here is the back of the aigrette. I've set it next to Curtis Grace's business card so you can get an idea of size.
Back of aigrette

And here is another view, in a different light, in case you would like to look at more details.


How old is this aigrette? Curtis Grace, who studied Fashion Design at Parson's in new York and has quite a collection, thinks it late Victorian; he felt it was late 1880s. Aigrettes really didn't go out of fashion after that...you find them constantly in Edwardian and Jazz Age designs.

The aigrette is incredibly delicate and is damaged with but a whiff of air. The comb, merely an eighth of an inch thick, is also delicate.

With these photos, those of you who would like to make aigrettes probably have enough visual information to work with. To get the spiky effect so important to many aigrettes, you can still use horsehair: it is still available for sale for use in the equine industry (tail extensions, anyone?), for violin bows, for hairwork jewelry, and the like. Here is a supplier, M&M Horsehair, just north of here in Ohio. I haven't used them; the link is just here for convenience. Burnt ostrich would also work, although the effect would be a bit different.

However, if anyone needs more information, I'd be glad to try and help.

Wednesday, April 06, 2011

Renovating the Wrap Front on My Sheer 1795 Morning Dress, Part 3


Almost there! That fold creeping from the
left neckline will be coaxed into position
closer to the neckline by tiny loose
tacking stitches.
 By George (again), the third round of changes to the dress bodice is completed. Are you wondering as much as I am when all this will end?

Round two had produced a decent effect, but I felt, well, too Greek, too round, and I had decided to abandon the idea of a poufy front for a smoother, slimmer, more tailored effect, as in my new design inspiration, the 1795 portrait miniature below.

So I took apart almost the entire bodice. Mrs. C. had suggested that I just slash and tuck, so that I could return to the original design should whim oblige me to, and I started to do that, but began to like the new results so much that...I took shears to the fabric. Now the changes to the neckline are permanent. How I hope I won't rue the day :}

You see the results in the picture up top. Of course, the bodice is on an unadorned dress form, so the fit isn't exact, but you should see the basic idea.

What I Did to Achieve the Look

Here are the alterations I made:


  • A small dart  in the modesty panel and the dress lining, angled in and down from the lower third of the armscye, to tighten the overall fit. I darted the lining fabric and the modesty panels separately so the dart would be smooth and without bulk.
  • Small downward-facing tucks in the fashion fabric along the armscye to guide small folds of fabric over the bust like my new reference portrait, above.
  • Narrowing the bodice lining neckline by an entire inch on each side, to widen the neckline.
  • Narrowing the bodice modesty panel by ditto near the top to match the lining.
  • Remounting the fashion fabric such that
    • except for the armscye-generated folds above, it is smooth until nearly the neckline.
    • using a combination of small pleats and a box pleat right at the neckline to create the neckline-centric folds of the reference portrait.
I am really pleased with the results. At last, at last!

Also toiled a new, loose sleeve in muslin last night, but it still might be a bit tight. Pictures later.

After that, I raise the waistline all around, hand-stitch everything back together, and we're off to the races.

Just Because...

...he's so sweet in the morning, nibbling and sipping while he warms his toes at the heating vent in the kitchen, little Christopher. Yes, that's the dreaded breakfast bar that I swore I'd never feed our boys. We alternate with old-fashioned oatmeal and cereal.

Monday, April 04, 2011

Springtime at Ashland -- and First Bicycles

Today we wandered the grounds of Henry Clay's Ashland Estate, not far from our home. What's that, boys with coats open in the snow? No, thank goodness. Those are spring beauties, one of our local wildflowers, famed in this neighborhood for looking like a last dusting from winter, overlate in spring, but with a pink tinge.

Springtime encourages bounciness :}


Naturalized garden flowers pop up on Ashland's lawns.


At home, it's time to test their first bicycles again. They are getting the hang of them!


Mild storms carrying lots of rain have arrived since, and outside it's green and glistening and just a bit pleasantly misty. A wonderful night for sleeping, listening to raindrops on the roofs.

Very best to all!

Sunday, April 03, 2011

From the Collection: Fine Antique Woman's Cap with Hand Embroidery, Drawnwork, and Needlelace

Cap from the side

Nicole of Diary of a Mantua Maker wrote a fascinating post called "Cap Research" on March 30. In it she explained that extant examples of women's caps are not all that easy to come by.

Well, I happen to have one in my possession, and promised her pictures and measurements. Here they are!

You will definitely want to click the images to see very large size views.

The cap is entirely handsewn, in many places with stitches so tiny that they can be barely seen with the unaided eye, and with threads as fine as spider's silk. The cutting and construction stitching are extraordinarily precise and the stitches used consist of hemming, felling, butted seams, and whipping.
The body of the cap is of cotton and the brim features simple, but pretty drawnwork. The back is lightly peaked. Three pieces, divided by handmade insertion are used to make the back share: two leaf-shaped pieces, one on each side, and a curvy spearhead shape in the back.

The insertion used on the cap is embroidered in beautifully rendered padded satin stitch with a classical stem-and-leaf design in extremely fine thread. At either edge of the embroidery is a minute line of drawnwork, 1/16" wide. It's so small that it barely shows up on the cap...the effect is more of minute pinholes than anything else.

To the cap edge is whipped a super-fine cotton frill, barely gathered, itself edged with a sort of needlelace.

First, the Pictures

The back of the cap.


The cap, flat, left side. Note how it does not lay flat: the leaf-shaped pieces ensure a convex shaping, and the leaf tips a peak at the top.

Wroops...the cap is not right side up...what shows as the left side should be the bottom. can you squinch your neck around to see?


The cap, flat, right side. Darn it, once again, I have the puppy on its side: what shows as the right side is actually the bottom. Sorry about that!


The side of the cap, showing the drawnwork on the brim, and the frill.


Ditto, but a detail showing the corner of the front of the cap, where the frill wraps around.


A detail of the back of the cap.


The inside of the cap. Note the hem finish, and that the drawnwork was made before the cap was cut, for the drawnwork is included right in the hem.


The inside of the cap, from a front edge to part of the back. There are three remnants of tapes, one each at the front corners, and the other protruding from what may be a tiny eyelet hole in the back, perhaps to shape the back to the back of the head. I have not pulled on it, obviously.


The brim of the cap is composed of two pieces, seamed at the top. Here is an inside view of that brim seam.


Second, the Measurements
  • Top to bottom: 8 1/2"
  • Right brim panel:
    • width at bottom = 4"
    • width at narrowest point = 3 3/4"
    • width at top = approx 5 1/4"
    • length from bottom hem to top center seam = approx. 6"
  • Vertical insertion edging the brim and shaped to the right side back piece (it's of one contiuous length all the way from the hem of the right side back piece to the hem of the left side back piece)
    • width most of the way from top to bottom = 5/8" wide
    • width at the bottom  = 1/2"
  • Right side back piece, of a leaf shape:
    • width at bottom  = 1 1/4"
    • width at widest point = approx 3/14" 
    • width at top = pointed
    • height = approx. 8"
  • Insertion between back right piece and back piece,
    • width at bottom = 1/2"
    • length on its longest side is as long as the back piece; the other side is trimmed away to fit the curve of the side back piece
  • Back piece, of a curvy spearhead shape:
    • width at bottom = 1 5/8"
    • width at widest point = approx. 3 1/2"
    • width at top = pointed
    • height = approx. 8" 
  • Insertion between back piece and left side back piece
    • width at bottom = 1/2"
    • length on its longest side is as long as the back piece; the other side is trimmed away to fit the curve of the side back piece
  • Left side back piece, of a leaf shape:
    • measurements match those for right back piece
  • Left brim panel
    • measurements the same as for right brim panel
  • Gauze frill
    • width to edge = 1"
    • Frill is continuous around cap, but is made of two lengths. The second length is felled with a 1/16" felled seam 1/4" from the insertion between the right side back piece and the back piece, in a spot where it would rarely be noticed.
    • Attachment to cap: appears to be barely turned in towards the inside of the cap-- rolled, almost, and then whipped on. It does not appear to have a hem of its own. On the outside of the cap the frill is flush with the cap hem; it's only on the inside that the minute ridge is visible.
    • Hem on outer edge = 1/8" wide. Construction: turned in and hemmed down flat.
    • Needlelace on the frill: help! Unfamiliar. Because the color and weight of the threads so closely match those used on the cap, I hypothesize it was made by the cap maker as part of the project, and it was not purchased. It is NOT the mid-to-late nineteenth century, or 20th century lace I am familiar with, by any stretch.
  • Hem width around bottom of cap = approx. 1/4", with small variations. This is the only hem that is not a tour de force. the variations may be due to the fact that the insertion and the drawnwork go right to the bottom and are turned up with the hem, and also perhaps because there is a channel for strings in there in the back.
  • Hem width around brim = 3/8". Construction: hem is turned in towards cap, so outer edge is neat.
  • Seams between insertion and panels = 1/8" wide. Construction: the insertion is hemmed. The piece is hemmed. The two hems are butted and overcast to create a flat seam with utterly no space nor any ridge at all: perfectly flat. The thread used is so fine the eye can barely make it out. The combination of butted hems and handsewing produces shadowing and fine waves in the fabric that catch the light and become decorative in themselves.
  • Ties:
    • Tie at right edge = 1/16" wide, 4" long, ripped at end. Construction: sewn down inside the cap right at the corner between the front brim and bottom of cap. No evidence of stitches on outside of cap.
    • Tie at left edge. Ditto, but it's just a fragment less than  1/2" long.
    • Tie at bottom of hem in back panel, near join between back and back side piece. 2 1/8" long, ripped at end. Cannot tell if it issues from eyelet or not. No evidence of other eyelet.
Nicole, if you need more information, please let me know. I am a poor illustrator, but could attempt to draw a pattern of the pieces for you.

Source

I bought this cap locally for about a dollar some years ago. It was sold as a baby's cap, sans provenance, in a clear plastic bag jumbled with plastic grab bags of vintage lace, costume jewelry, and so on. Noting the fine handwork and materials, I purchased it. Looking at it some time later, I thought, surely few babies ever had heads that big, and realized that it must be for an adult woman. It's only on close inspection these years later and after a lot of reading that I realize that it really is a nice little piece.

I have utterly no idea how to what period it might date, and leave that to your judgement.
Hope you have enjoyed this little adventure!