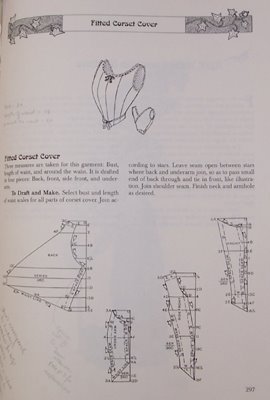
 Here is the second set of steps I followed in making up a 1909-era fitted corset cover from Frances' Grimbles' The Edwardian Modiste.
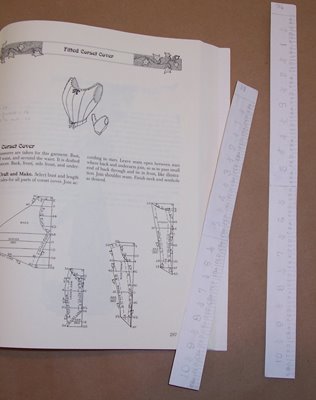
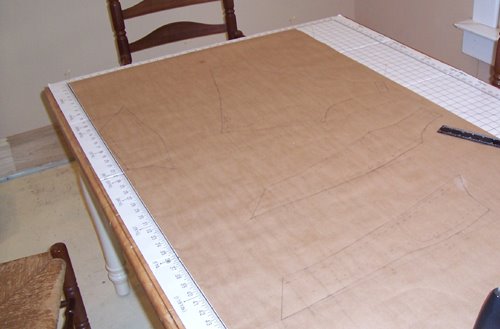
All the pattern pieces being drafted in pencil on heavy Kraft paper, I next cut them out. I marked each in pencil with all the pattern markings from the originals in the book. I also noted on each piece where the shoulder and side seams are, where hems and finished edged are. I marked how many pieces of fabric to cut from each pattern piece, and marked the grainlines (following Frances' instructions, p.8).
Cutting the Pieces from the Fashion Fabric
For this project I used 100% cotton fine white batiste fabric.
After ironing it, I laid it doubled on the work table, since I'd need to cut two fabric pieces from each pattern piece.
Each pattern piece was carefully pinned to both fabric layers, and outlined entirely around with blue tailor's chalk. Then I cut out all the pieces.
After that came something that proved critical: when sewing books tell you to transfer all pattern marks to the fabric, they mean it. With a garment as fitted as this, it's a major pain if you forget to copy a mark and thus can't line up a piece with its mate properly or can't figure out where a hole goes.
When transferring marks such as seamlines, make the with full lines, not a series of dots. I used both pencil and tailor's chalk. It's SO much easier to follow a full line when pinning and basting pattern pieces together than to try to reconstruct the seamline in your head from a couple of wide-apart dots. Just try to follow a few dots when pinning prcisely curved bodice seams, for example!
Pinning the Corset Cover Pieces
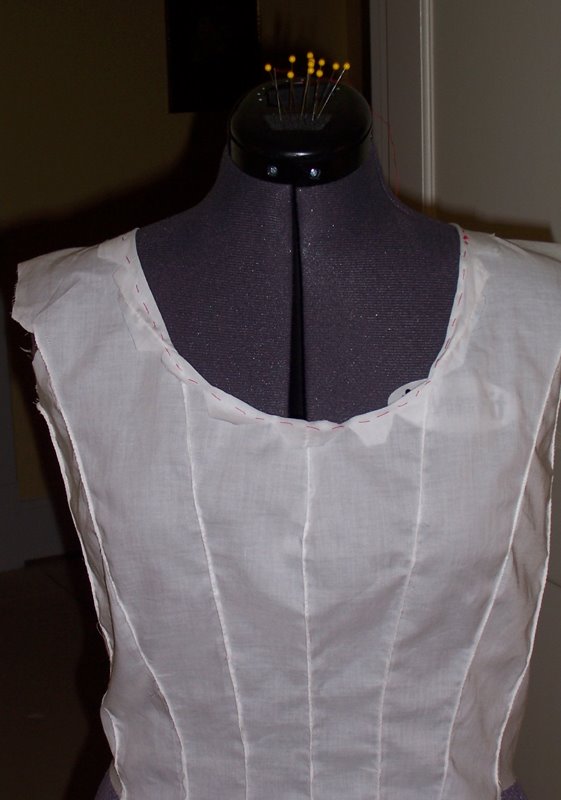
Next I pinned the fabric pieces together. I pinned them on the mannequin, because that was was able to see the fabric drape on teh body and know with more surety which piece was to go where. All the pieces ended matching up pretty surprisingly well when I took into account easing curved pieces one to another...when I pinned them straight with no ease the pieces didn't match up at their ends. Another reason to pin on the mannequin and not flat!
Only pieces that didn't match perfectly was the side underarm to side front piece. Still don't know why but it didn't end up affecting the fit.
Also found that following Frances' suggestion and pinning from the bottom of the pieces up to the neckline, with the pin points facing up, worked better for some reason.
Basting the Corset Cover Together
Being rather persnickety, I follow old sewing book guidelines and baste everything before I sew it.
Following Frances' suggestion, I basted pieces together from the waistline upwards. Again following suggestion, I basted in this order:
Here is the second set of steps I followed in making up a 1909-era fitted corset cover from Frances' Grimbles' The Edwardian Modiste.
All the pattern pieces being drafted in pencil on heavy Kraft paper, I next cut them out. I marked each in pencil with all the pattern markings from the originals in the book. I also noted on each piece where the shoulder and side seams are, where hems and finished edged are. I marked how many pieces of fabric to cut from each pattern piece, and marked the grainlines (following Frances' instructions, p.8).
Cutting the Pieces from the Fashion Fabric
For this project I used 100% cotton fine white batiste fabric.
After ironing it, I laid it doubled on the work table, since I'd need to cut two fabric pieces from each pattern piece.
Each pattern piece was carefully pinned to both fabric layers, and outlined entirely around with blue tailor's chalk. Then I cut out all the pieces.
After that came something that proved critical: when sewing books tell you to transfer all pattern marks to the fabric, they mean it. With a garment as fitted as this, it's a major pain if you forget to copy a mark and thus can't line up a piece with its mate properly or can't figure out where a hole goes.
When transferring marks such as seamlines, make the with full lines, not a series of dots. I used both pencil and tailor's chalk. It's SO much easier to follow a full line when pinning and basting pattern pieces together than to try to reconstruct the seamline in your head from a couple of wide-apart dots. Just try to follow a few dots when pinning prcisely curved bodice seams, for example!
Pinning the Corset Cover Pieces
Next I pinned the fabric pieces together. I pinned them on the mannequin, because that was was able to see the fabric drape on teh body and know with more surety which piece was to go where. All the pieces ended matching up pretty surprisingly well when I took into account easing curved pieces one to another...when I pinned them straight with no ease the pieces didn't match up at their ends. Another reason to pin on the mannequin and not flat!
Only pieces that didn't match perfectly was the side underarm to side front piece. Still don't know why but it didn't end up affecting the fit.
Also found that following Frances' suggestion and pinning from the bottom of the pieces up to the neckline, with the pin points facing up, worked better for some reason.
Basting the Corset Cover Together
Being rather persnickety, I follow old sewing book guidelines and baste everything before I sew it.
Following Frances' suggestion, I basted pieces together from the waistline upwards. Again following suggestion, I basted in this order:
- the front pieces together,
- then the side front pieces to the front pieces,
- then the underarm pieces to the side front pieces,
- finally the back pieces to the underarm pieces and the top of the back pieces to the side front pieces at the shoulders.
If alterations were needed, I was told to make them at the underarm seams and the shoulders, but none were needed really as far as fit to the body. The fit was pretty close.
What didn't fit was the lengths of the pieces. Some were too long, so I marked the spot where they should be cut on the original Kraft pattern pieces.
Stitching the Corset Cover Together
I could have used felled seams, but chose to use French seams. Both seams leave no edges needing some sort of finishing...all raw edges are enclosed by fabric.
Here's where I made a silly mistake! A French seam is sewn in two parts.
First you stitch 3/8 (or 1/4) inch OUTSIDE the seam line, in the seam allowance area. Then you flip the pieces inwards and sew ON TOP of the seam line to enclose the fabric pieces' raw edges.
Note that means marking the seam line carefully on your fabric...do not guess on this one unless you're really skilled, which obviously I am not.
What I did by mistake was to start by sewing on the actual seam line. That meant that when I flipped the pieces over and sewing about 3/8" in from the edge, I was taking up 3/8" or so of fabric on each side. All in all I lost an inch and 3/4, at least, so when I put the corset cover on the mannequin and then tried it on me, the poor corset cover was WAY too tight. Had to take out all the seams and start over.
Yet at that point I had trimmed the seams! So this second round I couldn't do French seams because I didn't have the needed amount of fabric. Instead I did straight seams, and then carefully rolled and closely overhand stitched the raw edges by hand (with both raw edges of each seam held together and treated as one). The effect is quite dainty actually, and probably better in terms of less bulk than all but the finest French seam would be, although the seams are not as strong.
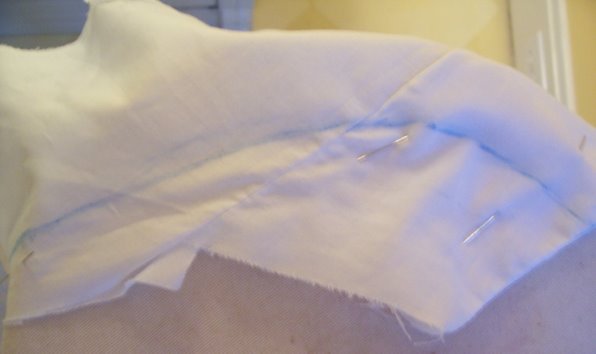 Cutting the Neckline and Armscyes
What, you say, this hasn't been determined by the pattern?
Nope, it hasn't, really. You could go with the original neckline, but the general directions written in The Edwardian Modiste allow, nay almost expect, you to play with the results and get them to what you want, not what the pattern thinks you may want.
I decided where I wanted the neckline to be based on the cut of a chemise I have. I actually put on the chemise and then the corset cover over it.
To make an even curve that matched on both left and right sides of the neckline, I then marked the curve of the neckline, following the curve of the chemise but just a little higher up on the chest, marking on ONE SIDE of the neckline ONLY, in my case the left side. Then I took off the corset cover, folded it along the front seam, and then copied the neckline curve to the right side of the neckline. To copy the chalkline more easily I held up the doubled fabric against a windowpane so I could see through the fabric and trace the marking.
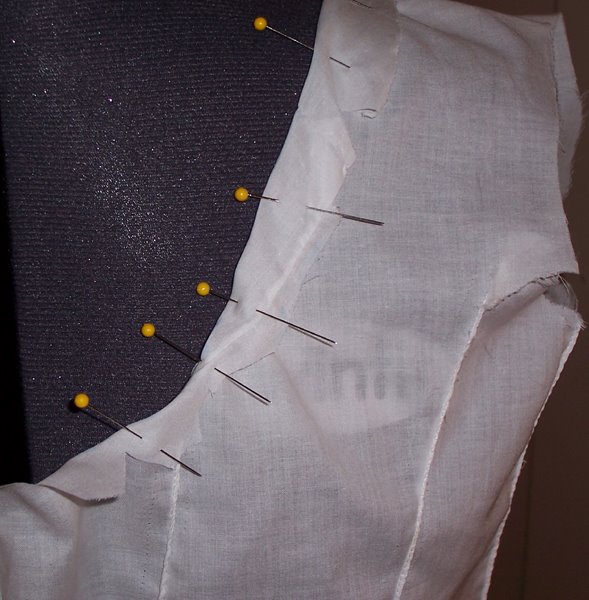 The back of this corset cover is made in a V surplice, so there is no back neckline to speak of. All I had to do was blend the neckline with upper hemline of the back pieces. Mine matched without much blending neccessary.
Now I needed to set the hem allowance OUT from the actual neckline. Did this by measuring 1 inch out from the neckline and marking a second line.
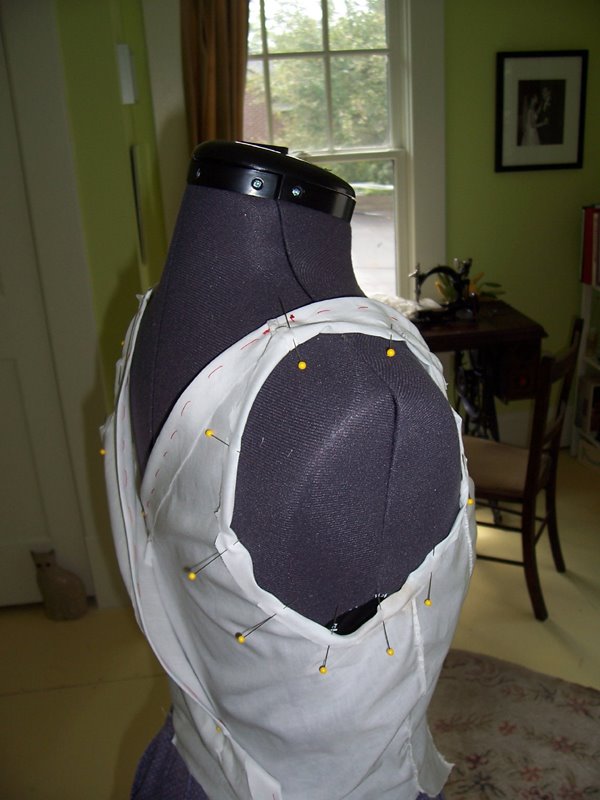 Now I put the cover back on the mannequin inside out and turned in the neckline, clipping little Vs as needed so the fabric would turn in neatly. I avoided clipping seams as much as possible but when I had to, dotted the seam edge with Fray Chek.
For the armscyes (armholds), I did basically the same thing. This time I based the armholes on a semi-loose, semit-fitted armholes of a sleeveless princess-cut chemise dress that I wear a lot and whose armholes are very comfortable.