Showing posts with label Edwardian flounced petticoat dress diary. Show all posts

Friday, January 06, 2006

An Edwardian 1911 Flounced Petticoat Dress Diary, Part 3: Completion

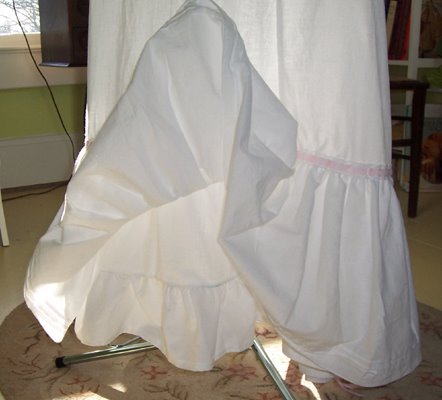
It's done! A muslin petticoat made in 1911 style with a double flounce! I decorated the outer flounce with tiny tucks and lace insertion, threaded with pink ribbon. 

The petticoat was sewn primarily on a Willcox and Gibbs treadle sewing machine, and the garment's construction features the incredibly narrow, precise machined hems that the Willcox and Gibbs hemming attachments make possible, plus the equally precise tucks. 

This marked the first time I'd used these attachments, and they clear up the mystery of how finely sewn many antique garments are. Old machines such as the W&G make that sort of work quite straightforward. 

I used a Singer 27 VS handcrank machine to produce small gathers at the waistband and on the flounces. Only the finish on the waistband lap is handsewn. 

I drafted and constructed the petticoat following instructions from Textbook on Domestic Art, 1911. You can too! Previous posts on this blog tell more about the textbook and how to find it on the Cornell HEARTH site. 

Additional Views

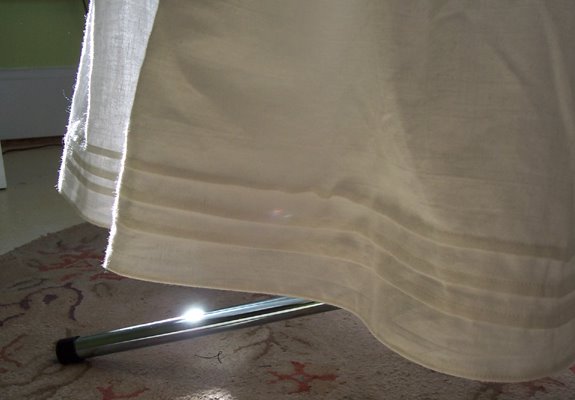
The petticoat is triple-tucked. The hem on bottom is 1/8 of an inch wide, and is a double hem, that is, the raw edge is turned to the back of the garment, then turned under again to fully hide it. 

The Willcox and Gibbs attachment did that in one smooth motion, which left me rather amazed. I can't get as clean a hem on my electric machine.
The garment has two flounces. That means extra volume when you wear it. The lower flounce starts about shin height, which means the skirt fluffs at your feet when you walk, but leaves your knees unencumbered, and is cooler generally.
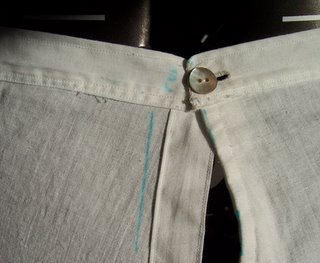
Closeup of the placket. It's a bit hard to see, but the stitches are tiny: chainstitchers like the Willcox and Gibbs generally make incredibly small stitches. Second, between one stitch and the next, the line is very straight. The stitch guide helps, and the precision of the cast-iron parts that drive the machine, but it may be the needle that has the most effect. I didn't know this until a few weeks ago, but the standard needles many people use on electric machines are ballpoint...that is, they're not too sharp. When the machine makes a stitch, the ballpoint edge slides into the next available hole in the weave. The commercial Schmetz needle I am using, by contrast, has a very sharp point, so the needle goes right through the woven threads, not between them. Eh voila, each stitch follows the next perfectly straight, not in a slightly offset pattern. And I thought it was my skills:} Oh well.

And last, a side view of the petticoat. Behind it you can just see the Willcox and Gibbs. Yes, that is one very small machine.

Monday, November 07, 2005

An Edwardian 1911 Flounced Petticoat Dress Diary, Part 2: A Puzzle of Proportions

Currently I am drafting a 5-gore underskirt or petticoat, with dust ruffle and flounce, according to instructions in the 1911 textbook, Textbook on Domestic Art

It has been an interesting process. The instructions rely on sizing up or sizing down a draft based on proportions taken from a model skirt. Since my body no longer follows the suggested proportions of a waist 15" smaller than the hips, whoops, well, something interesting happened to the results, and I am still mulling over my solution and whether it was the right one. 

Instructions for drafting and then making up the skirt appear on pages 74-85. You can find the original source materials, in full, on the Cornell University Home Economics Archive (Hearth), at http://hearth.library.cornell.edu/. By the way, the text bases a street skirt on the same draft...you learn how to do variations to make a pattern endlessly useful. 

Drafting the Petticoat

Here is the skirt draft illustration.

I found the instructions to be clear and simple. First, the textbook discusses the proportions necessary. From these, if you like, you can calculate the waist measure for each gore, the hip measure, and the length to the skirt bottom (minus the dust ruffle). 

However, you don't have to do this: the step-by-step drafting instructions have you make these measurements as you draft up your pattern on paper. I laid long lengths of freezer paper on my big Hancock's measuring and pinning board and drew the drafting dots and lines with pencil and ruler. 

The Proportions Problem Appears

When I finished the back gore, it looked too narrow compared to the model drawing, which had quite a flare on it. 

What was going on? 

Remember that the draft is based on proportions, right? Well, oh dear, I have a thicker waist of 30" compared to the model's 24". So when I drew the oblique line from waist to skirt bottom that forms the back of the gore, I got less of an angle than a woman with a smaller waist would have. What to do? The text states on p. 76 that "(t)he average width of an underskirt on lower edge, before dust ruffle is attached, is between 2 1/2 and 3 yards, for the average person, unless very wide skirts are in vogue". For the model that's 90" inches of "sweep", as the term has it. Well, I bet mine wasn't any 90". It didn't have the right flare at all, and I had checked my math, I hoped. 

 What Textbook on Domestic Arts Suggests Doing

The textbook writer knew that some girls would have thicker or thinner waists. So on pp. 83-84 it says,

"If more fullness is desired at bottom of skirt, increase width of each gore by starting 1/3 of its length below the waist line, on each bias side. [If you read Harriet Pepin's Modern Pattern Design on http://www.VintageSewing.info, you'll see this mode of splitting the angle of the gore into two parts in action.] For less fulness, decrease....(T)he width around bottom should be in good proportion to the height and size of hips of each individual, even when extreme fashions are in vogue." 

Aha! So I was supposed to add inches to the sweep by adding width at the bottom of each gore. Okay, how to do it?

Solving the Proportions Problem...With Algebra?

So I rummaged in the brain and remembered the simple algebra formula for coming up with a proportion. The model waist of 24 is to model sweep of 90", as my waist of 30" is to X. I solved for X and it said I needed 112" of sweep, distributed around each side gore and the back gore. By the way, that comes to the 3 yards circumference maximum suggested by the book. 

I measured the bottom width of the side gores and the back gores with a ruler...but didn't know how to distribute the inches needed to make up 112". That's when I had a, perhaps, bright idea. Using the proportion formula again, I calculated the waist/sweep proportion of the model back gore, and compared it to my waist/sweep proportion. 

Aha: I was 4 inches short on my back sweep measurement. Surely the side gore would have the same problem, but it didn't. The results were the same, no matter how many times I redid my math. Further, the four inches I needed in back, when added to the sweep of the other gores, added up to the ideal 90"! 

So, suspecting I had drawn my lines wrong on the gores, I redrafted them. (Oh, how boring that was.) But no! I had done it right. 

 When That Doesn't Work Perfectly, a Middling Solution

Frankly, I don't know what error I made or what principle of geometry is in effect that causes the bottom width of a gore to come out differently when you do it by math versus drawing it out. But I did decide what to do. I kept that 90" sweep, as being befittingly narrow for 1911. Then I distributed 2 inches of extra to the back gore and 1" each to the side gore. If when I build it in muslin it makes me look dumpy, well then I'll redo it with a 112" sweep, and I will have learned how proportions affect the line of a dress in a visceral way. 

I'll see how it turns out! Oh, by the way, had someone back in high school applied algebra and geometry to something interesting like sewing instead of to endless drills, I might actually have liked math class. [Note as of September 17, 2021: our twin sons have had algebra and these days, their teachers have them work out problems based on all kinds of applicable situations. Nor more plain drills. Yay!

An Edwardian 1911 Flounced Petticoat Dress Diary, Part 1: Neat Tips on How They Were Worn

My cool 1911 textbook Textbook on Domestic Art has given me some key knowledge into how people fitted and wore their underthings. In reference to what they call an underskirt and I call a petticoat, did you know:
  • "An underskirt should be 1" shorter than the outside skirt, as well as narrower, except the flounce."
  • The outer skirt length for the high-school girl audience was set at 4 inches above the floor...that comes to right about instep. The petti would be one inch shorter than this.
  • "The flounce is added for flaring as well as beauty." Note that the flounce was a second layer to the petticoat added towards the bottom: the text's model has a 12" flounce set on such that its bottom is even with bottom of the dust ruffle.
  • "A dust ruffle about 4" deep is generally put on to prevent wear."
  • (The) "width around the bottom (of an underskirt) should be in good proportion to the height and the size of hips of each individual, even when extreme fashions are in vogue."
  • A petticoat could have a gathered back, a pleated back, or a "habit" or straight back. The text recommends a fuller back, as opposed to the habit back, for those whose "figure" needed it to sit well.

By 1913, the situation was a little different. Garment Construction in Schools (also available on the HEARTH site) writes:

  • "(The) petticoat is intended to fit closely around the hip, and is narrow at the lower edge also (2 yards)."
  • "The fulness at the lower edge is supplied by a scanty frill of material..."
  • Embroidery is suggested as being a pretty and effective alternative to a frill. Naturally it wouldn't pouf out the skirt either, in this time of severely vertical skirt lines.
  • The top was faced with a "false hem" cut on the bias, in calico for a cotton petti, and sateen or calico for a woollen one.

Both texts recommend quite a variety of materials. Petticoats could be cotton, either plain or in colored prints with "a deep frill of material", or in flannel. Wincey (a type of wool) was used for summer wear, at least in England.