Background
 |
Part of our group at the Jane Austen Festival. Laura in her
new open robe ensemble is second from left. |
This robe has had quite an evolution. At last summer's Jane Austen Festival,
Laura picked up a lovely Indienne fabric, a block print on dark red background of stylized tulips, and she dreamed of having a Regency dress made from it, in a tall, columnar style of the 1800s.
As always, please click on each image to see a larger version.
Enter our 1790s project. As most of you know by now, several of the rest of us in the period sewing group have been planning for the 2010 festival, and our project centers on ensembles from the very roots of the Regency, the 1790s. Since Laura's block print was perfect for that era in both pattern style and the mid-weight of the cotton,
Jenni and I persuaded her to back up a decade and try a round gown. We decided to use several extant robes and round gowns as the design and construction basis for this gown.
First, a circa 1785
peach-colored open robe and matching petticoat, from the 2007 "
The Age of Nudity" exhibit at Kent State.
Second, a circa 1798-1805
brown silk round gown, item 1447, from Karen Augusta. Note: the item is described as silver in the title; I do not know why.
Additional ideas came from a lovely circa 1795-1810
block print round gown in the Colonial Williamsburg collection.
Then followed weeks of mockups, secondary research in all the usual suspects (documented below), a great deal of online searching, and the valued assistance, kindness, and support of costume experts Dawn Luckham and Suzi Clarke.
Enter an obstacle: after working out the bodice, Jenni discovered that we might not have enough fabric for the gown. Not a pleasant feeling, after all the work...
Until, and let us complete the theatrical segue to its conclusion, enter a solution. Jenni decided to morph the gown into an open robe and to make a petticoat to go underneath. Here's an example from the Victoria and Albert Museum,
a circa 1795-1800 block-printed glazed cotton robe, lined with linen.
As these extant garments tell you, better than my
previous posts showing the history of some 1790s fashions as they were shown in paintings and drawings of the day, the round gown and open robe have their forbears in the closed and open robes of earlier decades. While the round gown, as we discovered in our research, showed a number of structural adaptations and innovations in construction that would result in a few years in later Regency dress construction, the open robe was a much clearer descendent of open robes from previous decades. It could be constructed with a back in one piece, pleated and tacked to a lining, like mantuas from earlier in the century (and see the well-known early Regency open robe in Janet Arnold, p. 43), or with a wholly separate bodice, with the skirts attached to the bottom (see for example the polonaise in Janet Arnold, p. 37).
What follows then, is a wonky dress diary, because the photo documentation starts out with our idea for a round gown sporting three drawstrings, from neckline, to underbust and then highish waist circa 1795, and morphs to a robe like the V&A example above. If you get a little confused at times reading it -- mmm-- so did we :} All a big experiment, another essay. Gee, I do a lot of those, don't I? Laura, we're glad you do not mind playing guinea pig.
Level of Accuracy in Construction
The Jane Austin Festival's in ten weeks. Jenni and friends and I have been researching and constructing for months and months now, and Jenni and I have several ensembles to complete for spouses and friends and ourselves. Therefore, while we want to produce a garment whose cut and
overall construction could have been used in period, and so we have documented our decisions at every turn, we are mixing handsewing and machine sewing. C'est la vie.
Patterning the Gown...Erm...Open Robe
We used the Sense and Sensibility Elegant Ladie's Closet pattern back pieces, cut to Laura's size, as a raw base to work from.(Note: We lengthened all the pieces at the bottom so that we could cut the dress with the lower waistline of the mid-1790s.)
Our goal was to "back up" the pattern to an earlier time period. For this, we used Nancy Bradfield's
Costume in Detail: 1730-1930 (pp. 69, 73-75) as our guide. We noted from this book, as well as from extant examples (see especially that brown silk gown link above), that earlier in the century mantuamakers managed an elongated, elegant back by cutting or pleating the back such that it featured a number of long curved seams. By the end of the century, the really high waist made such a look impossible, and the back ended up rather tiny, with center focus on a small to tiny diamond-shaped piece.
An aside: If you have the Bradfield book, just for fun do page through the 18th century section and watch the design of the back pieces change. The diamond shape is an outgrowth of what came before. Not that all the experimentation always went the same exact way. In the Karen Augusta brown silk round gown , the narrow panels are retained; the diamond pattern is there but it is stretched downwards, almost like an upside-down spear point. The mantuamaker cleverly used skirt pleating to reverse the elongation, so that viewed as a whole, the effect is like an hour glass, or rays from a central spot at the waist. It's gorgeous.
In the 1790s, we were in middling ground, neither very long-waisted nor very high-waisted. Further, Bradfield's book details a number of dresses which had been remade from earlier dresses, and still featured lovely, elongated back pieces. That's the direction we went.
Here is the pattern in the process of cutting it to an earlier look. Jenni did all this in Swedith tracing paper. We left the pieces long so that we can fit the bodice to a waist height that suited Laura. Jenni made several mockups this way.
Jenni next made up a toile. Here I am attempting to fit it to Laura. The little goddess headpiece I've got on? We had a Useful Things Swap that morning, and that's one of the new 1950s treasures that made its home here.
Here's the bodice on Laura, with the back marked at a waistline she liked. We worked out some of the wrinkles after this. The sides needed pulling in, and the armscyes cutting.
Here's the front. I had requested of Jenni that she design the toile front pieces like those for a 1780s gown, but elongated, and with the center front angled longer at top than at bottom so that when gathered with drawstrings at top, underbust and waistline, the center front would be vertical.
I cannot tell you how many Nancy Bradfield drawings, Norah Waugh diagrams (
The Cut of Women's Clothes),
Costume Close-Up diagrams, plus every other diagram I could find, even from early 20th century books, and photos of extant garments, I examined trying to figure out how to work this.
Our intent at the time was to produce a very lightly gathered front, as in the Karen Augusta brown silk gown; since the fabric is midweight, too many gathers might look heavier than Laura might like, methought. I knew from a 1770s extant gown and reconfigured 1790s gowns in Nancy Bradfield, that some robes in the 1770s and 80s used drawstrings as fitting aids, so that the angled front would be necessary.
Further, since the brown silk gown is fully lined in the bodice, we decided to do the same here, and run the the drawstrings in channels between the lining and fashion fabric, as I saw in a
Antique Dress Gallery 1770s polonaise (item 5092), in Bradfield, and per Dawn Luckham.
Showing the drawstring at work. More details on the sewing method in a later post.
In the event, that idea only worked mezzo-mezzo.
Mmmm. Hmmm.
Reworking the fit.
The toile, with the bodice fronts trimmed away a bit.
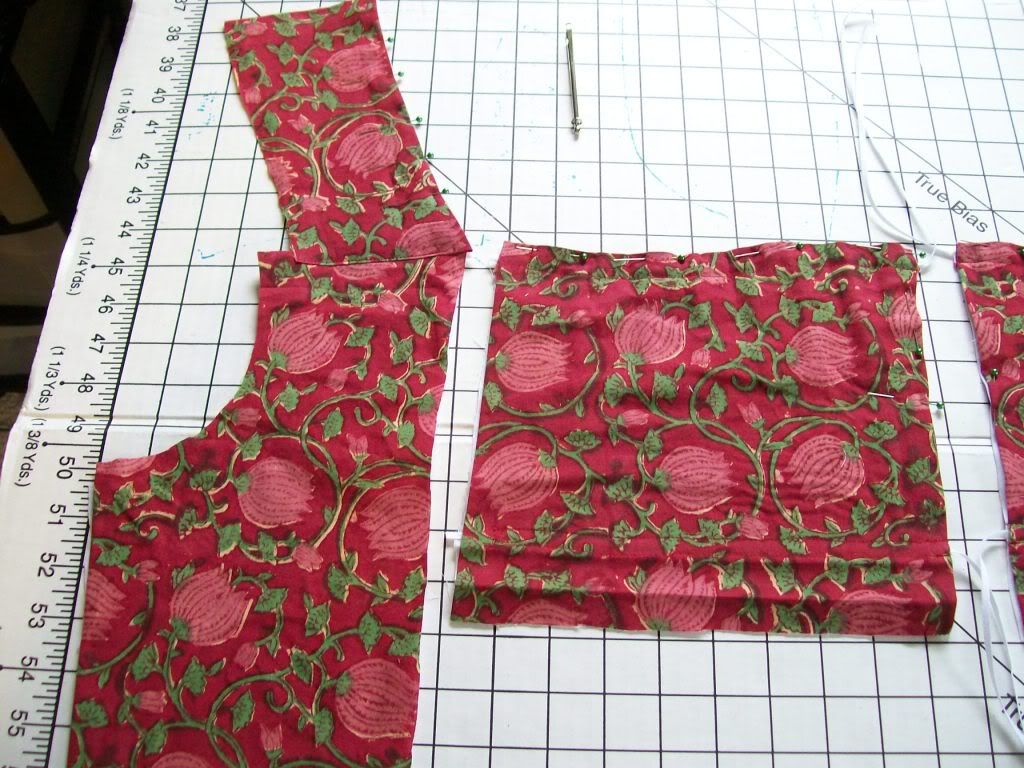
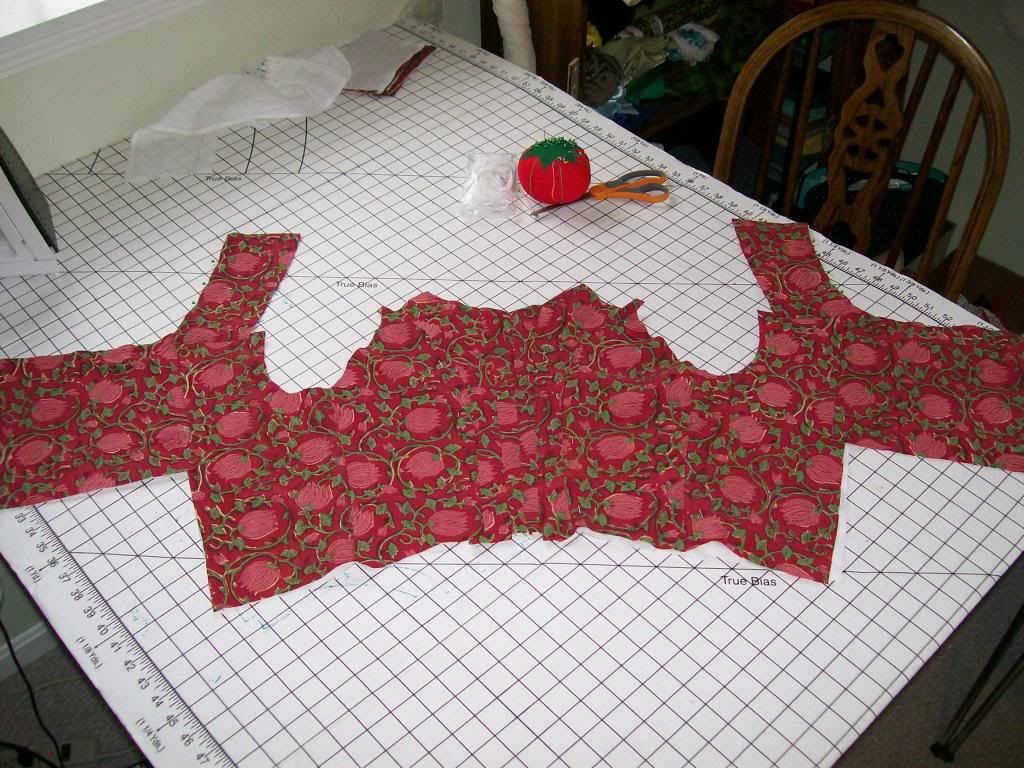
After Jenni and Laura and I were happy with the fit, Laura cut out the lining pieces. Here they are, lined up in the order in which they will be sewn. They include seam allowances of 5/8". Ordinarily I would use less, but it's good to have width to work with when you will be doing at least one more fitting. Note, because we found it more accurate, we ended up cutting off the straps (that means cutting the uppermost projections from the pieces to the far left and right), and attaching them separately.
Cutting the Actual Robe
As always, we started with the bodice. Jenni used the fitted lining as the master template from which to cut the fashion fabric.
Here is the bodice cut out in the fashion fabric. Jenni is very precise in her cutting, which is a must for this sort of dress. Fudging will affect your fit in really frustrating ways.
A Bit About Eighteenth Century Seam-Sewing Conventions
It was a common practice for eighteenth century mantuamakers to construct their bodices by treating the fashion fabric and the lining fabric as a unit, sewing each to the other in a single operation. Here, though, is the kicker: the seams were turned in during the sewing so that when a seam was sewn, not only would two fashion fabric pieces be attached to one another, but the lining would be attached as well, and get this: the seams would be finished, too. No raw edges to finish.
Very clever, I think. Saves massive amounts of time and energy, which for a woman sewing all by hand, would have been critical. Think of this. In Fanny Burney's
Evelina, if I am not mistaken, Evelina is fitted for and receives a complete new "suit" of clothes in just a few days. I understand from other sources that this sort of speed has been documented in extant records.
Methought actually doing seams this way might be quite simple. Indeed, once we got the hang of it, Jenni and I did not find it too difficult, but it could be fiddly. If I were to keep constructing clothes this way, I am sure I could speed up a good bit, but to date these fingers still are a bit slow.
There are quite a number of variations on this seam sewing method. For my money, the best descriptions and illustrations are offered in Linda Baumgartner's
Costume Close-Up, right in the first chapter.
After reading and sketching, Jenni and I settled on one of the
Costume Close-Up methods, as illustrated by Jenni below:
Constructing the Bodice Back
First thing to note: Jenni constructed this dress by machine. While she used the seam technique described above, she did not sew each piece to its neighbor individually. Instead, she pinned all the pieces together, and then sewed them on the machine at once.
She started by constructing the back of the bodice first. As you can see from the pictures above, each side of the back is a mirror image of the other. Each side of the back is composed of a back piece, an inner back piece, and a side back piece.
For each seam, Jenni
- folded in the raw edges of the first lining piece to the depth of the seam allowance
- folded in the raw edges of the first fashion fabric to the depth of the seam allowance
- Did the same for the second lining and fashion fabric pieces
- Nested the pieces together as in the drawing above, so that all the seam allowances lined up
- Pinned the pieces together on the seam line.
You can see an example below. Jenni has already pinned together one inner back and back piece (for the left side of the back of the bodice) and is in the process of folding in the fabric for the inner back piece of the other side.
Here is a picture, taken from the side, of a seam prepared and pinned. All the raw edges are turned in, and the pieces are nested together as they will be sewn, and pinned. Do, please click on the image, to see each layer of fabric identified.
Here is another photo, below, of the fashion fabric and lining nested. You are looking at an armscye (armhole), and Jenni is getting ready to sew the side seam underneath it. You can see how the lining and fashion fabric for the front piece (towards the right of the photo) are nested with the lining and fashion fabric of the side back piece (towards the left of the photo).
Once all the pieces of the back of the bodice were pinned together, she pinned the fronts together and their straps together, pinned the fronts to the backs, and set the entire bodice on the stand and checked the result.
Then she sewed all the seams down. She told me later that for some seams this went well, while for others she found she had issues with all four layers staying together properly, and ended up sewing or resewing several seams, with just three layers, hemming down the innermost lining layer. Here is an example:
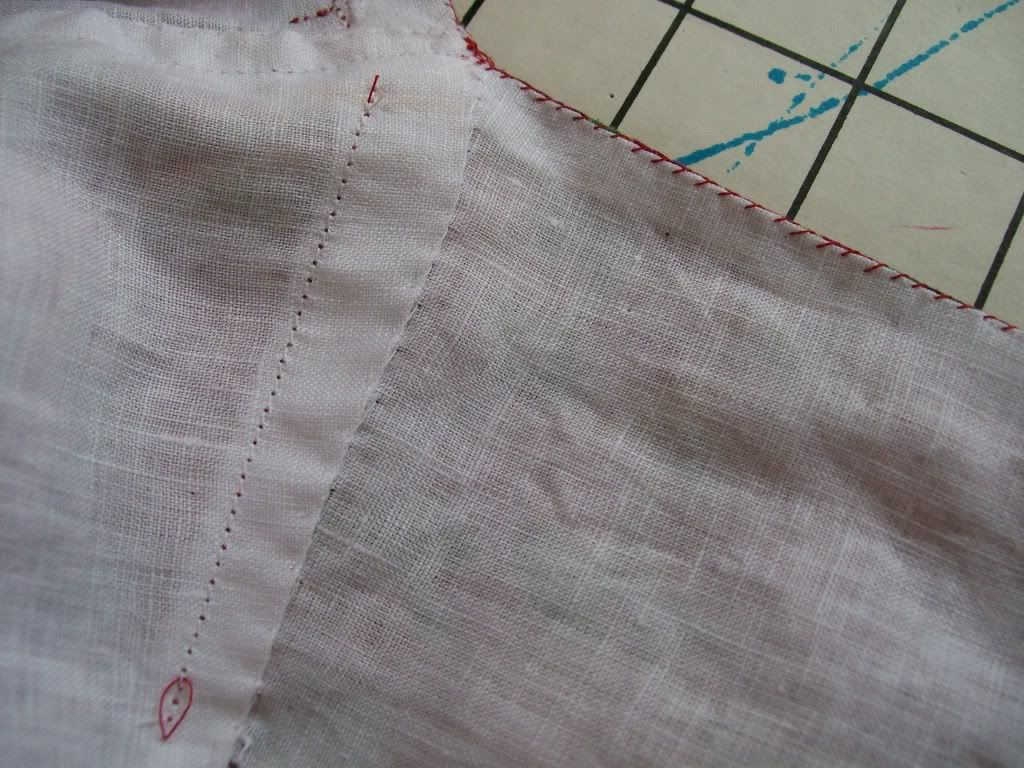
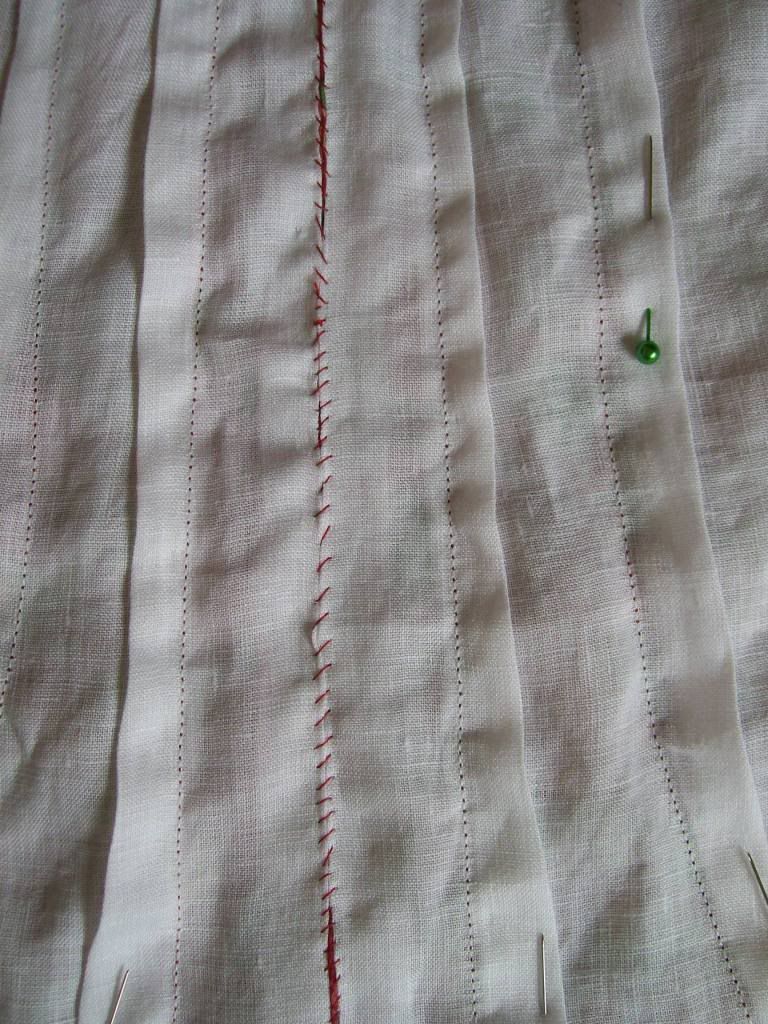
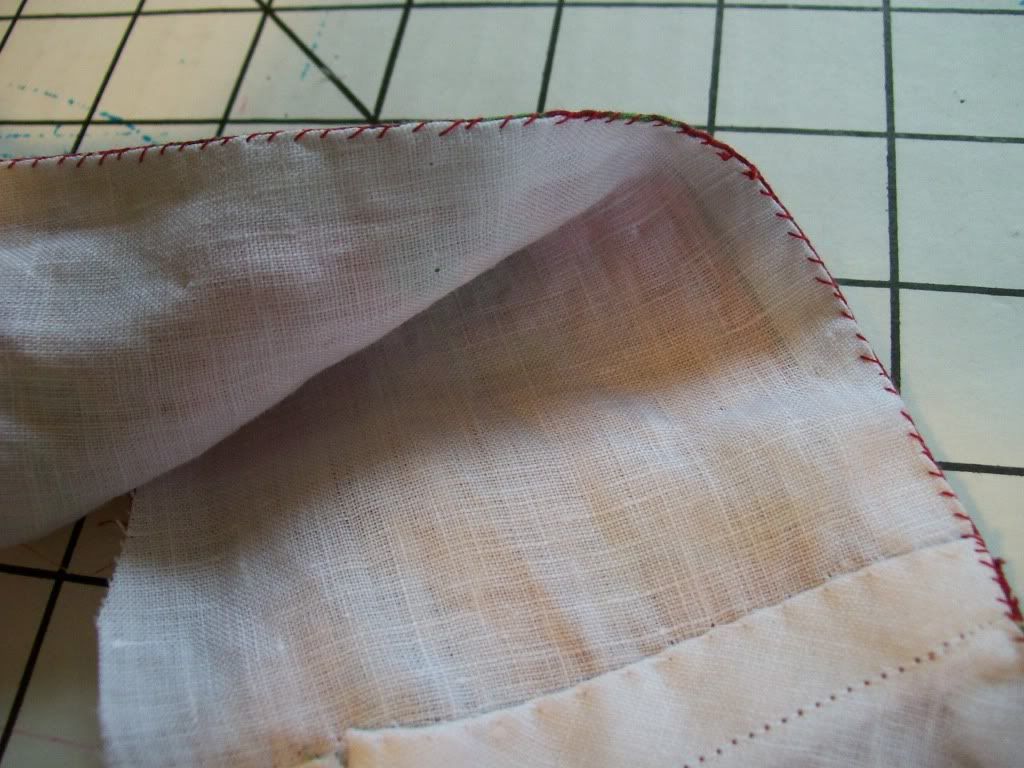
Do you see the center back opening in the image above? She could have machine sewed it, right sides together, so that no one side would have overlapped the other. Instead, she chose to do some handwork here. She whipstitched the seam, as you see below. She placed right sides together, and set the whipstitching quite close to the edge.
In the museum images of garments that I have looked at, the central back seam was often whipstitched. Once the seam was sewn, the pieces were carefully opened out, like the pages in a spiral-bound notebook, until the seam laid flat. There is no ridge. Just to double-check, I consulted Nancy Bradfield's
Costume in Detail and Linda Baumgartner's
Costume Close-Up to make sure.
Here is how it looks from the outside:
...and the inside.
Constructing the Bodice: Front
Remember how at the beginning of this post I wrote that the design changed midstream? Due to a shortage of fabric, Jenni could not give the open robe the longer waistline and multiple rows of gathering found on early 1790s open robes. She opted for a very simple gathered front, quite high-waisted, with both the neckline and waistline gathered.
The front is in three pieces, then. Side front, shoulder strap, and the gathered front part.
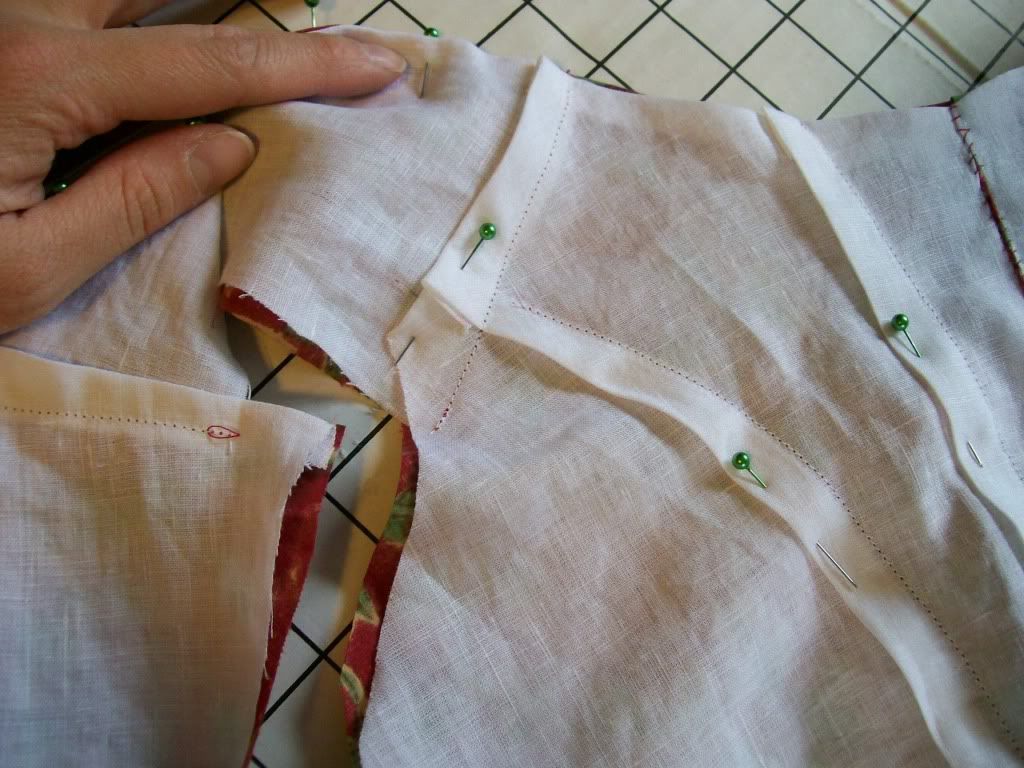
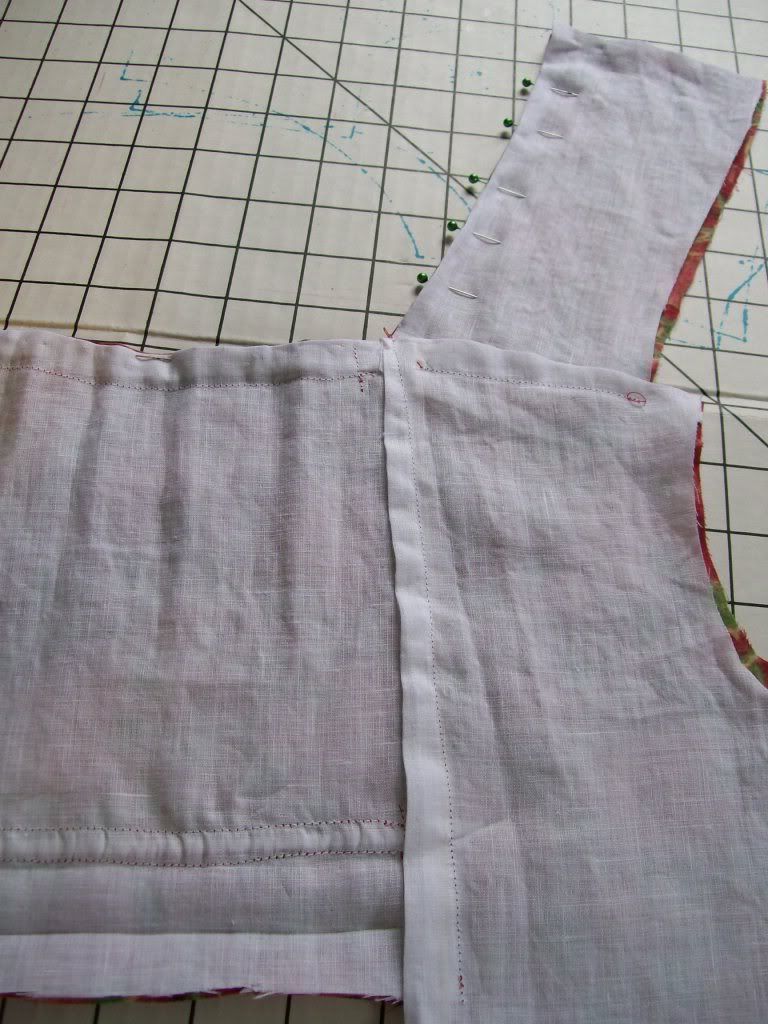
Also remember that we altered the basic S&S pattern, in which the shoulder straps are integral to the front piece...a development which became popular, I understand, right near the end of the century. Because we were backing up the design a few years, we opted to lop off the shoulder straps and add them back separately, so that you'd have the expected seams that sit above the bust on each side. Here is that seam pinned in place:
Oop, a bit of a problem. you'll see that the strap and the side front didn't quite match with the front. Mmm. Look very carefully at the photo below...she had to fudge a bit, like we often do, and the Original Cast did too. By the way, you can see the tripartite front construction very clearly here.
Here it is from the front, sewn. Looks very nice. A reminder not to freak at little issues like this.
And from the back. You can see that three layers were stitched, then she photographed the below, with the seam allowance on the lining ready to be hemmed down.
Once the straps were sewn on, the garment looked like the below, all laid out, fronts, which look like short wings spread out at the sides.
On each front piece, between the lining and the fashion fabric, she sewed a drawstring right into the shoulder seam, nesting it between the lining and fashion fabric layers. It's made of 1/8" twill tape. This is used to gather the neckline. Another is at the bottom.
The fronts were finished by turning in the raw edges down the center front closures, and ditto for the front bottom, and sewing them together. As I did not participate in this part of the construction design, I cannot recall whether she handstitched or machine stitched these seams, and if she did them right sides together or top-stitched them, as would have been period.
She also overcast the neckline seam, all the way around. The rights sides of lining and fashion fabric facing out, per usual, she turned in the seam allowance for fashion fabric and lining inwards. Then she whipstitched the neckline all the way around, per the below.
Once pretty much sewn up, here is what she had:
and...
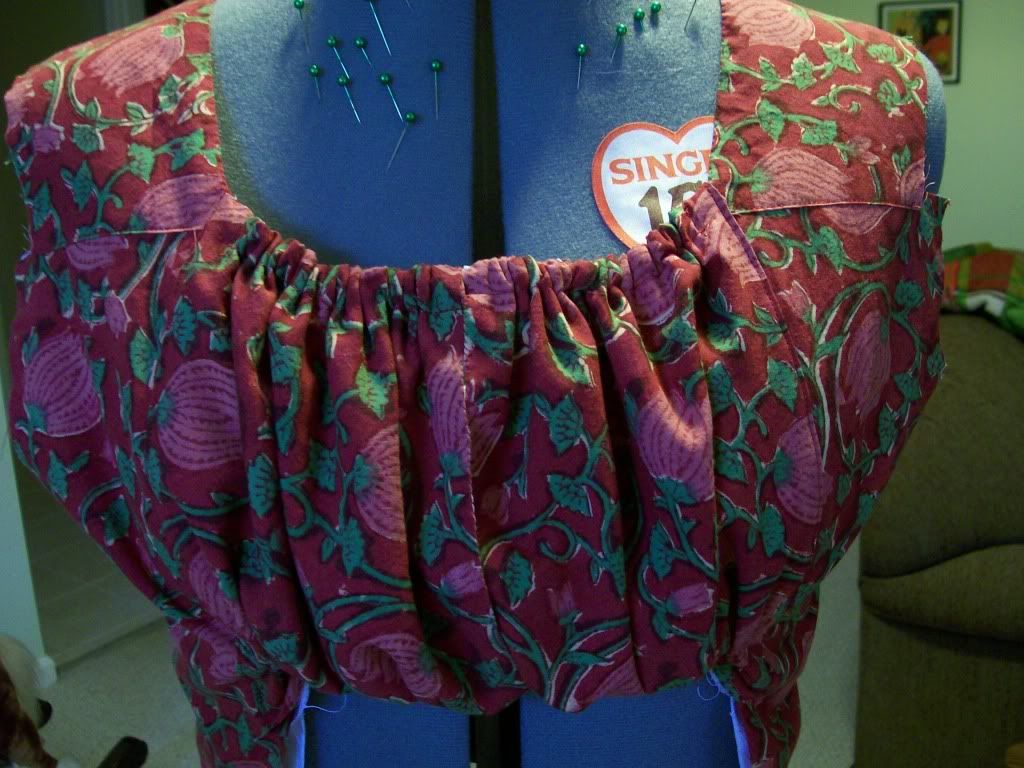
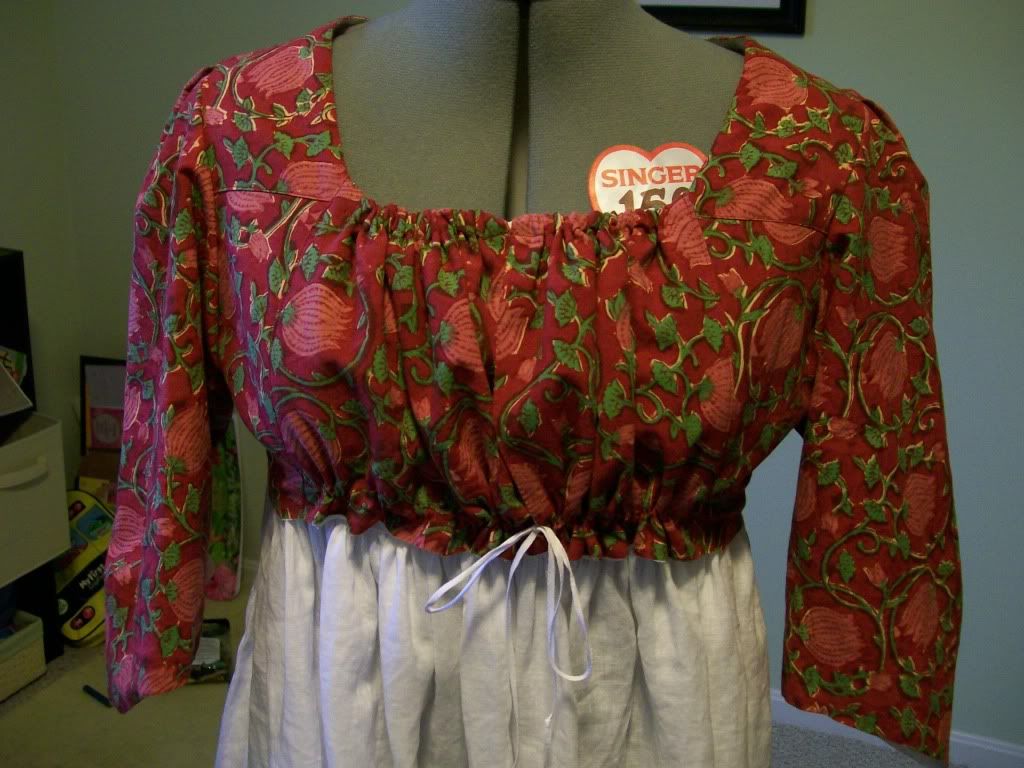
The basic bodice, once constructed. You can see the twill tape tie that holds the bodice bottom closed. The bodice may be pinned shut along the center front, too, if desired.
If you wish to see more images, see
Jenni's Photobucket album to see things rather in order of construction. Start at page 4 and work your way back to page 1.
The Rest of the Story, and More...
- See Part 2 for the completion of this garment.
- See 1790s: Costumes and Research Documentation
I've done a number of costumes, Jenni has done many more, and I've posted reams of documentation, including looks at portrait miniatures, translations from a German fashion magazine, looks at Gallery of Fashion, and so on.
We're having a blast with this era :}


.jpg)