When last I wrote about this project in spring 2021, I had tried a whole series of hem stiffeners to create the desired flare at the bottom of the godet-cut petticoat, while still allowing the large godet plaits, or organ pleats, or funnels, whatever you want to call them, to do their luscious magic at the back.
Just as a reminder, here is a sample of what godet plaits look like on an exterior dress. These are wired.
 |
| From All the Pretty Dresses blog |
As I have explained in a host of research posts (for which, again see the 1890s Costumes and Research page), such plaits were also popular features of petticoats, at least on the pattern sellers and women's advice literature side.
At the end of the testing process, I'd ended up choosing flat steel tape repurposed from a mini tape measure to insert into the hem.
The tape was inserted between the hem and the hem facing and a line of stitching added just above the tape to hold it in position. A second row of steel tape was added a few inches above, but only running from the front through the sides of the petticoat, because it had a tendency to create a hoop-like effect if it reached all the way around.
Here is a shot of the process and a few of the results.
 |
| More pinning, and an example of the lovely rounded godet plait created by the steel tape. |
 |
| The completed pair of godet plaits in the back, with the second row of tape measure flat steel tape set at the top of the hem facing section. It too was run into the facing and sewn in place. |
 |
| Nutty Nutmeg |
Facing Facts: I Had Used Too Light a Fabric For the Petticoat Body
Adding Wired Rings to Shape the Godet Plaits
 |
| Joyce Godsey of The Time Traveler's Sourcebook group on Facebook posted an 1897 Delineator pattern for making them, number 1257. |
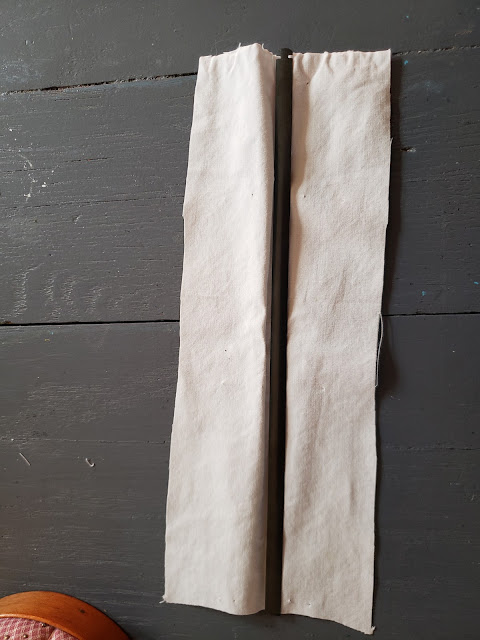
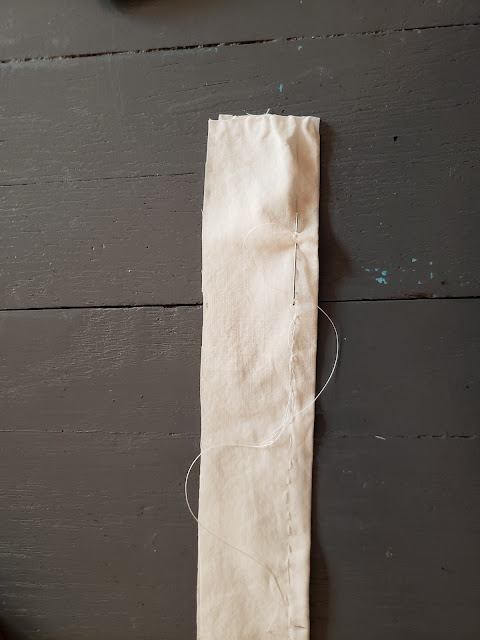
Each ring consists of two wires, made from that springy measuring tape steel, encased and sewn into muslin. Unlike the Featherbone commercial originals, these are rather loving-hands-at-home, but they are light, and they worked to hold the flutes in position fairly well.
 |
| A length of the steel tape and a folded piece of closely woven muslin, repurposed from a worn-out pillowcase. |
 |
| Encasing the first piece of steel tape in the muslin. There will be a total of two steel tapes, with space in between them. |
 |
| Stitching a channel for the tape to inhabit. |
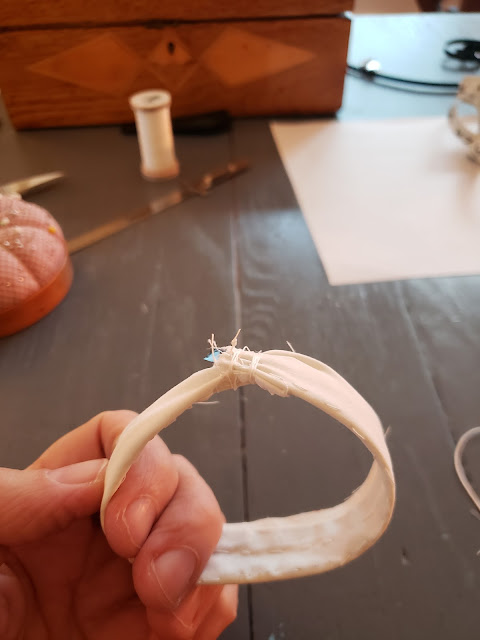 |
| Once two tapes are inserted, closing the ring and stitching it shut. No, it's not pretty stitchery. |
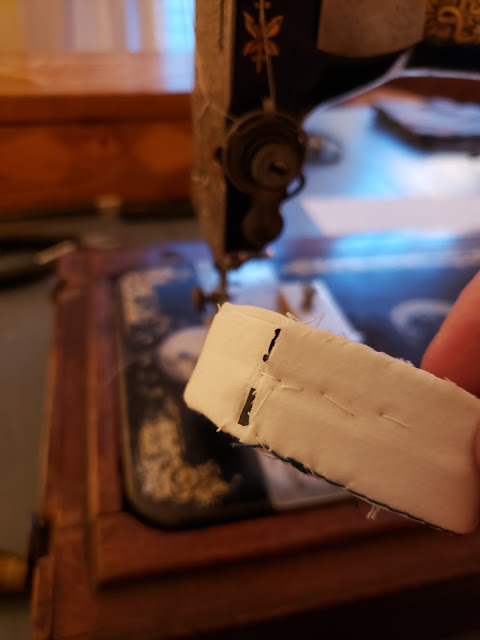 |
| The ends of the steels poked out and had to be worked back in before being sealed into the ring with muslin. |
 |
| A pair of completed rings. Handsome they are not. Of utility they are. |
The rings were pinned into approximate position. As of this juncture, they are still just basted in. They really do help shape the pair of godet plaits, but as you can see, the hem bottom is still trying to collapse. I hoped that the addition of the planned hair cloth frilling would solve that problem by imparting some stiffness. Mmm, I can see that I am remembering out of order, too. The hoops went in before the second row of steel tape was added around the petticoat hem.
 |
| Aren't we getting flare and godets reminiscent of a real mid-1890s skirt? Alas that this is not an outer skirt in itself! |
 |
| Demorest's Family Magazine, February 1895, p. 207. |
Adding Two Rows of Hair Cloth Box-pleated Frills
The original LHJ petticoat was of moreen, set with three rows of box-pleated haircloth frills to create the requisite skirt flair, with no attempt at real godet plaits, other than the overall godet-style skirt cut, which was considered, to use a popular term of the day "regulation". You've seen this image a lot, but it bears repeating.
 |
| Petticoat with haircloth box pleatings. Ladies Home Journal, July 1895, p.25. |
Following Miss J. E. Davis in The Elements of Modern Dressmaking for the Amateur and Professional Dressmaker, (p. 139), I decided to encase my haircloth frills in the silk shantung, for a more handsome effect. I had enough hair cloth [mid-weight Hymo from Vogue Fabrics] to make two rows of frilling.
Cutting the hair cloth on the bias, which is its best angle for strength, hand-sewing each length together, and then encasing them in silk by cutting wider pieces of silk, covering the front of the hair cloth strips and folding the edges behind and stitching them down on my Willcox and Gibbs 1911 chain stitch treadle machine, took far longer than it takes to read this overlong sentence.
Can't see the embedded video? Here is the link to it: https://www.youtube.com/watch?v=Tl9JDmgpOCM.
Nevertheless, at last it was done, all 24 yards.
How to box-pleat it, though? The resulting fabric strips were seriously stiff. I ended up creating each box pleat by eye right at the Singer 27 hand crank machine, quite literally folding a pleat, sewing it slow single stitch by single stitch, then pleating its fellow and sewing that in turn. Rinse and repeat. It took many hours, but pre-pinning was out of the question as the pins were tough to insert into the layers of silk and hair cloth without bending them.
 |
| Sewing the second half of a box pleat in place. |
The resulting box-pleated strips were so pretty! You can see it coming, though. How to get them on to the base of the skirt, which now consisted of shantung in front, mid-weight interfacing in the middle, and a shantung facing in the back, all covered by a layer of muslin? That's four layers in itself, not counting the up to six layers in the pleated frilling. All the while avoiding the two rows of steel. Oh. My. Goodness.
It wasn't a problem of the needle going through the fabric...hand cranks and treadles are famous for making their way through sail cloth and leather, provided the needle is strong enough. No, it was how thick the resulting pleats were, being each composed of two layers of hair cloth and four layers of silk shantung. That's some Dagwood sandwich. There simply wasn't vertical space on the machines to safely and evenly run them under the needle with the added layers of the petticoat itself.
Nothing for it but to hand-sew them on to the base of the petticoat, the bottom one first, and then a second one over it, slightly overlapping the first, one painful stitch at a time, with a mid-size embroidery sharp.
I spent several days on that as time allowed, first on the floor and then, bum numb, on a chair. :)
 |
| Stitch, stitch, stitch. |
 |
| It's no wonder I dreamed of digging into some buttercream cake decorations. Can you see the similarity, or is it just me? |
However, the results are gorgeous, scrumptious, like pure-butter buttercream icing on a wedding cake. Sculptural. Delicious. One of the prettiest effects I have ever obtained, bar none. And all this to be hidden as a petticoat and never seen except when I accidentally on purpose reveal an ankle and the accompanying frillies.
It's too bad the petticoat cannot be worn as an outer skirt, but it's a tad shorter than mid-1890s street length, as it should be, and it's very obviously pieced in front. Oh well, perhaps someday I will reclaim the frilling and put it on another, outer, skirt.
Also. I am positive you have noticed a problem.
Giving In: Adding Hair Cloth to the Back of the Petticoat...and More Hem Steel Tape
And so we come almost full circle. Despite all of the takes on period wires and boning and frills to create a back with enough oomph, my petticoat continues too weak to hold its flare in the front and sides.
Once the frilling was added, the carefully created two godet plaits in the back collapsed into a single flute, and the wiring in front collapsed as well.
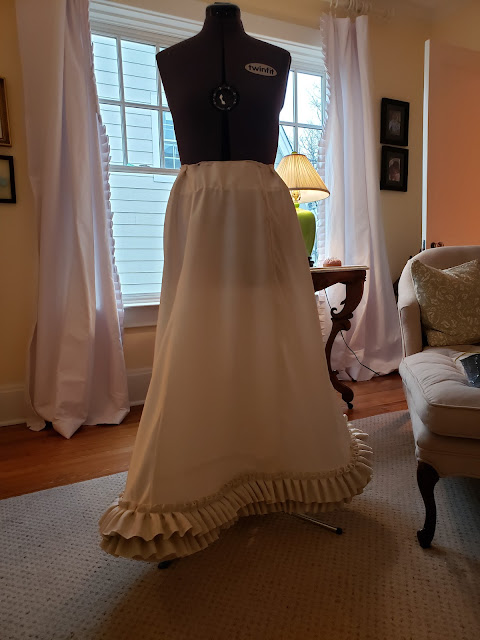 |
| The petticoat is not animated and taking a step forward. The rows of frilling are interfering with the two rows of steel tape underneath and setting the shape awry. |
 |
| One giant godet plait, and all heck breaking out across the back. |
Oh, bloody H-E-double-hockey-sticks.
I worried this would happen, and sure enough, it did. No wonder dressmakers inserted as many as five rows of wire or boning into their hems!
What now?
I will tell you what now. This project started in October 2019. It's now two years and multiple months later. There's no giving in. The project has become an effort to figure out the physics of the thing and to show the way to others. I will keep going. So far as I know, nobody else has yet spent so much effort in experimenting with these period methods, and while I am doing an approximation of experimental archaeology, might as well be fully thorough about it.
The next steps are to pull off the lining in back and insert a layer of the Hymo hair cloth, expense or not, then re-add the hoops, making new godet plaits. Then add more wire on front and sides. This time, encase in cotton tape and sew to the lining. It'll just have to be visible underneath.
Lessons Learned So Far
We know now that for a godet-style petticoat, the 1890s advice still stands:
- The foundation fabric must, by all means, have lots of body or the structure will collapse. Use as close to the original fabric as possible: all hair cloth, heavy taffeta, or as close to moreen as you can get. Or interline the back of the petticoat with haircloth and be prepared for a back-heavy petticoat that will need to hook to the corset or risk sliding down.
- The lighter the fabric, the more rows of steel tape or wire you will need.
- Not so concerned with true godet plaits? Make the LHJ petticoat with a godet-cut pattern and gather the back and add the frills, and be done with it. The effect will be moderate, but LHJ was not targeted to fashionistas, but to more middle class women.
 |
| Claytonia virginica |




My dear Natalie!! I am cheering for you from down under!! This darned petticoat will not be the boss of you in the end!
ReplyDeleteMay I suggest that you go investigate the cost of white denim? Or duck cloth? Duck is very stiff but white denim is basically what moreen sounds like.
I so feel for you, that ever arriving moment when you think, should I just try one more thing? Push on, or regroup? We are like peaceful military strategists. We are the engineers of the concorde. Whatever you do, we all benefit from your experience which is very generous of you.
I have only made a few dresses of this era, all for stage and all from fabrics that would burn blue shall we say. And I never went through this, but I did have the fun for many years of the page fro a bridal magazine, and my role was to reverse engineer the whole thing, so I feel you <3
Dear Mrs. C.,
ReplyDeleteA giant hug is winging its way down under right this moment. You have long experience with complex puzzles of projects, so you've given me extra vim to get this thing to work.
Guess what's leaning on the wall of my closet? A bolt of cotton duck. Bought decades ago for some home decoration project. Heh, heh, guess there's going to be a bite taken out of it pretty soon. What a brilliant idea. Did you know, too, that duck was a popular summer skirt fabric, as being durable for street wear, during this period? I have multiple references for it, including one in which the godet plaits are *stuffed* at the top to give them extra shape. We have a fabric that ticks all the boxes: it was used, it has the right physical properties, and boy howdy, I paid for it so long ago it might as well be free.
Bless you to the skies!
Can't decide whether I should do the work now or get the toile done on an 1810 ballgown: that dress has to be ready by July and knowing me, it will take that long :)
Hugs again, and happy Autumn in NZ,
Natalie
Oh my goodness, it was Meant! I mean at least you will get to the next stage super fast as you can stand on the shoulders of all the learning to date. And all that GORGEOUS pleated base all done. I didn't know duck was so popular for outerwear. It is so sculptural, stuffing the godet plaits would work a treat, but I can see that getting too warm in those humid July days.
ReplyDeleteI feel like you have earned some 1810 fun, it being one of your happy places. Hmm I wonder how much Bridgerton influence will appear at that event?? ;-)
Hugs to you too - M
Dear Mrs. C.,
ReplyDelete:)
Lots of Bridgerton influence, lots and lots. It's really the thing right now and has drawn quite a number of folks into costuming, which pleases me no end.
Am going to try and work on both projects, but itching to do the 1810 gown. It's supposed to be winter again this weekend, so there may be real hours to put in.
May it be just right there the next bit,
Natalie
Dear Natalie,
ReplyDeleteI am incredibly behind on reading your blog posts... but I am finally finding time to stop life and enjoy the read! This really is a labor of love... I greatly enjoy your term 'bum numb' and I do think that the pleated ruffles are incredibly grand. It sounds pretty awful to sew through all of those layers, though! Sending encouragement!
Best,
Quinn
Dear Quinn,
ReplyDeleteThank you so much! Sometime this fall or winter I'm biting the bullet and taking the back of the petticoat apart. It'll get the missing panel and I will -- sigh -- add lightweight hair cloth to finally obtain those godet plaits. Then it's putting the bally thing back together again. Located an extra length of the unpleated trim, and will pleat that up and add it, but will still need to make more. Phoney. The thing is ha going in my closet so it's not ignorance. I can see why so few are still extant: they take up so much room!
Very best during the mellowing days of summertime,
Natalie